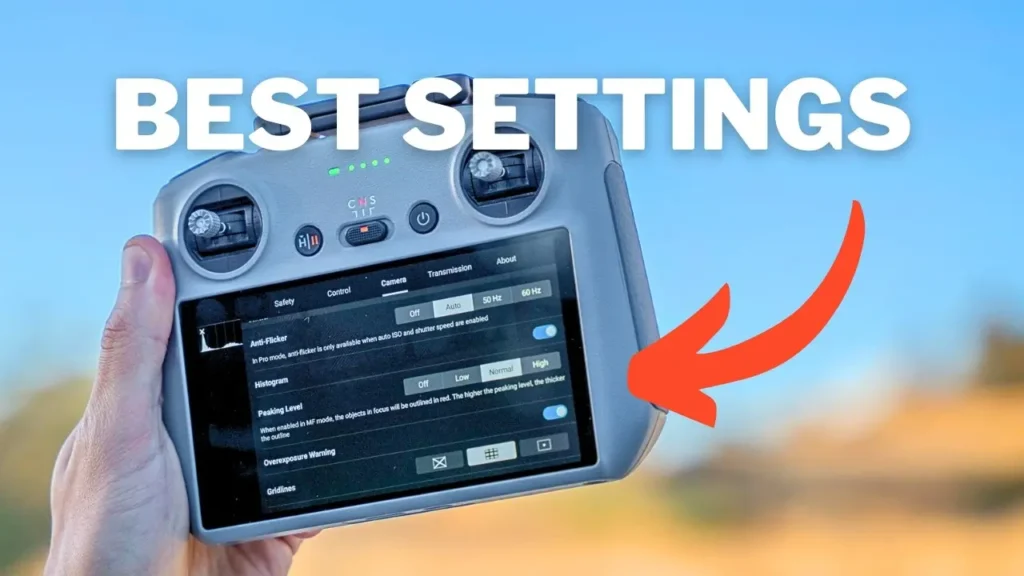
The DJI Air 3S is undoubtedly one of the best drones available right now, offering both impressive photo and video capabilities. In this guide, I’ll walk you through the essential settings for photo and video that will help you capture sharper images and smoother footage for cinematic results. Whether you’re new to the drone or have had it for a while, this guide will ensure you make the most out of your DJI Air 3S without overcomplicating things. While the specific settings discussed here apply to the Air 3S, they are also applicable to the DJI Air 3, Mini drones, and Mavic drones, though some variations may exist.
Resolution and Frames Per Second (FPS)
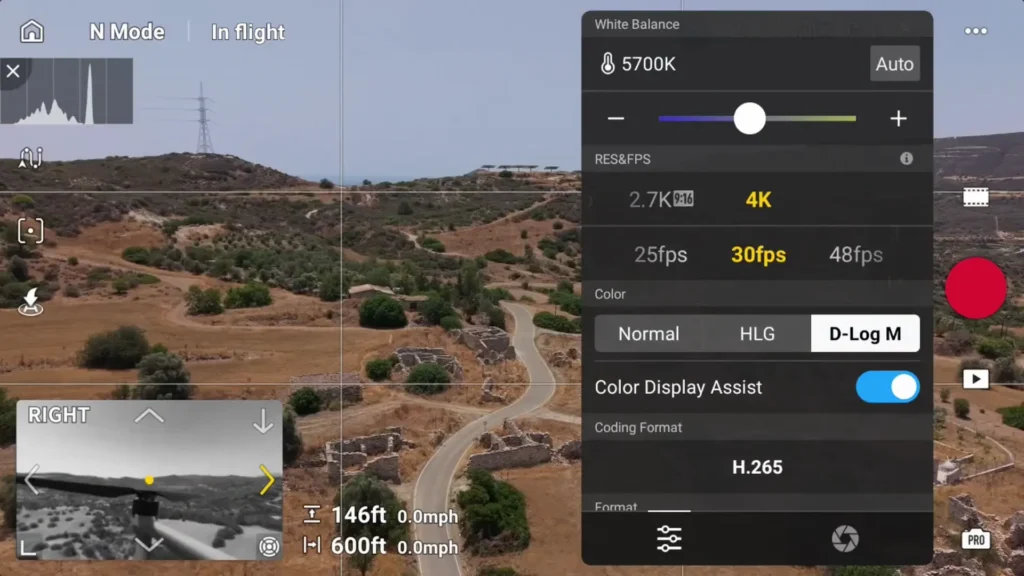
The first key setting to consider is resolution and frame rate. The DJI Air 3S offers options for 4K and 1080p horizontal video, with 2.7K available for vertical shots. The frame rate options range from 24 frames per second (fps) up to 60 fps in regular video mode. For those interested in slow-motion footage, the drone offers dedicated modes for 4K 120 fps, 1080p 120 fps, and 1080p 240 fps.
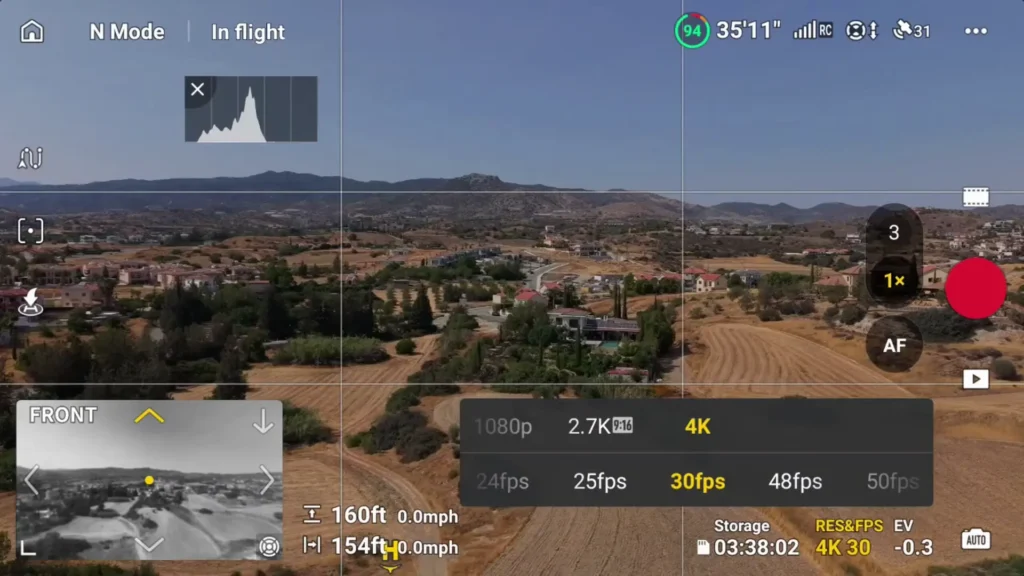
Personally, I prefer shooting in 4K 30 fps, which works well in most situations. If I’m flying very low and want to slow down my footage in post-production, I switch to 4K 60 fps. However, for social media platforms like Instagram, TikTok, or YouTube, 4K 30 fps should suffice, with the option to crop for vertical content. For social media-specific vertical videos, shooting in 2.7K is ideal.
Color Settings
The Air 3S offers three main color profiles: Normal, HLG, and DLOG M. If you prefer images straight out of the camera for easy sharing on social media, Normal is a great choice. For more dynamic range, HLG (Hybrid Log-Gamma) can be used, though I personally prefer DLOG M. DLOG M provides more detail in both the shadows and highlights, giving you more flexibility for post-production grading.
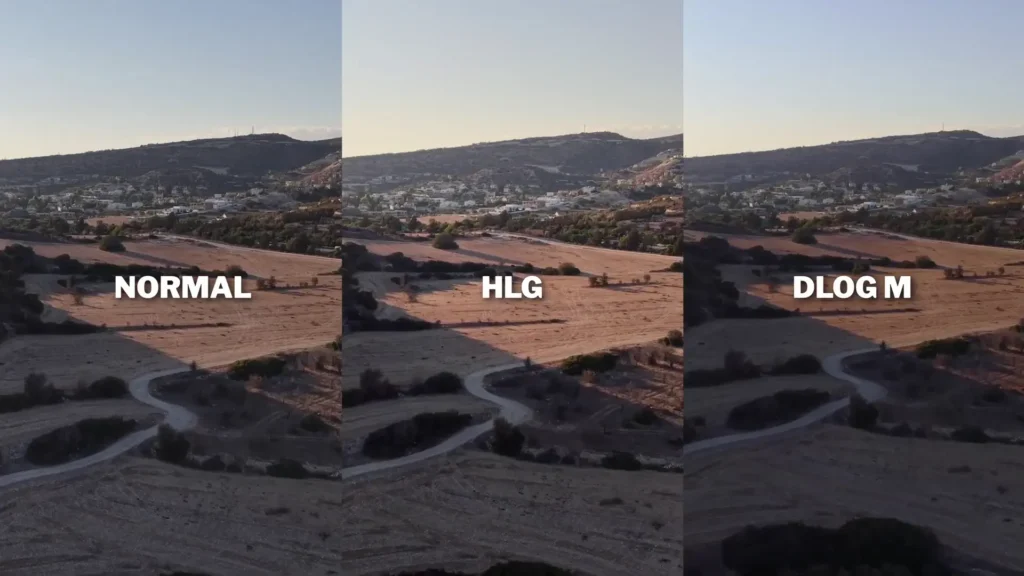
It’s worth noting that the Air 3S has 14 stops of dynamic range, but this is only available in video mode. If you’re shooting in DLOG M and want to see how the final result will look, you can toggle the Color Display Assist to get a more accurate preview.
Exposure Settings
Proper exposure is key to capturing well-balanced images and videos. For auto mode, I recommend keeping the exposure value at -0.3 or -0.7, especially when facing the sun. This adjustment will prevent highlight clipping. If you want more control over your exposure, switch to Pro Mode, where you can manually adjust the shutter speed and ISO.
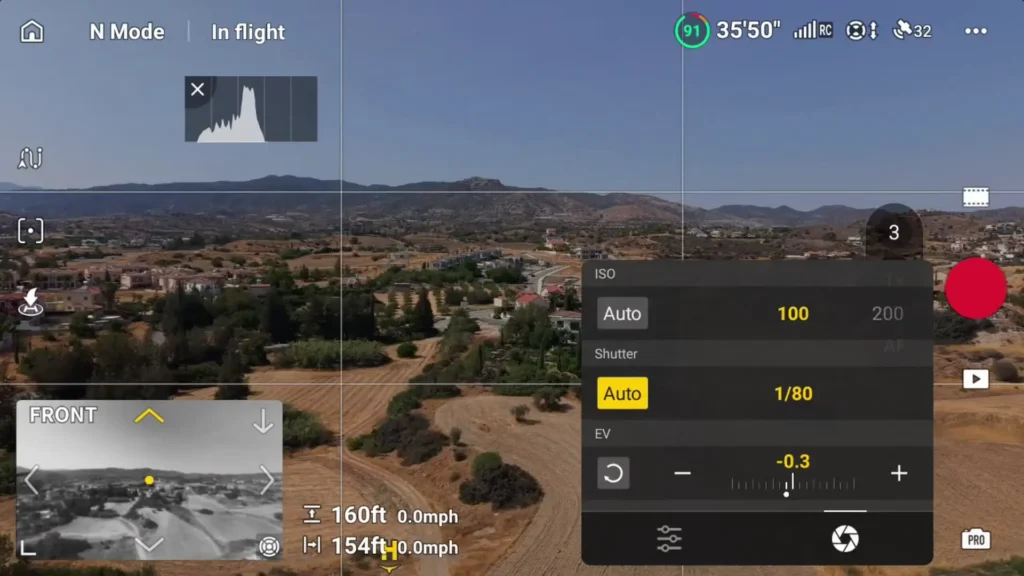
For video, following the 180° shutter rule is ideal. For instance, with 4K 30 fps, the shutter speed should be set to 1/60. Keep the ISO as low as possible to maintain image quality. In low-light situations, such as during the golden hour or sunset, adjusting the ISO can help control exposure. To prevent the ISO from getting too high, you can set it to auto, while fixing the shutter speed.
White Balance
For consistent color accuracy, you can either keep White Balance on Auto or set it manually. Auto works fine for general scenarios, especially when the lighting remains constant. However, when rotating the gimbal or experiencing changing lighting conditions (e.g., sunny with clouds), manual white balance is recommended. A setting of 5700 Kelvin works well for daylight shots, but you can adjust this based on the environment.
ND Filters
Using ND (Neutral Density) filters is crucial for controlling exposure and achieving natural motion blur, especially for smoother footage. The DJI Air 3S has two focal lengths—24mm (1-inch sensor) and 70mm (1/1.3-inch sensor)—requiring different ND filters for each lens. I personally use KN&F ND CPLs for controlling reflections on surfaces like water or glass.
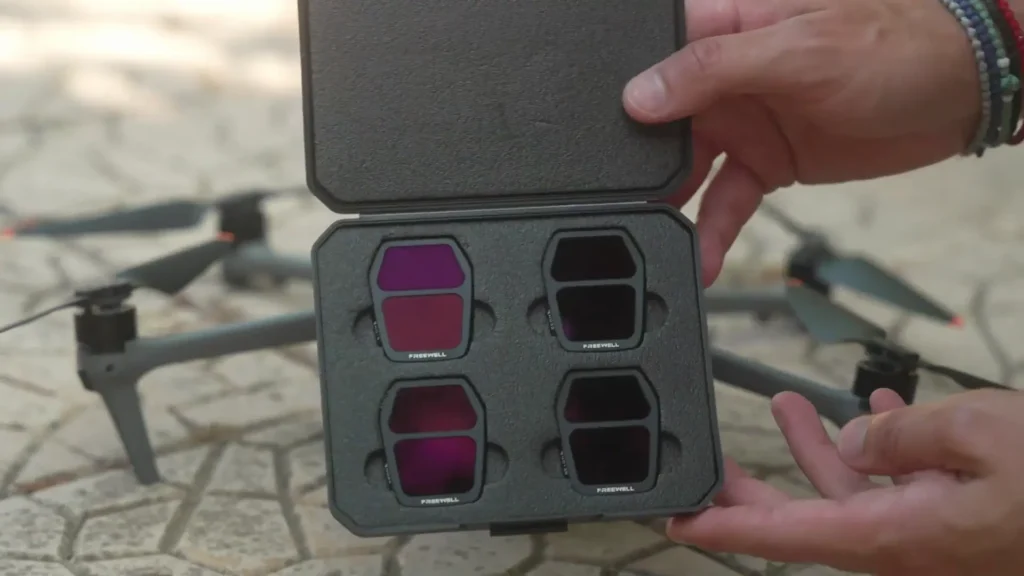
As a general rule of thumb, the brighter the light, the stronger the ND filter required. Keep an eye on the drone’s exposure meter to determine if you need a stronger ND filter.
Sharpness and Noise Reduction
Sharpness and noise reduction settings are a matter of personal preference. While some pilots prefer reducing sharpness to -1 for softer images, I typically leave the settings at default. You can experiment with these settings to determine what works best for you and your style of flying.
Gimbal Settings
The gimbal is an essential tool for capturing smooth footage. The DJI Air 3S offers three profiles: Cine, Normal, and Sport mode. Most of the time, I fly in Normal mode, using half-stick movements to keep footage smooth. For slow and controlled footage, I switch to Cine Mode.
You can adjust the gimbal settings in each mode to suit your preferences. For instance, you can modify gimbal control speed and tilt smoothness to ensure smooth transitions when tilting the gimbal or stopping the drone’s movement. While these settings aren’t saved automatically to the cloud, taking screenshots of your configurations can help preserve your preferences.
Photo Settings
The DJI Air 3S offers both 12 megapixels for the 24mm and 70mm lenses, and 50 megapixels for the 24mm lens, as well as 48 megapixels for the 70mm lens. For long exposure shots during the day, I typically use the 12-megapixel setting, as it allows shutter speeds of up to 8 seconds. For 50-megapixel and 48-megapixel shots, the maximum shutter speed is 2 seconds.
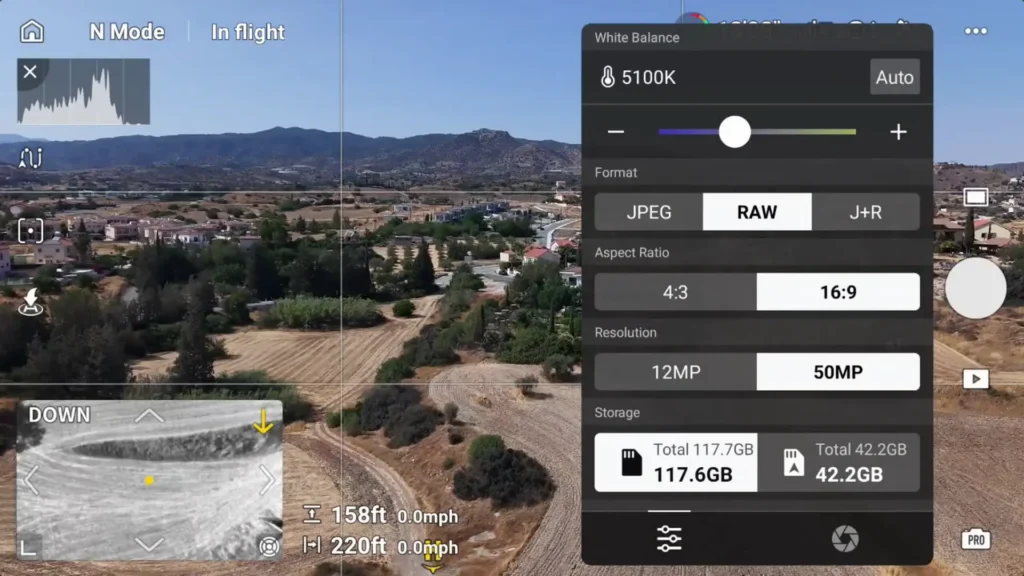
For photo formats, I recommend shooting in RAW, as it offers more flexibility in post-production. However, if you don’t need the extra editing potential, JPEG is fine. If you’re shooting in challenging lighting conditions, the Auto Exposure Bracketing (AEB) feature is useful, allowing you to take multiple exposures and merge them in editing software for the best result.
Bonus Settings
The button customization on the DJI RC2 controller is a handy feature. I’ve set C1 to control the gimbal tilt, allowing for quick changes during flight. For C2, I use it for either Cruise Control or the Auxiliary Light when flying at night.
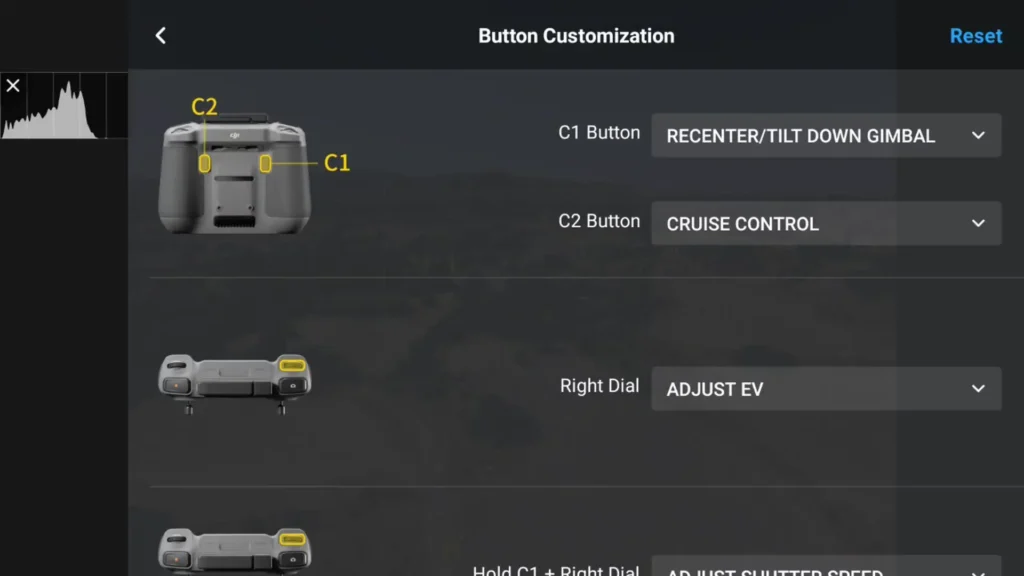
Additionally, the right dial can be customized for exposure value adjustments, which can be more efficient than tapping on the screen.
Extra Features
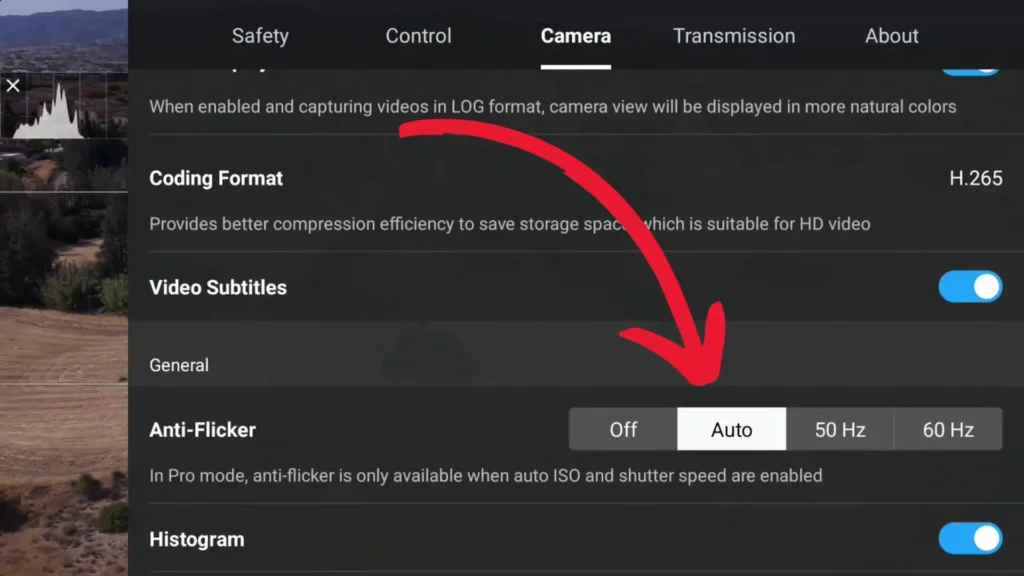
Several additional settings can improve your experience, including anti-flicker for preventing light flicker in auto mode, histograms to check exposure, and peaking level for manual focus. You can also enable zebras to check for overexposure, although I find this feature distracting and prefer to rely on the histogram.
For composition, you can enable grid lines to help frame shots and use frame guides for specific video formats like 4K 30 fps or vertical video.
Lastly, custom folder and file naming options can be useful for organizing your media, especially when traveling. This allows you to categorize photos and videos by location or date, making it easier to access your content later.
Table of Contents
Article Summary
By adjusting these settings, you can optimize your DJI Air 3S for both photo and video, ensuring you capture stunning shots with ease. Whether you’re new to drones or a seasoned pilot, these tips will help you get the most out of your DJI Air 3S. If you’re considering upgrading to the Air 3S or are still deciding between models, check out the additional videos linked in the description for further guidance.
Read More: DJI RC PRO 2 REVIEW


