If you just got yourself the brand new DJI Neo, there are a few things you need to change right now to get the best possible image quality. These settings adjustments and tweaks will help you get the most out of your drone and ensure your videos are top-notch from the start.
Table of Contents
To get the absolute best possible image quality from the DJI Neo, you would need to use a dedicated remote controller either the RC N3 controller that comes with the Fly More Combo or the DJI RC2, which can be purchased separately. These controllers offer manual control over settings like ISO, shutter speed, and white balance, allowing for more precise adjustments to achieve the best video quality.
Camera Section
In the camera settings, you can adjust details like sharpness and noise reduction. Under the general section, you’ll find tools like histogram, overexposure warning, and grid lines. These features can help improve your image quality by making it easier to achieve accurate exposure and composition, which ultimately enhances the overall look of your video.
Histogram
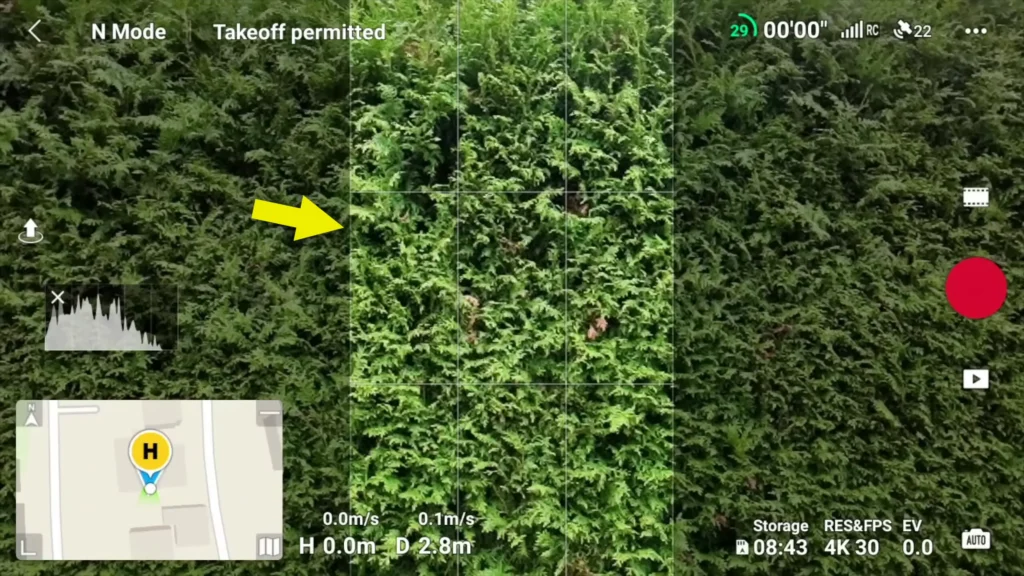
The histogram is a movable box on the screen that displays the exposure levels of highlights, mid tones, and shadows.
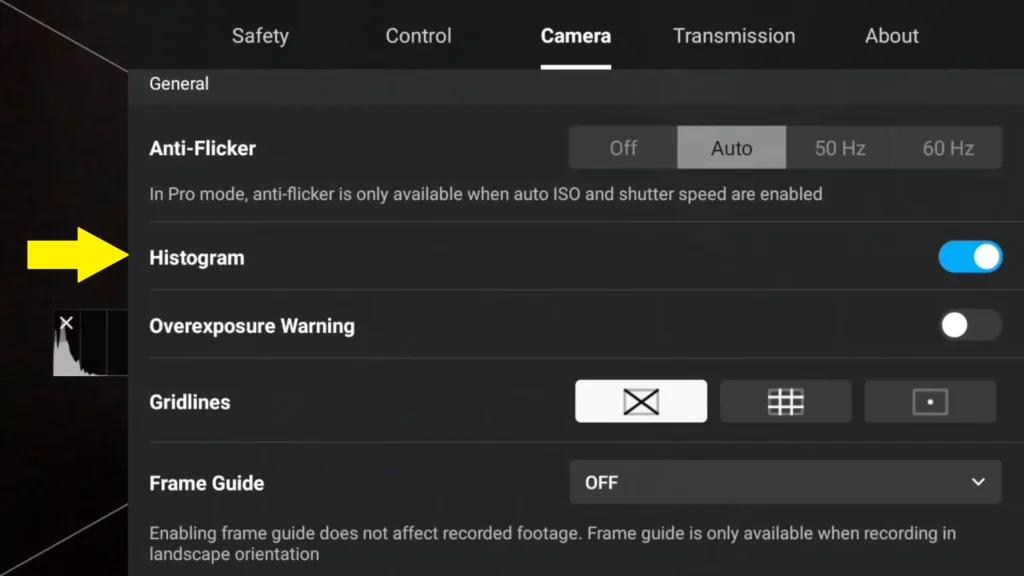
On the histogram, the Left Side represents shadows, and the Right Side represents highlights, with midtones in between.
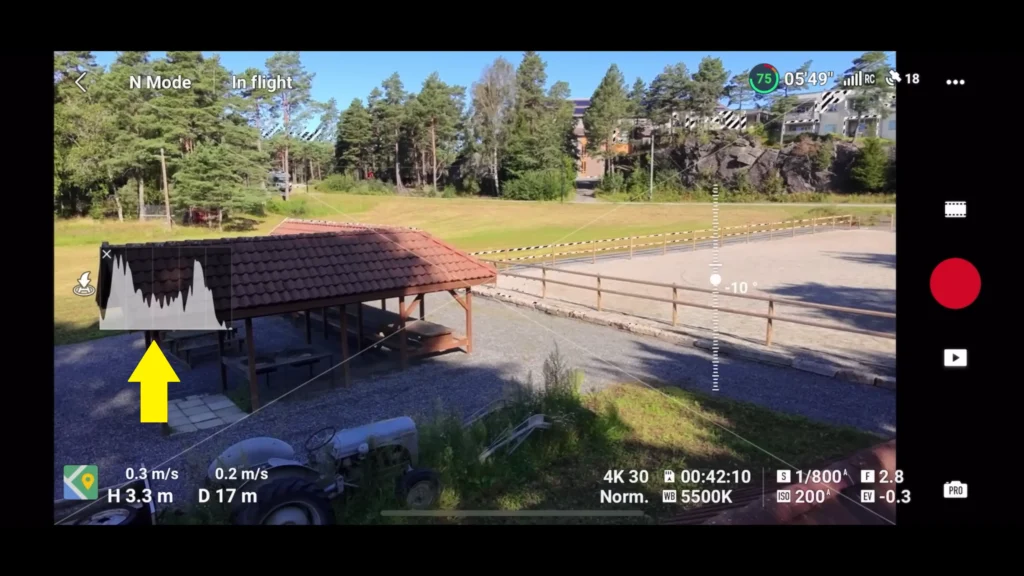
When the shadows or highlights are high, they risk clipping, meaning lost detail in the darkest or brightest parts of your footage. Turning on the histogram helps you monitor exposure and avoid clipping, ensuring better image quality.
Overexposure Warning
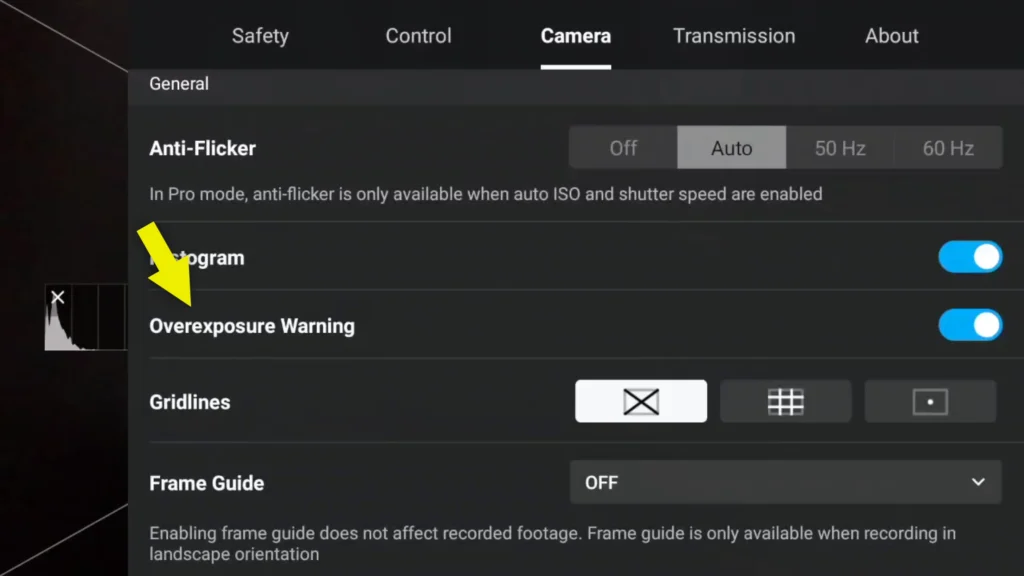
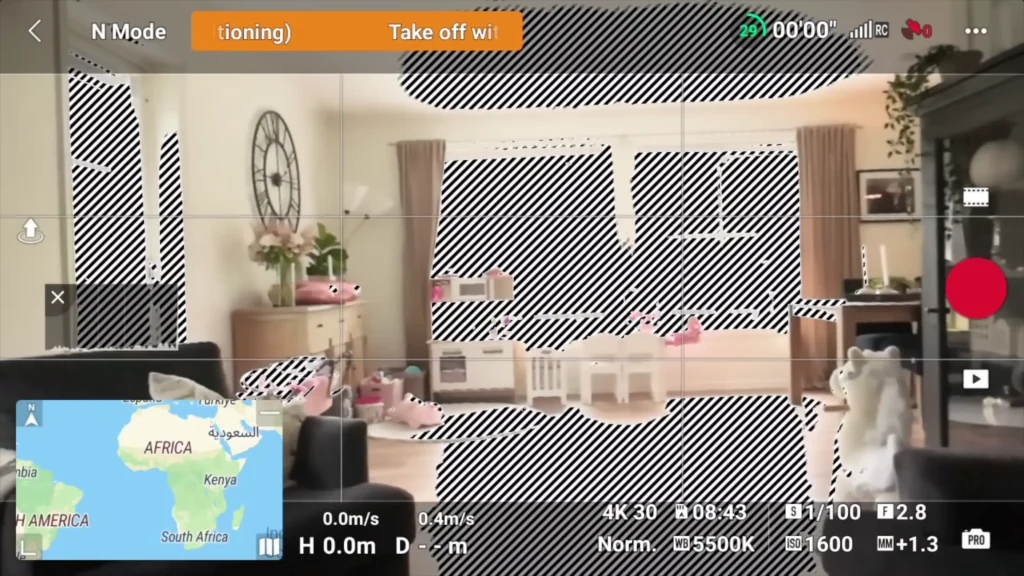
The overexposure warning highlights the bright, overexposed areas in your image with visible zebra lines. When used with the histogram, it provides a clear indication of exposure, helping you better visualize how the final video will look.
To enhance the image quality on the DJI Neo, adjusting the white balance and style settings is crucial. Here, you can fine-tune sharpness and noise reduction, which can make a significant difference in the overall look and clarity of your footage.
Recommended Accessories
| Image | Product | Features | Price |
|
1
 |
Charging Hub |
Brand: Qmint |
|
|
2
 |
Propeller Guard |
Brand: DJI |
White Balance
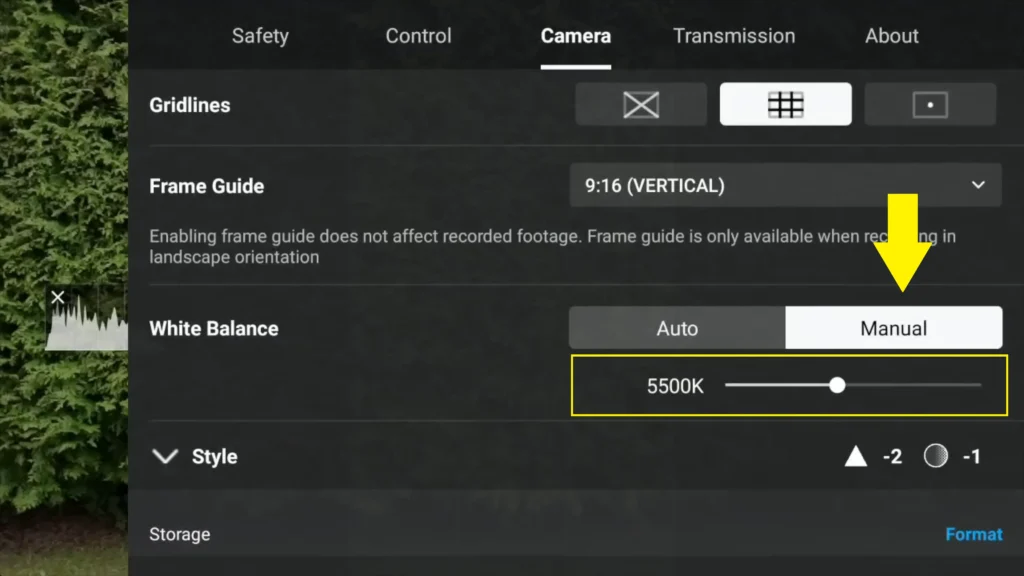
For optimal results with the DJI Neo, set the white balance to manual between 5,000 and 6,000 Kelvin. Staying around 5,500K is ideal as it tends to work well in both cloudy and sunny conditions. This range helps maintain consistent color accuracy in your shots without the fluctuations that can occur in automatic settings.
Sharpness
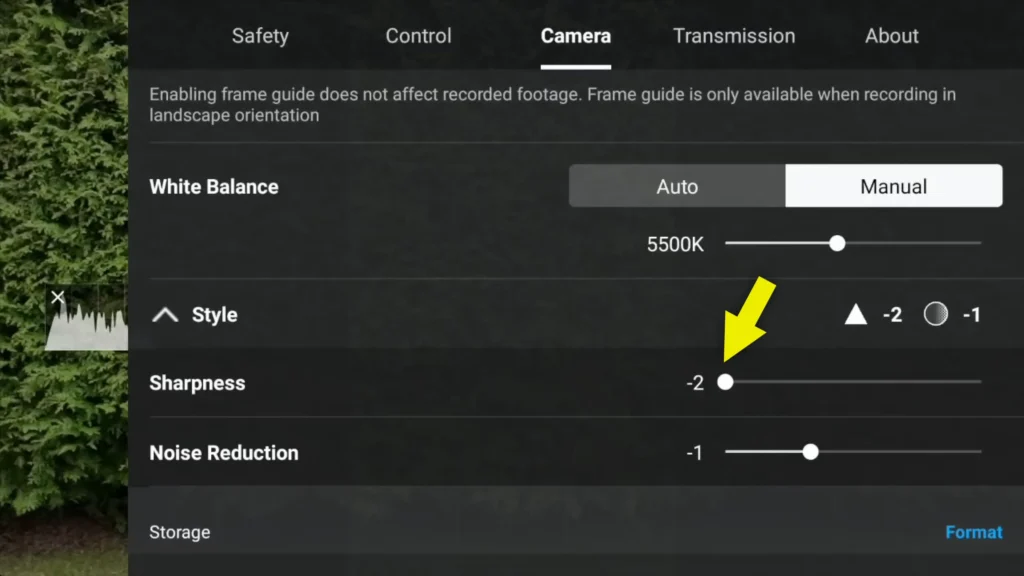
For the best image quality with the DJI Neo, it’s recommended to reduce the sharpness setting, as the default tends to be too high. Setting sharpness to -2 will give you a more natural look, preventing overly sharp edges that can detract from image quality. This adjustment is particularly helpful for beginners, allowing for smoother and more professional-looking footage straight from the drone.
Noise Reduction
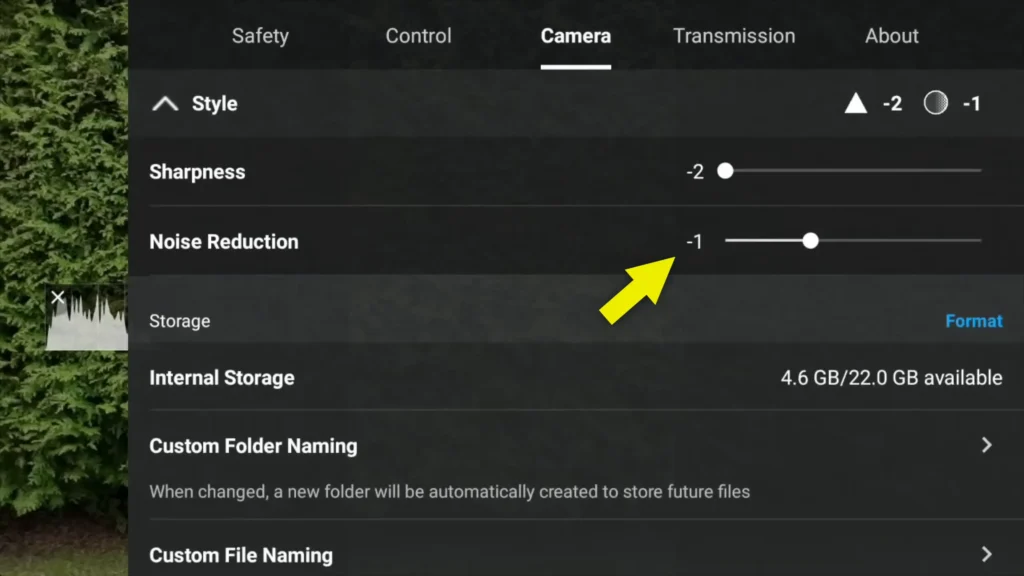
Noise reduction on the DJI Neo, it’s generally best to leave it at zero for balanced results. However, if you notice a bit of mushiness in textured areas like trees, try reducing noise reduction to -1 or -2 to maintain clarity. In open landscapes, keeping it at zero typically works well. Adjusting sharpness to -2 remains the most impactful setting for achieving smoother footage, especially beneficial if you’re aiming for a more cinematic look.
Manual Settings
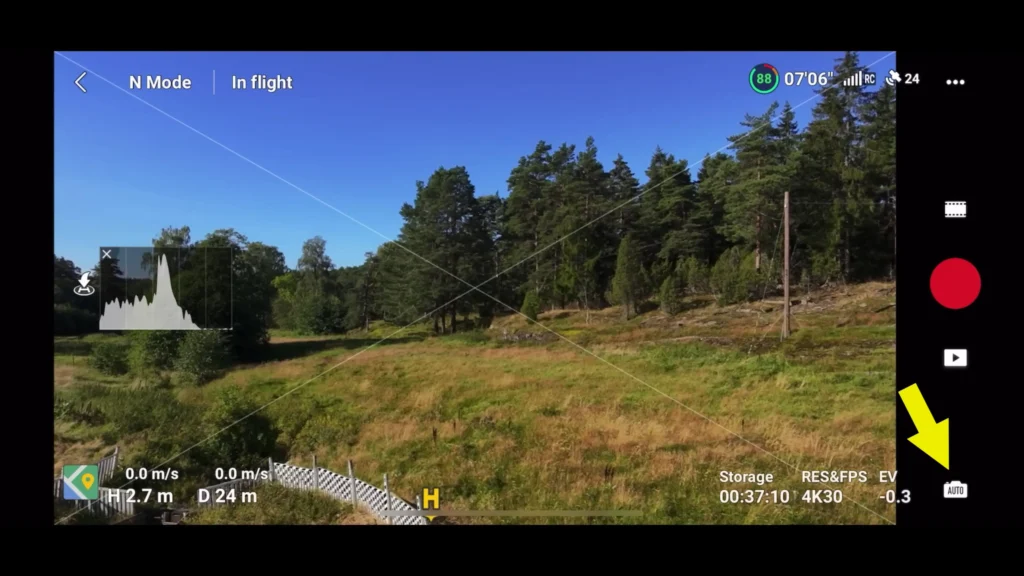
On the main screen, where you can see the live preview of your drone’s footage, there’s an icon at the bottom right that says ‘Auto’. By tapping this, you can switch to Pro mode or (Manual mode). This mode allows you to manually adjust settings like shutter speed, ISO, and white balance. Using manual settings helps you achieve a more stable and consistent image without automatic adjustments affecting exposure or color balance, which is especially useful when you want to capture high-quality footage. Additionally, combining this with sharpness set to -2 will result in even better video quality.
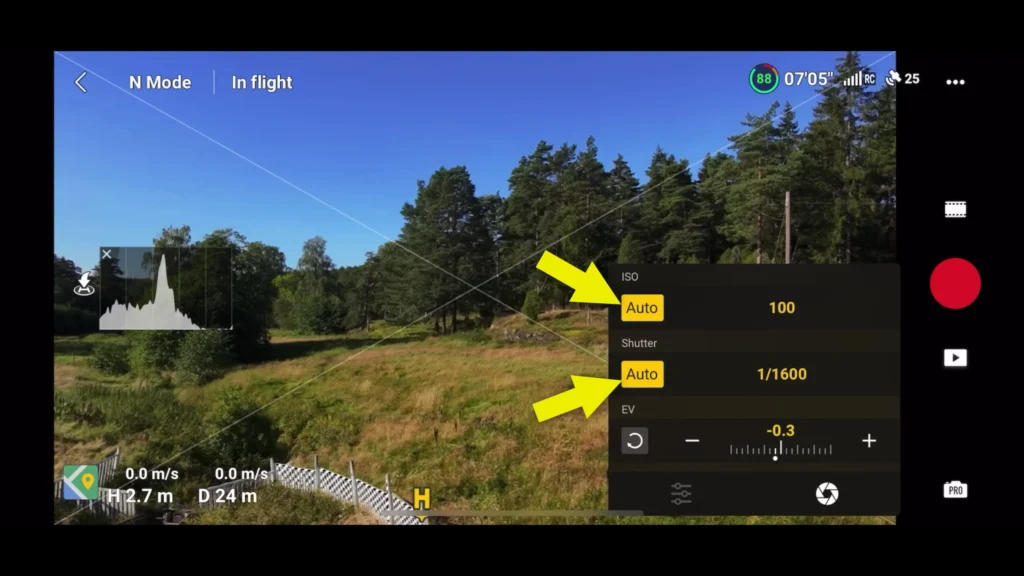
For someone new to drones and who may not have been interested in them until the release of the DJI Neo, this is probably the first mistake many beginners make.
The reason some people get better video quality than others is that they use a dedicated remote controller, where they can manually adjust settings like sharpness (set to -2), unlock ISO and shutter speed, and fine-tune the white balance. These manual adjustments play a crucial role in capturing smoother and higher-quality footage.
Video Subtitles
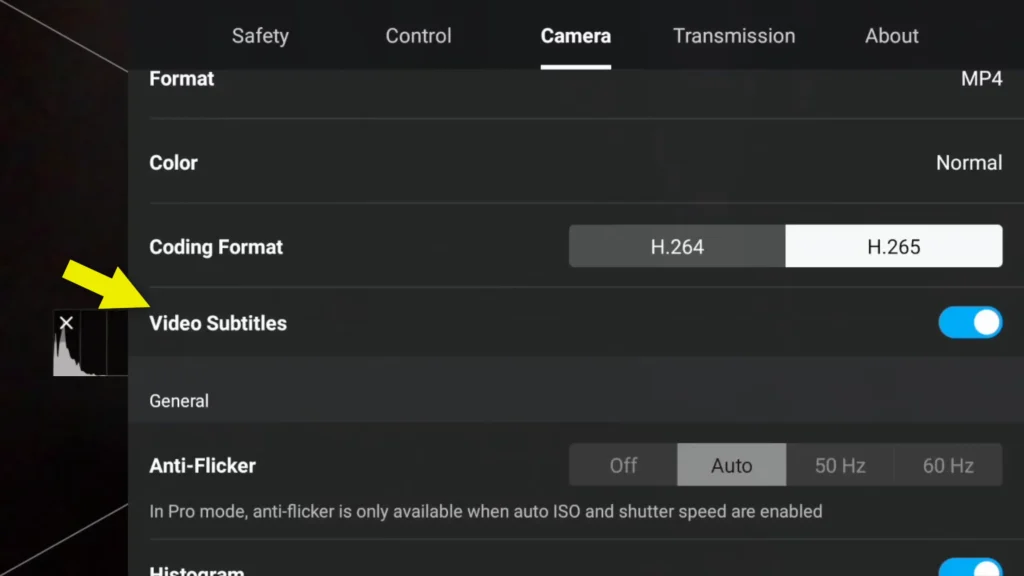
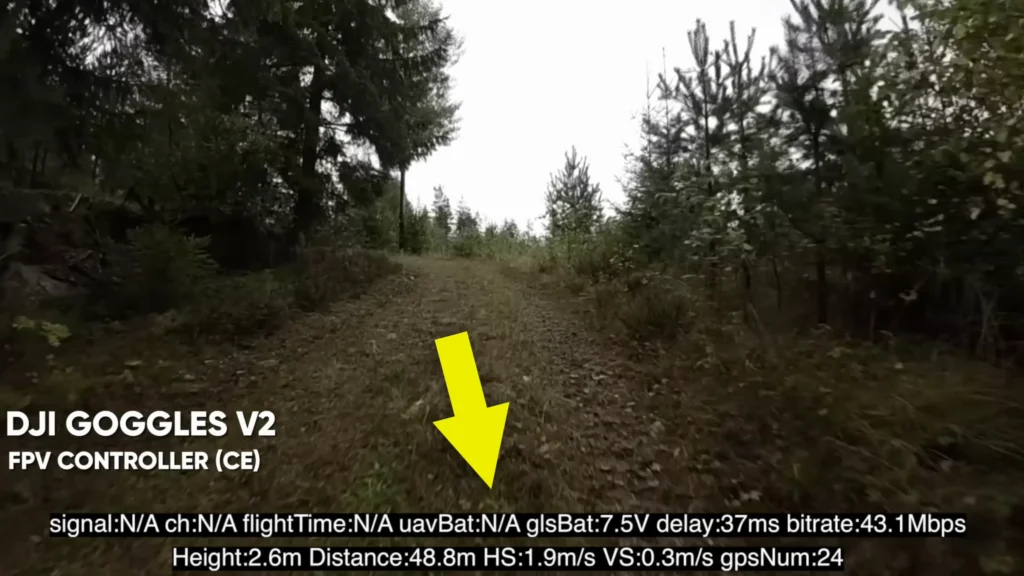
To keep things organized and save space, consider turning off video subtitles. These files are often unnecessary when transferring videos to a computer, and they take up some storage. Subtitles can contain data like speed, altitude, and height, so if you don’t need these overlays for your footage, turning them off will free up space on the DJI Neo’s 22 GB internal storage.
Recommended Accessories
| Image | Product | Features | Price |
|
1
 |
Propellers |
Brand: DJI |
|
|
2
 |
Flight Battery |
Brand: DJI |
Frame Guide
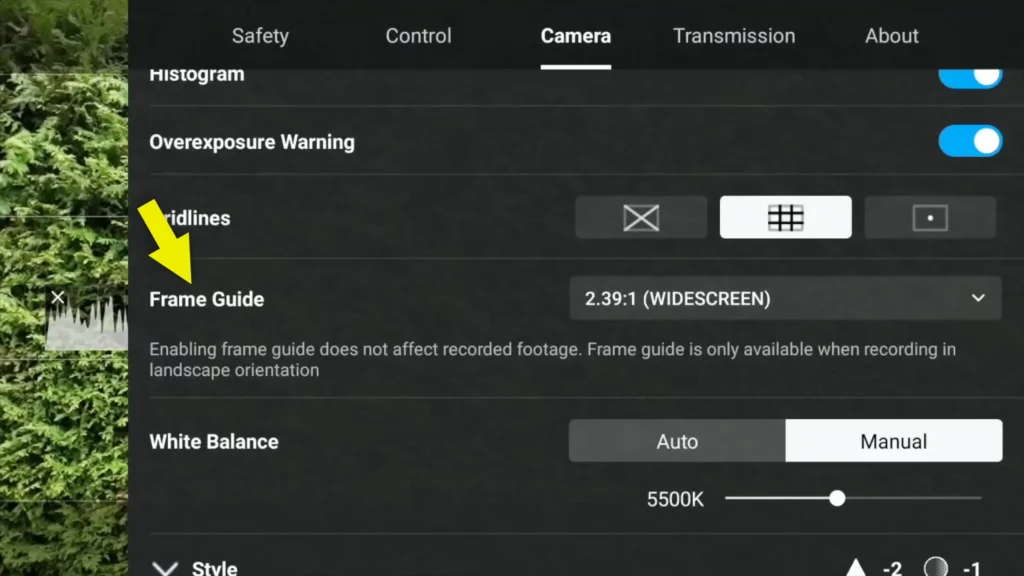
If you’re shooting videos for social media like TikTok, Instagram, or Facebook, or for a widescreen TV, frame guides can help. These guides display aspect ratios on your screen, such as 9×6 for Instagram, making it easier to compose shots specifically for each platform.
Aircraft Firmware
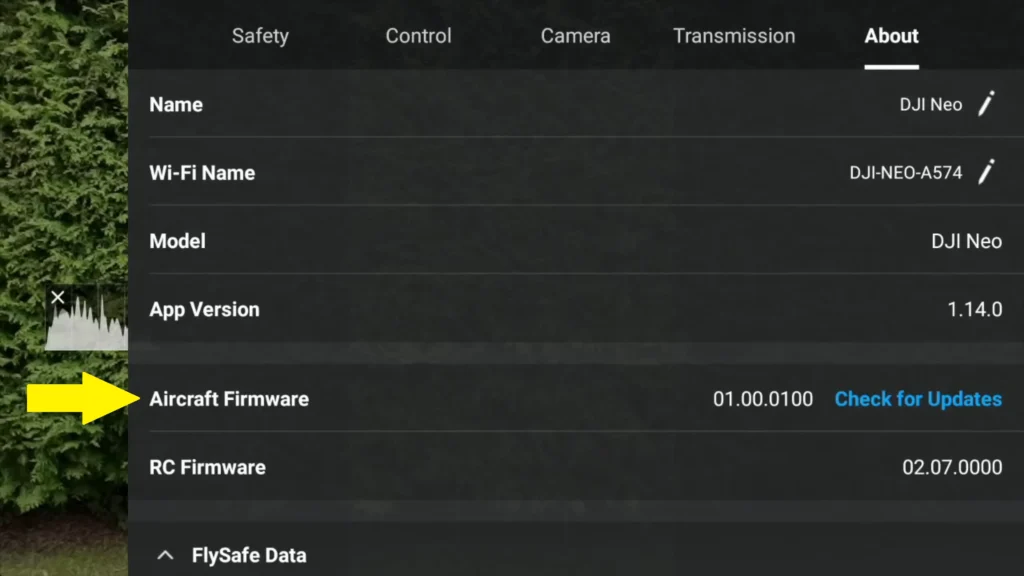
Before you start flying each day, it’s essential to check if there’s a new firmware update available for your drone. Firmware updates are released frequently, they can bring important improvements to features, performance, and stability. Keeping your drone updated ensures you have access to the latest fixes and enhancements for the best flying experience.
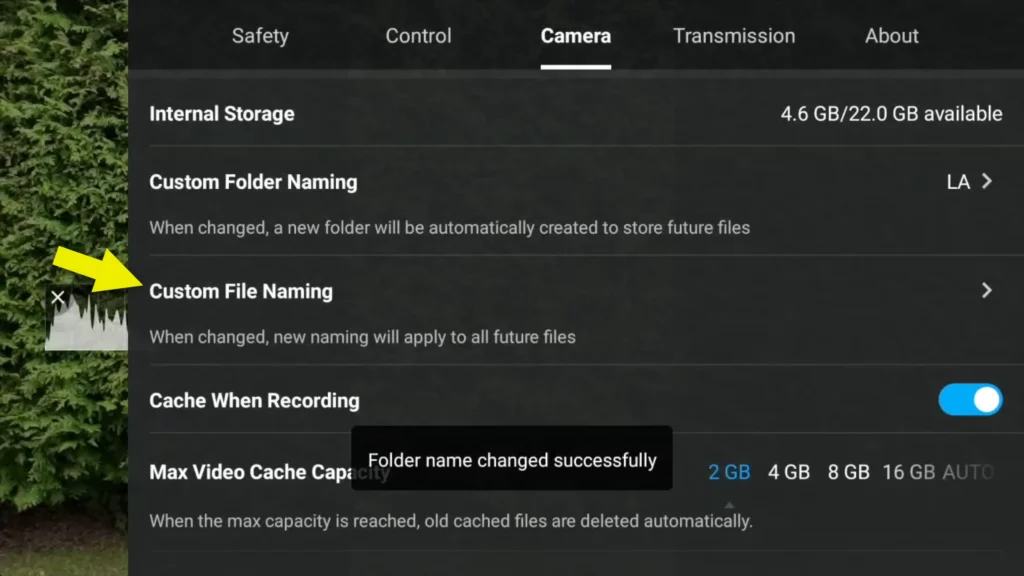
Custom Folder Naming
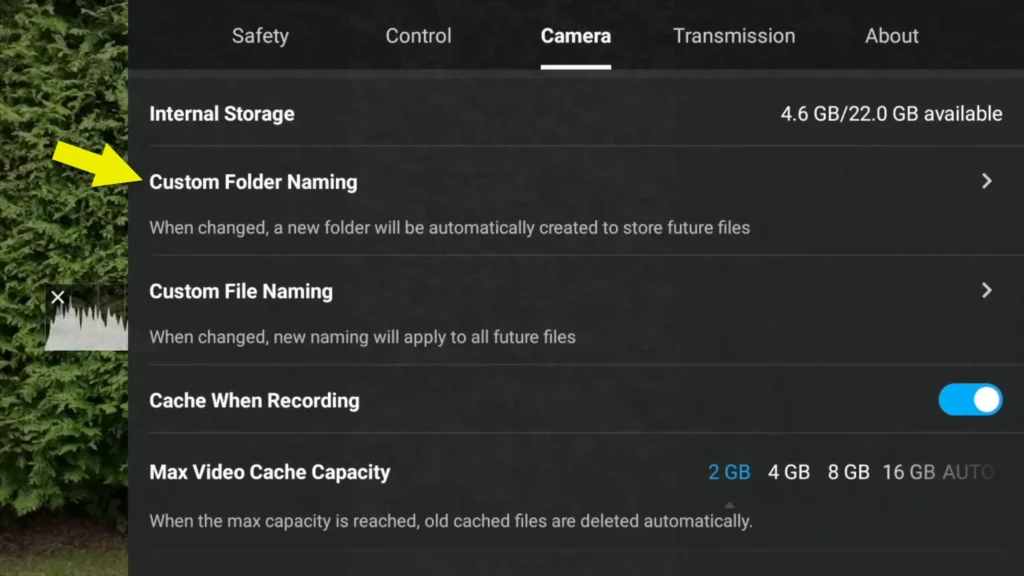
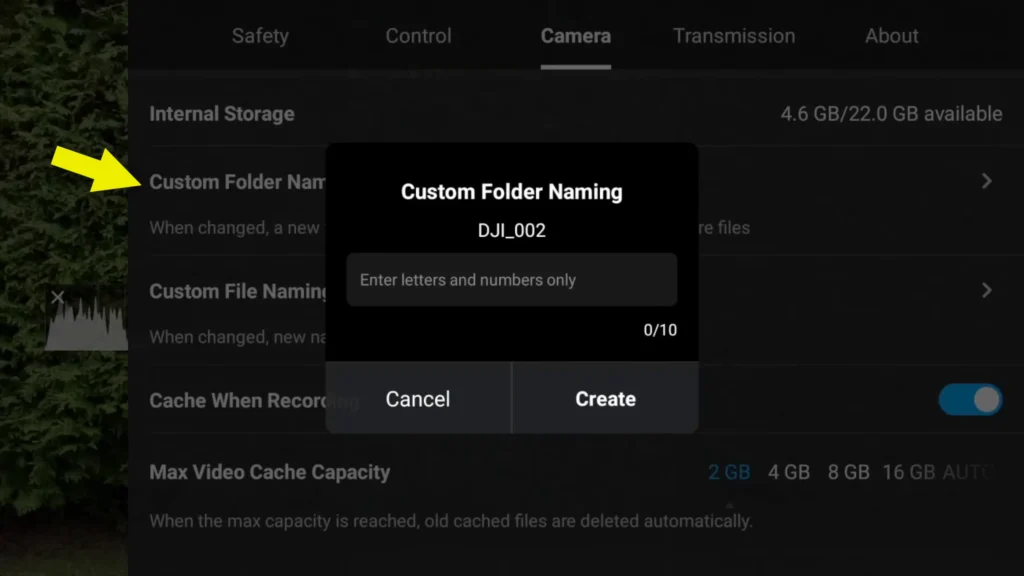
The folder naming option on the DJI Neo allows you to customize folder names for storing videos. This feature enables you to specify folder names for different sets of footage, making it easier to organize and retrieve videos based on location or occasion. For example, you could label a folder by location or project name, and all videos recorded afterward will be automatically saved into that specified folder, keeping your footage well-organized.
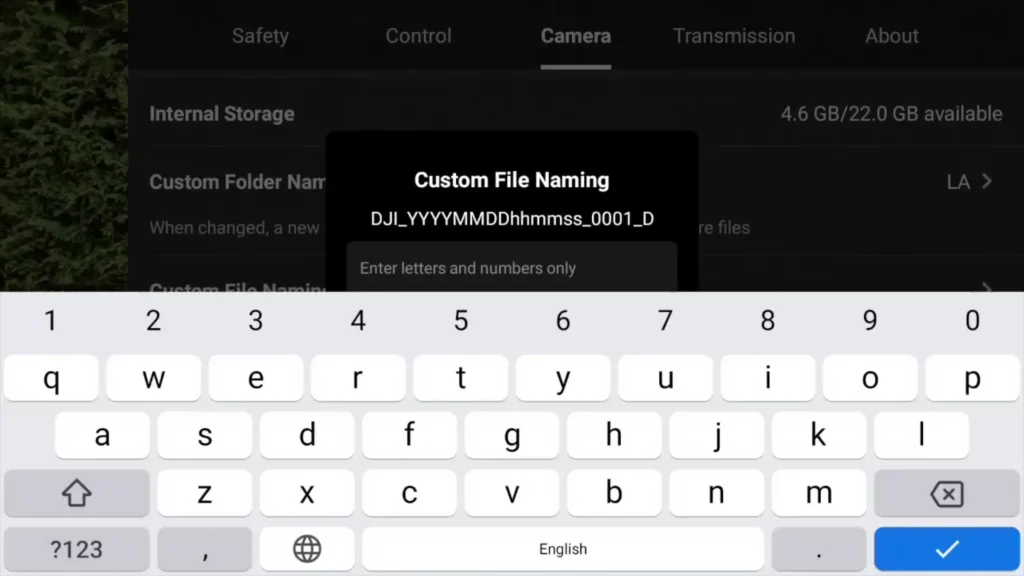
Custom File Naming
Additionally, you can customize video file names on the DJI Neo. This feature allows you to choose a specific format instead of the default ‘DJI_’ naming convention. For instance, if you’re shooting a project in a particular location, you could change the prefix to reflect the project or location name, which helps keep track of footage more easily when transferring or organizing files on your computer.
Recommended Accessories
| Image | Product | Features | Price |
|
1
 |
Control Sticks |
Brand: DJI |
|
|
2
 |
Car Charger |
Brand: DJI |
Smartphone
Let’s start with the smartphone settings. By default, there’s not much to adjust since the smartphone’s settings are generally optimized for video quality. However, if you’re someone who likes to experiment, you can always tweak the settings to find what works best for you.
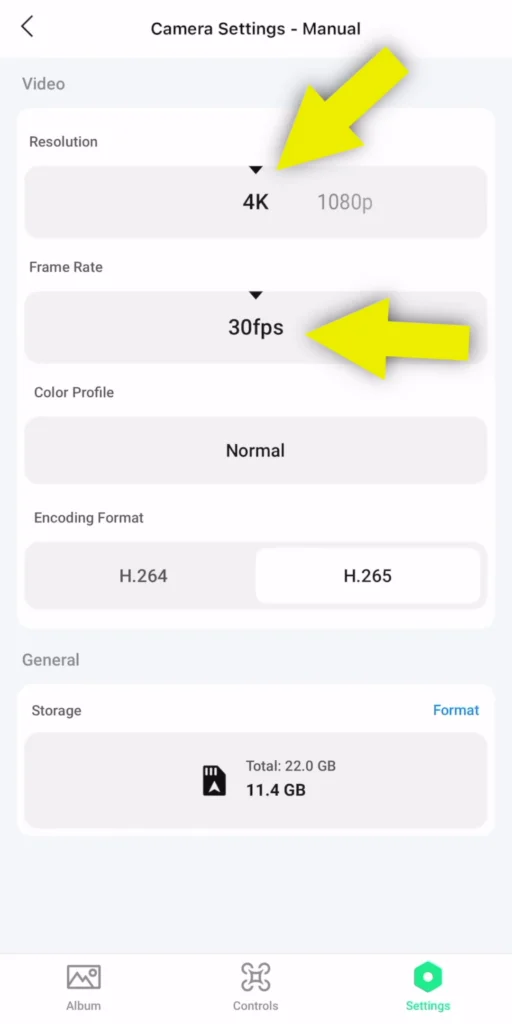
Camera Settings
In the Camera Settings, ensure the resolution is set to 4K with a frame rate of 30 fps. Just double-check to confirm you have the correct resolution. Essentially, there’s not much to adjust in terms of resolution and recording settings.
Smart Shots Modes Settings
Follow Settings
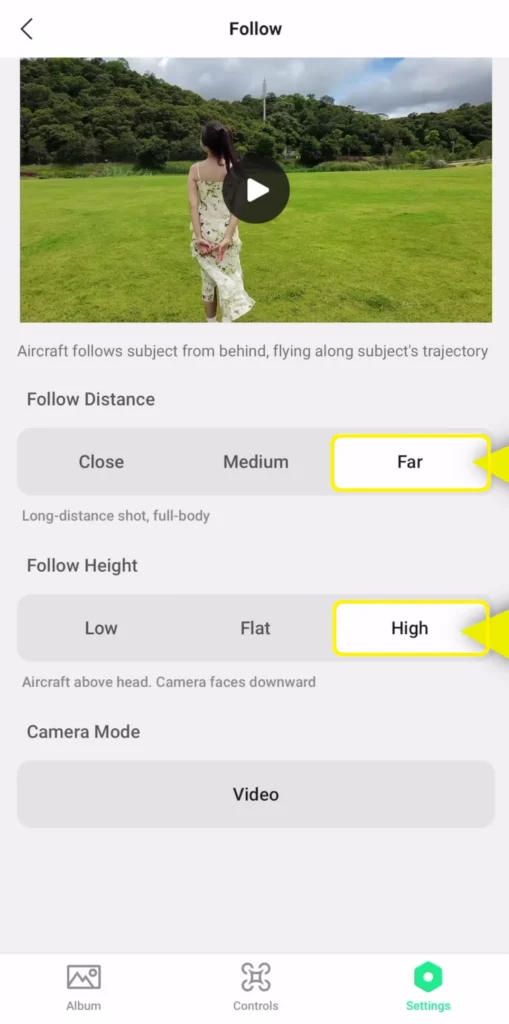
By default, the settings are typically set to flat and medium, which can work in some cases.
However, in most scenarios, these settings make the shots appear too close, taking away from the aerial experience.
To optimize, adjust the maximum distance to ‘Far’ and set the highest altitude to ‘High.’ This helps reduce sudden exposure shifts, enhancing video quality. By allowing the drone to fly further and higher, you get a more consistent exposure, which improves overall image quality as it captures a broader view.
For More Quick/Smart Shots Settings Read : 15 Essential Changes for DJI Neo Settings


