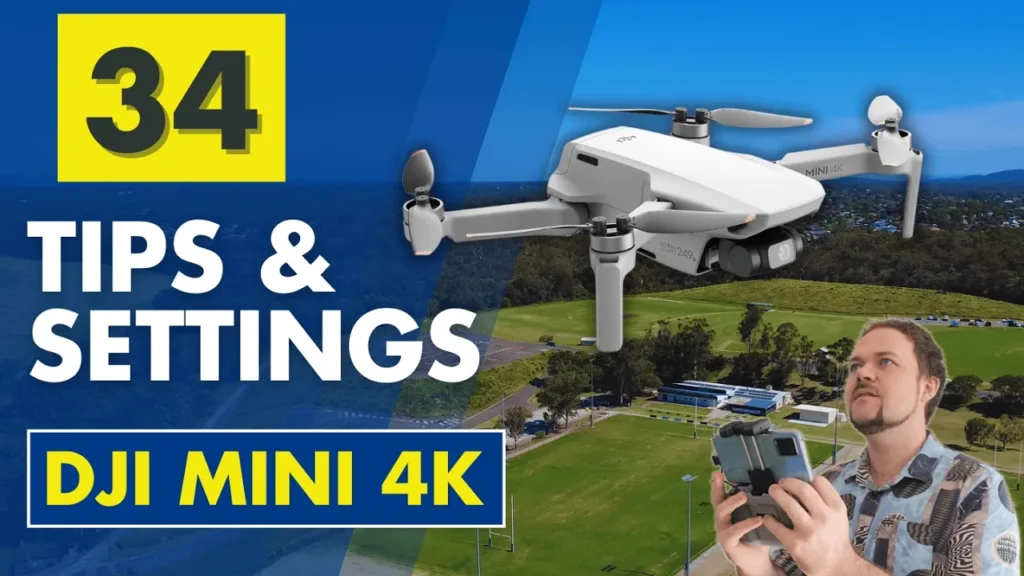
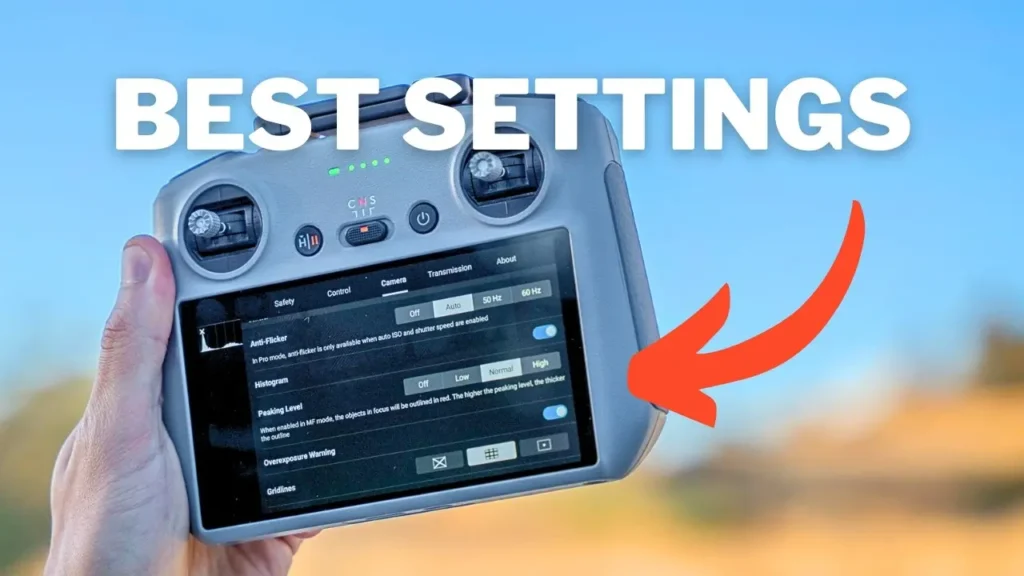
Are you feeling completely lost with your new DJI Mini 4K? Not sure how to make the most of your drone or feeling overwhelmed by all the settings? This video is for you! What’s going on, guys? My name is Dan Davis, and I’m the Creative Director at DanTube.tv Australia’s #1 drone YouTube channel. Today, I’m sharing my 34 best tips and settings for the DJI Mini 4K, breaking them down into easy-to-follow sections to help you get the most out of your drone.
Device Management
Our first tip is found in the Profile section under Device Management. Here, you can see a list of all the drones you’ve owned.
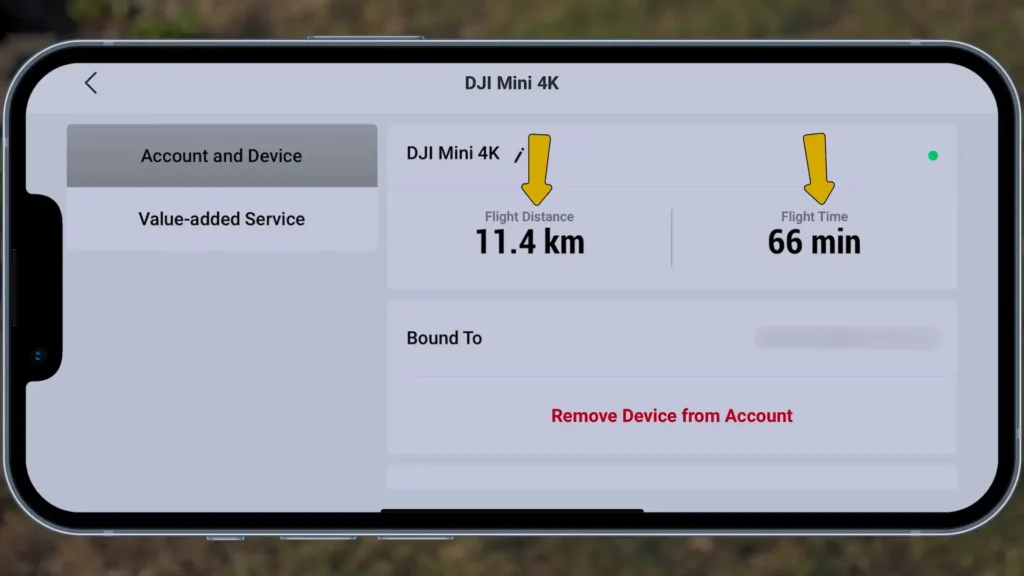
If you tap on the DJI Mini 4K, you’ll get valuable stats like:
- Total flight distance
- Total flight time
- Number of flights
This feature is especially useful if you’re planning to sell your drone in the future, as buyers often want to know its usage history. It’s also a great tool for monitoring battery health and ensuring your motors are in good condition. If you notice excessive flight hours, it might be time to replace a battery or send the drone in for maintenance.
DJI Forum
The DJI Forum is a built-in feature within the Profile section, making it super convenient, you don’t need to open a web browser or use another device.
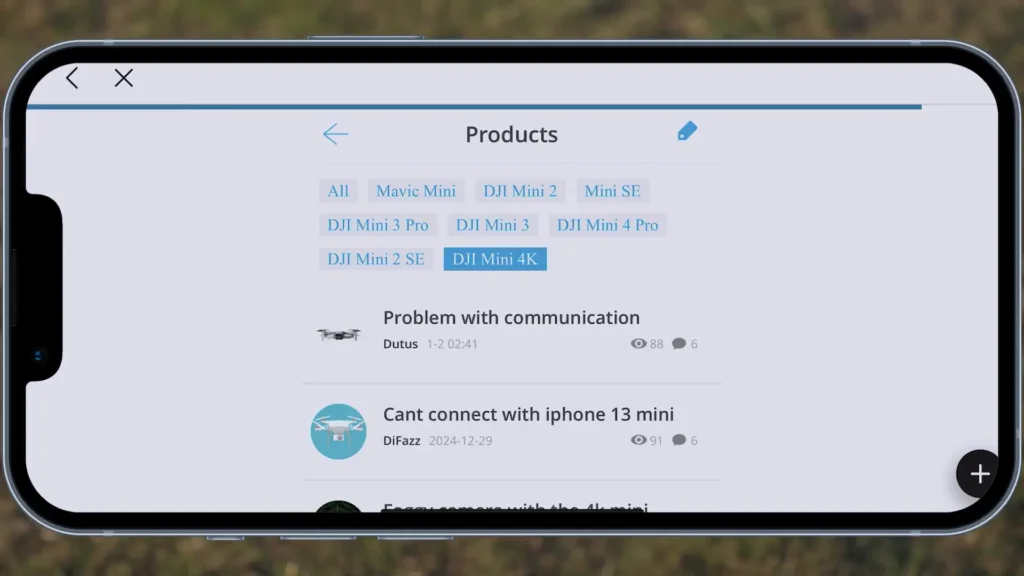
Here’s why it’s useful:
- You can browse discussions based on your specific DJI product (e.g., DJI Mini 4K).
- If you’re experiencing errors or issues, you can check if others have faced the same problem and see potential solutions.
- You can join discussions, share your thoughts, or even ask for help by pressing the pencil or plus icon to start a new post.
This is a great way to connect with the DJI community, troubleshoot problems, and get advice from other drone enthusiasts.
Find My Drone
The Find My Drone feature can be found in various locations within the user interface. One way to access it is by tapping on Find My Drone, which will show your current location as well as the last video recorded by the drone.
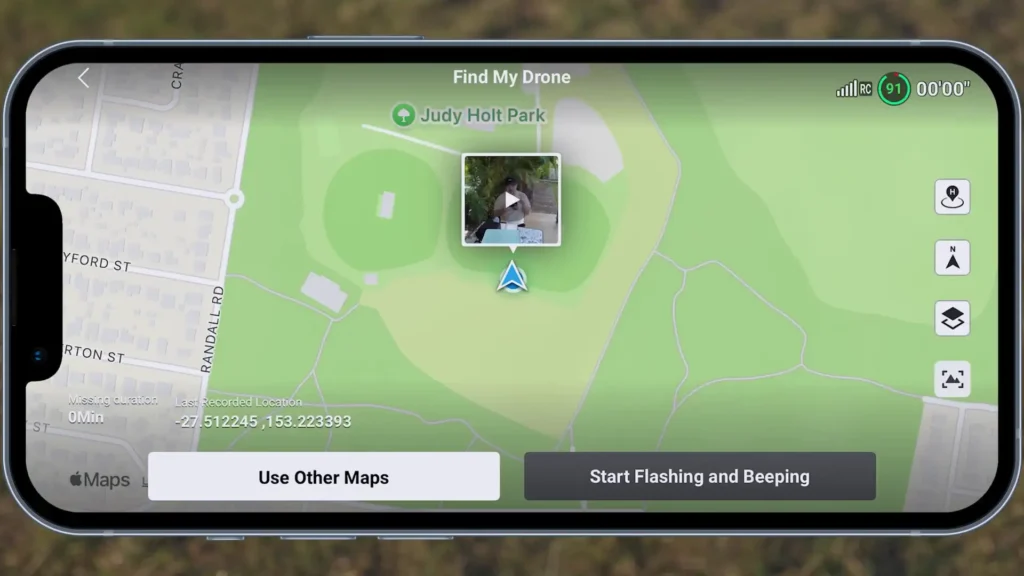
This feature is incredibly useful if you’ve lost your drone, as the last recorded footage might reveal where you lost connection, perhaps when it hit a tree or flew out of range.
Once you’ve reviewed the video, you can tap Start Flashing and Beeping. If you listen closely, you’ll hear the drone beeping while its lights flash, making it easier to locate, even if it’s stuck in a tree or hidden in a difficult spot. This tool is a great way to track down your drone quickly and efficiently!
Firmware Auto Download
The Firmware Auto Download feature is located in the Settings menu. When you navigate to this section, you’ll first see the Firmware Update option, followed by Firmware Auto Download.
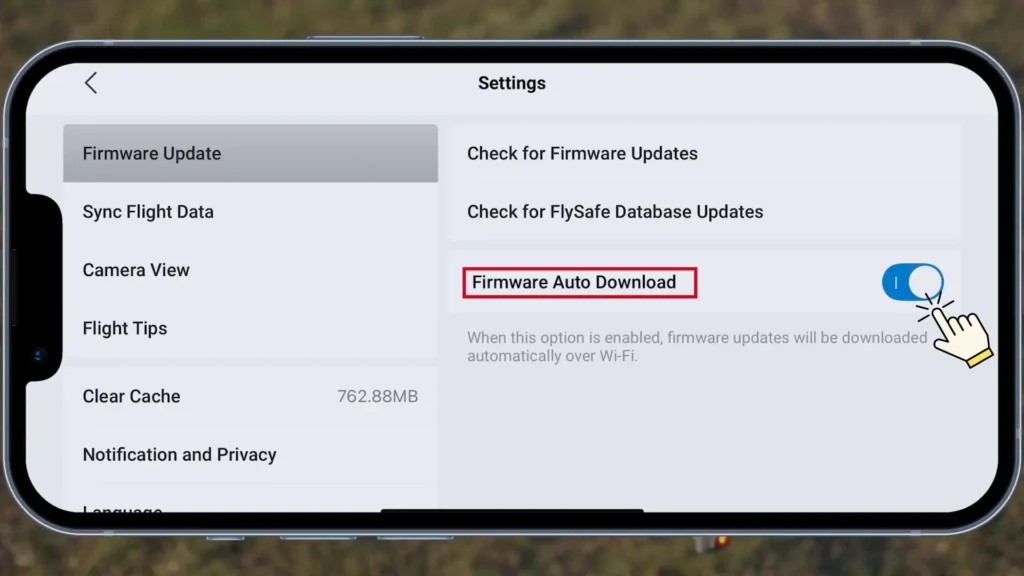
If enabled, this feature will automatically download firmware updates, saving you the hassle of doing it manually. Personally, I prefer downloading updates myself since it gives me the full experience of reviewing the update notes and understanding what changes are included. However, if you’d rather skip that step, enabling auto-download ensures your drone stays updated effortlessly.
Camera View
Still in the Settings menu of the main menu, you’ll find the Camera View option. When you tap on it, there’s an option to Auto Enter Camera View. By default, this setting is turned off, but when enabled, it allows the drone to go directly into camera view without taking you to the main menu first. I like to call this the “flight menu.”
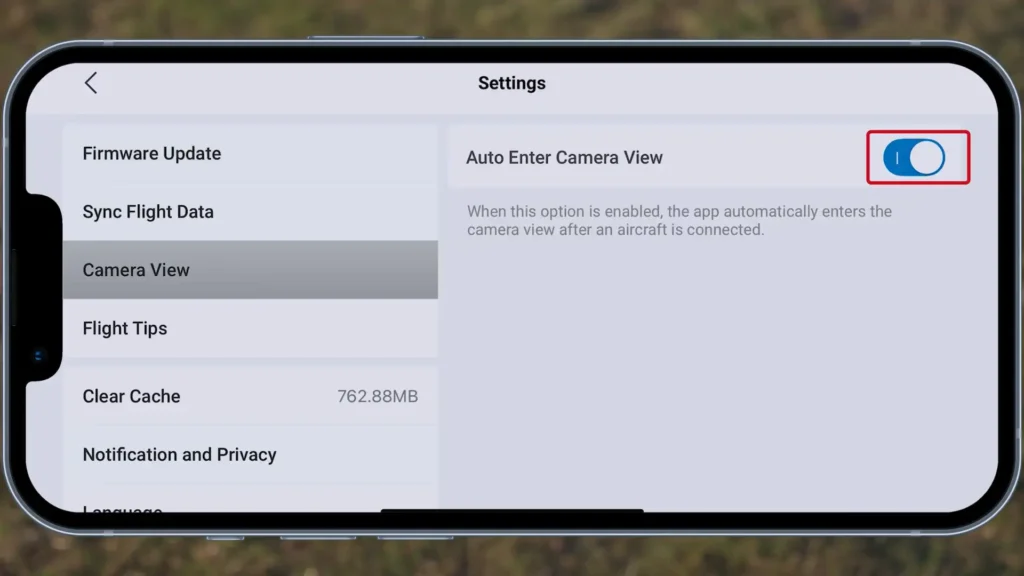
If you want to jump straight into capturing content without having to press another button, definitely enable this feature! It’s a real time-saver.

Pre-Flight Checklist
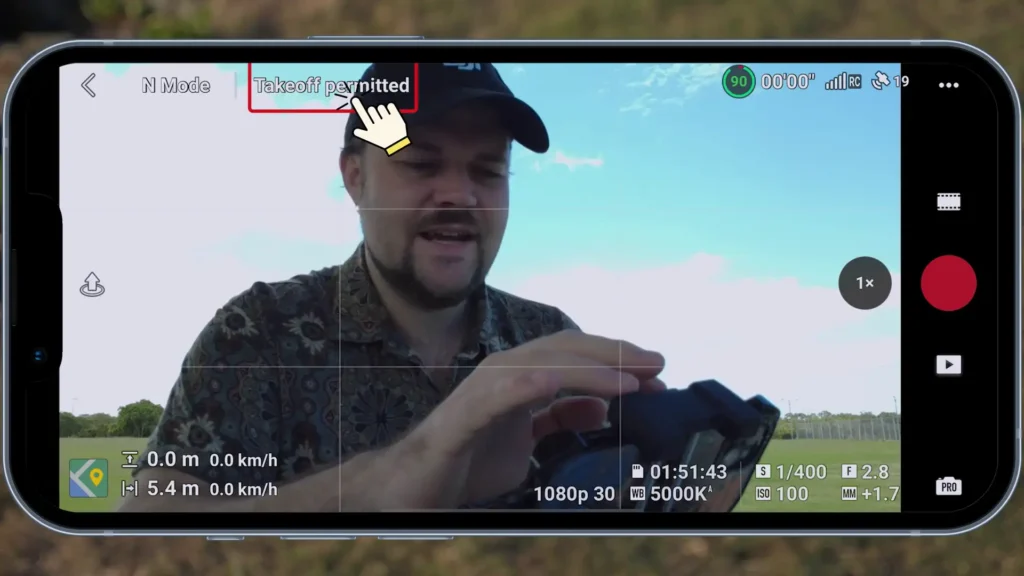
For tip number six, I’ve got the pre-flight checklist, which can be found in the top left corner where it says ‘Takeoff Permitted’. This section will display different messages and warnings depending on the current situation. For me, it says ‘Normal,’ meaning everything is fine with the drone. However, this is where you’ll see any error messages if there are issues with satellites, motors, or other components. If there’s an issue, it will pop up here, which is really helpful.
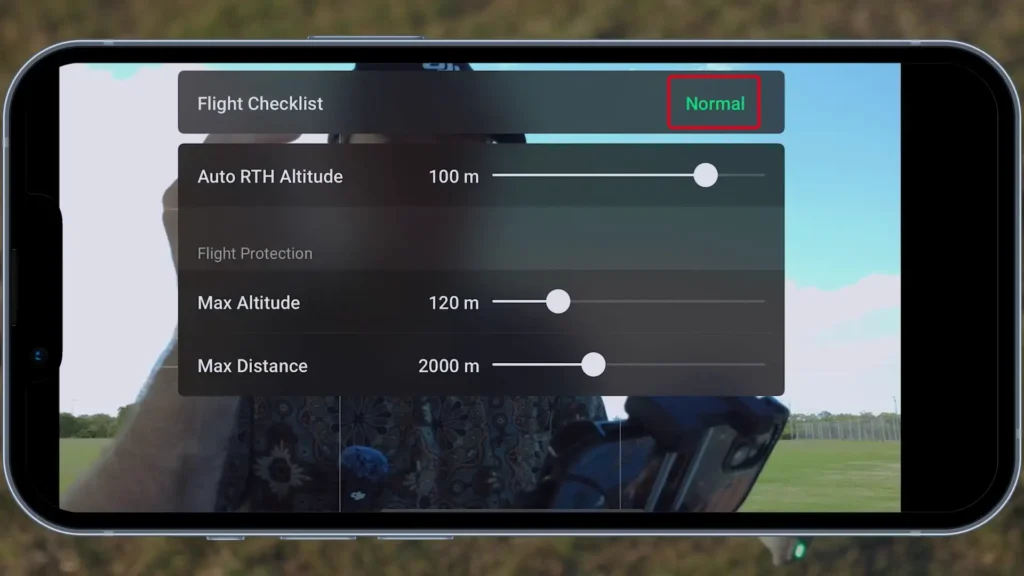
To check, simply tap on ‘Takeoff Permitted’ and it will give you a rough idea of the status. If there’s an error, you might see a red banner, which will notify you of the issue. Tapping on this banner will break down a detailed list of problems. Additionally, you can go into this section to adjust settings such as the return-to-home altitude, maximum altitude, and maximum distance
Map Interface
Now, for tip number seven, let’s talk about the map and ‘Find My Drone’ feature. As I mentioned earlier, the ‘Find My Drone’ feature is available in several areas throughout the app. In the bottom left corner of the flight menu, you’ll see a little map icon. If I tap on it, a larger map will appear. Tapping it again will prioritize the map and place the camera feed in the bottom left corner.
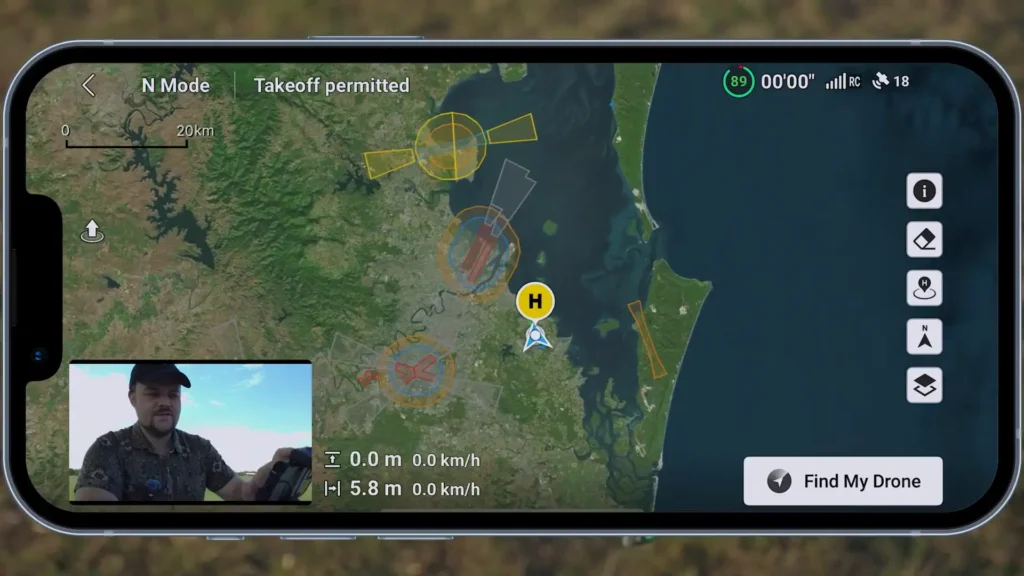
This is where you can see your exact location and the surrounding area. If you zoom out, it will even show you nearby airports and other drones in your area. Right now, you can see that we’re in a safe area to fly, which is great to know. You can also tap on the ‘Find My Drone’ button in the bottom right. This will bring up the last video the drone captured, giving you a rough idea of where you might have lost it. Additionally, it gives you the option to start flashing and beeping the drone, making it easier to locate.
This feature is especially helpful if you’re in a pinch. If you’ve lost your drone and start feeling stressed, you won’t have to worry about searching online.
Attitude Indicator Compass
For tip number eight, let’s talk about the attitude indicator compass. We already have the map up, and as you can see in the bottom left corner, if we press the icon that looks like a map in the bottom right of that window, it will switch to the compass.
In the top left of the compass, you can adjust the orientation between the controller or the drone itself. This depends on which perspective you need. For example, as I turn, the little icon turns along with it. If I switch to the other option, the icon turns again, so you can choose whichever view suits you best.
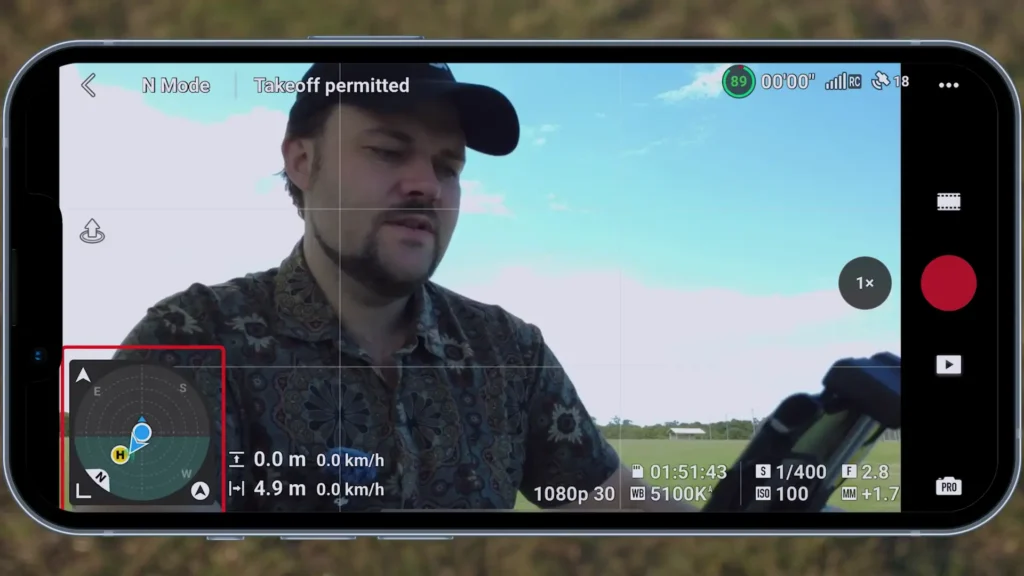
One of the most useful features here is how the compass helps indicate the drone’s attitude. If I pick up the drone, you won’t notice much because the gimbal compensates so well. But if I lean the drone left or right, you’ll see the indicator bar shift accordingly. If I tilt it forward or backward, the indicator adjusts too. This helps you understand how much the drone is battling against the wind, which is really useful if you’re noticing that the gimbal seems a bit off or you’re encountering issues with stability.
Additionally, the compass shows the direction of the home point and the controller in relation to the drone. If you need to orient yourself towards the drone, the indicator will help. For instance, as I angle the drone in the direction of flight, a green circle will appear, letting me know I’m facing the drone’s path.
This is a great tool for safety, ensuring you’re always aware of which direction you’re facing and helping you maintain the best connection to the drone. Plus, it gives you a rough idea of how much wind the drone is dealing with.
Auto Mode
For tip number nine, I’m going to switch to auto mode. As you can see, it’s a bit harder to see right now, but this is how it looks by default. In auto mode, you’ll see the storage, resolution, FPS, and EV (exposure value).
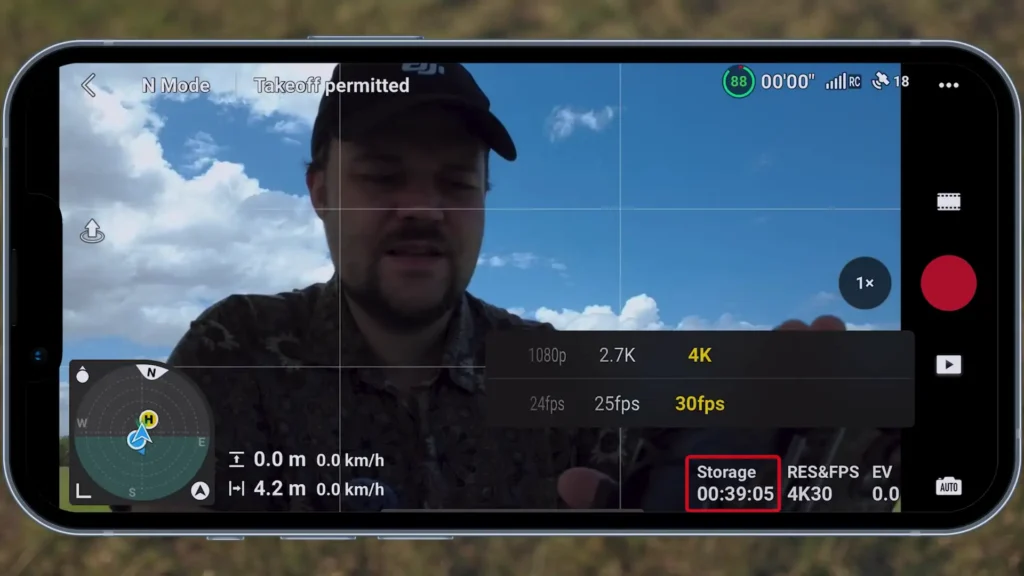
The storage indicator tells you how much recording time you have left. For example, if you’re recording at 1080p at 30 frames per second, you have 1 hour and 51 minutes of recording time. If I switch to 4K, you can see the recording time update in real time it immediately adjusts to show 39 minutes of recording time. This feature is really handy because it gives you a rough idea of how much time you have left for recording. While you can’t tap on the storage indicator, it provides useful information at a glance.
Pro Mode
Tip number 10 is located in the far bottom right corner. By default, it should be set to auto, but if I tap on it, it will switch to pro mode. This is where you can really get the most out of the camera and fine-tune the image.
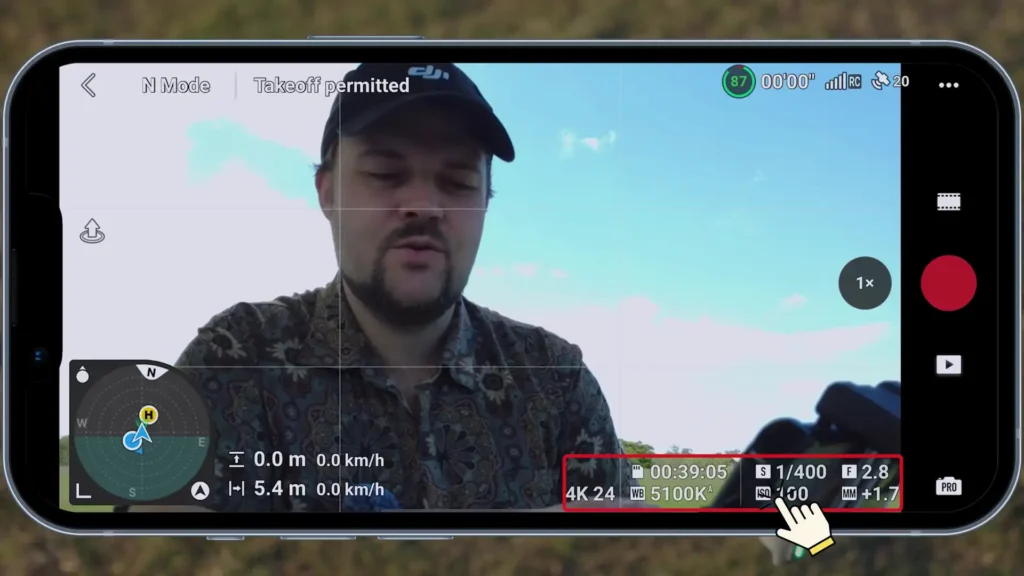
As you can see, the interface changes in the bottom right corner. I now have the ability to adjust ISO, shutter speed, and other settings, giving me full control over the camera’s performance. It’s really simple to adjust these settings on the fly, which is nice. For example, we can set the shutter to 500.
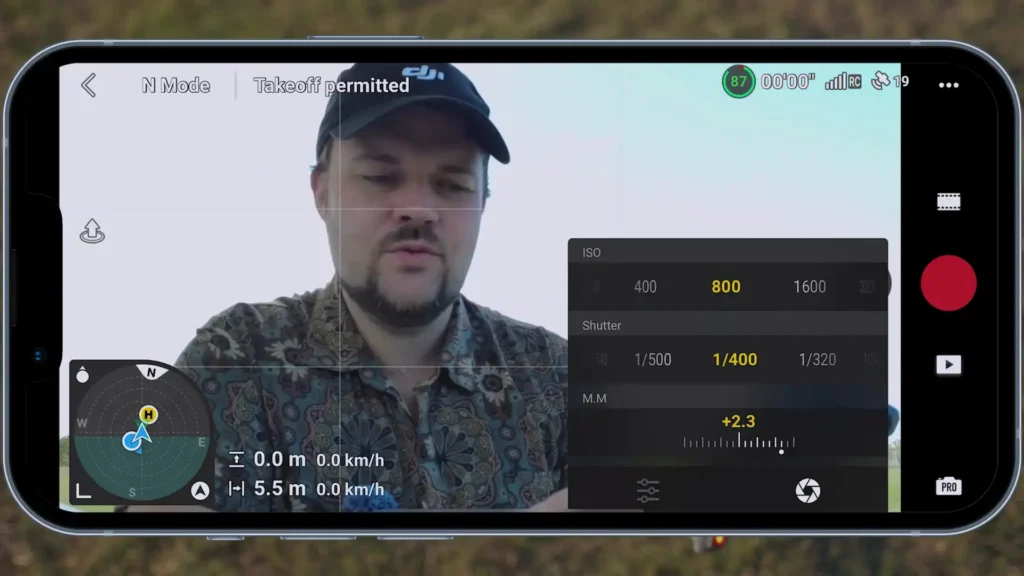
You can also turn off auto white balance and manually adjust the white balance based on your environment. Additionally, you can adjust the resolution and frame rate (frames per second).
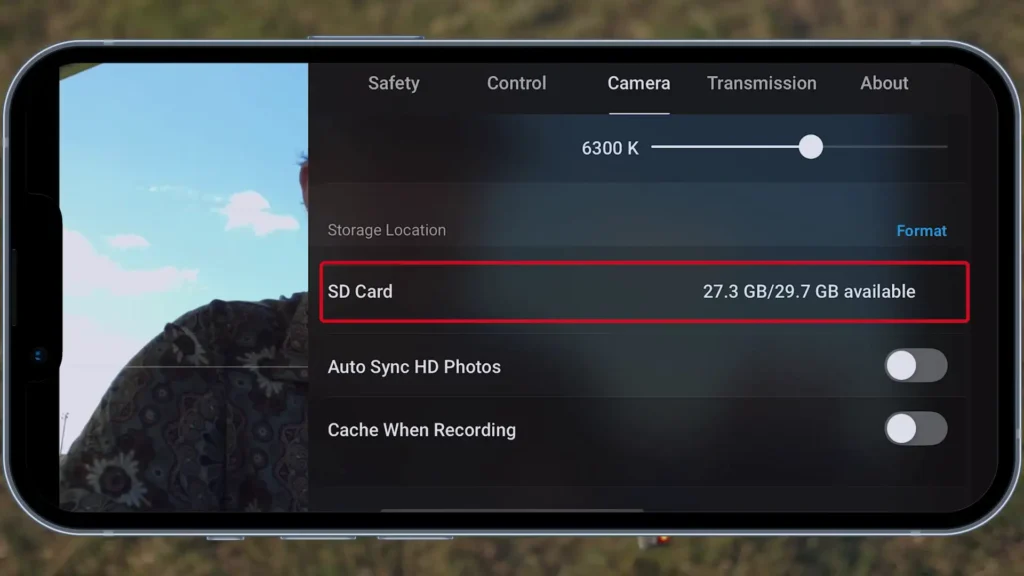
On top of that, you can see the status of the SD card and how much storage is available. Pro mode opens up more options for customization, making it well worth exploring if you want to get the most out of your camera
Digital Zoom
Tip number 11 is about digital zoom. This one is easy to access. You can see where it says ‘1x.’ If I tap on that, it will zoom in to 2x, since we’re in 4K. If I switch to 1080p, for example, I can zoom in to 4x, which is pretty cool.
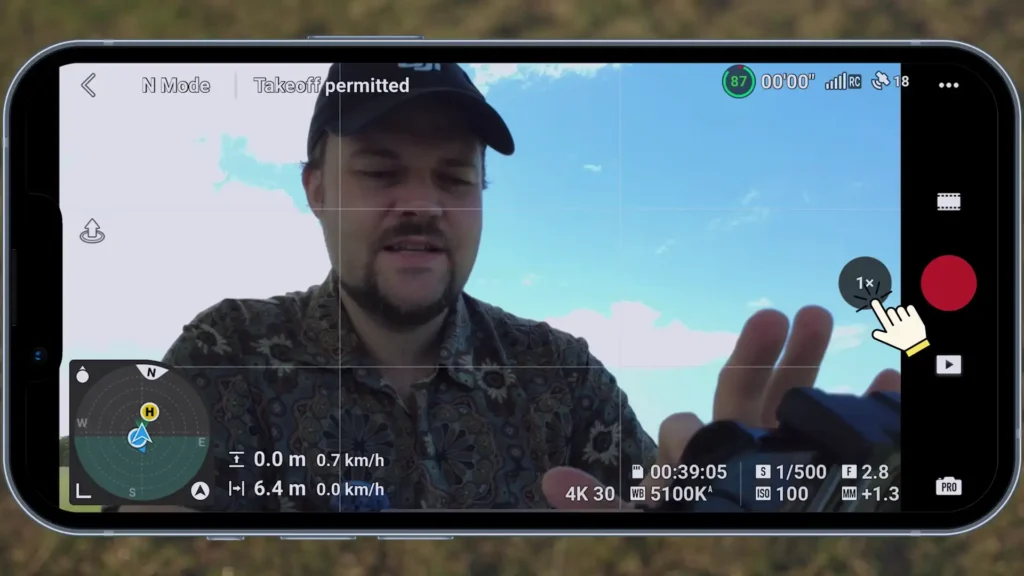
But the really interesting feature is that you can press and hold on the ‘1x’ and then drag your finger down to manually adjust the zoom level using a slider. This gives you a smoother zoom transition. It also tells you the equivalent focal lengths at 2x, it’s a 48mm equivalent, and at 4x, it’s a 96mm equivalent.
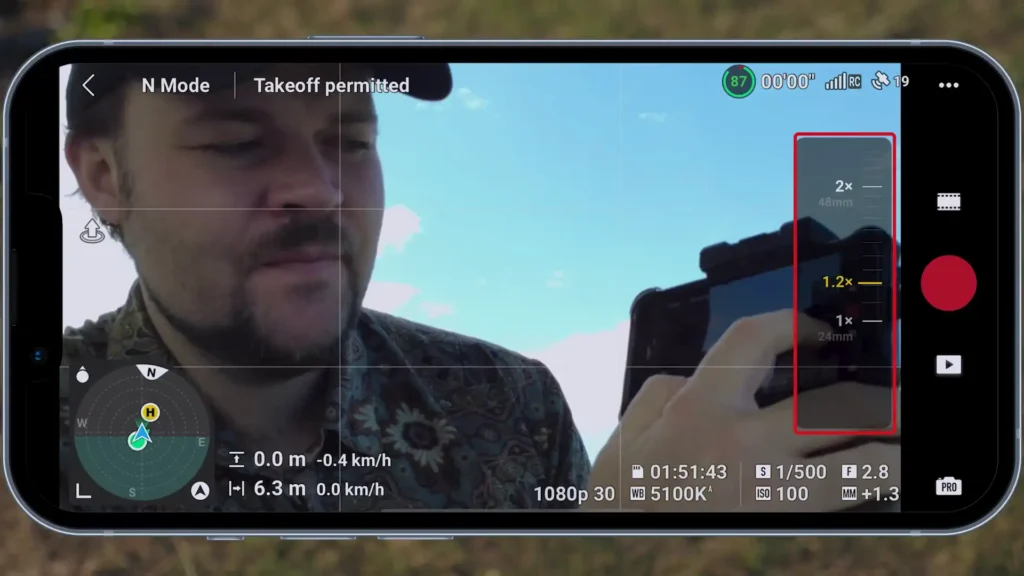
Since this is digital zoom, it’s not switching between different lenses, but you can still achieve a relatively smooth zoom, which is pretty handy to get used to. Alternatively, you can tap on the zoom options to switch between the different zoom points.
Keep in mind that 4K will be limited to a 2x zoom; you won’t be able to zoom to 4x in 4K. However, you can still press and hold and drag to adjust to the 48mm equivalent or the 2x zoom.
Quick Shots Modes
For tip number 12, I’m going to demonstrate the Quick Shot mode. To access it, tap just above the record button to bring up the options for Photo, Video, Quick Shots, and Pano. If I tap on ‘Quick Shot’, it won’t enable unless I’ve launched the drone.
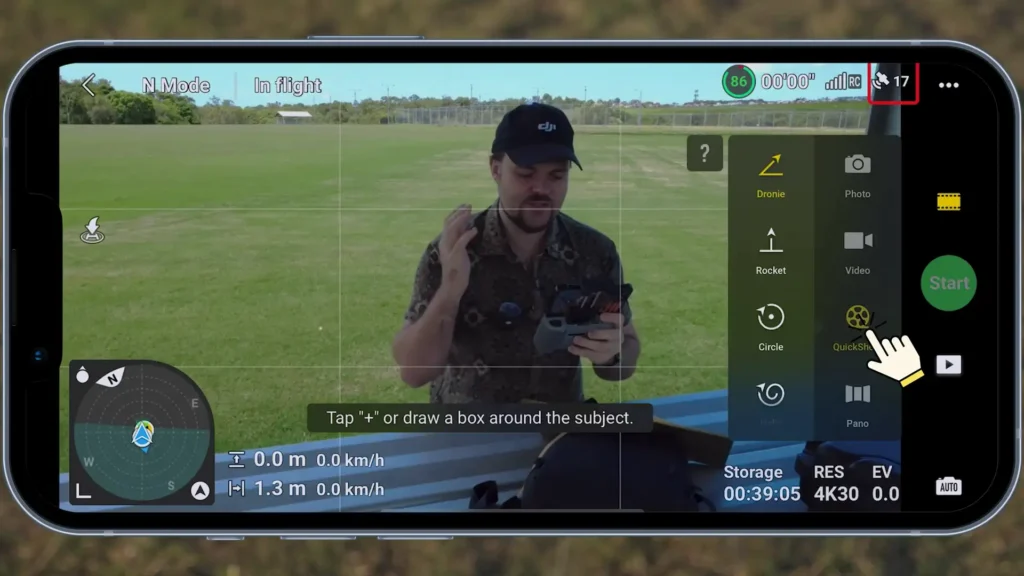
Now that the drone is airborne and I have enough satellites, I can go straight into Quick Shot mode. The interface will immediately display a little plus sign around me, indicating that I’m the focus point for tracking. This works like a tracking mode, where it follows the subject. I can tap on the plus sign to confirm my focus, and I can adjust the distance as needed.
There are several different Quick Shot options. If you tap the question mark, it will show you a video explaining each mode. Here are the options:
- Dronie: A zoom-out shot.
- Rocket: A vertical shot going straight up.
- Circle: As the name suggests, the drone will circle around the subject.
- Helix: A whip-around shot.
- Revealing Shot: This mode is great for dramatic reveals.
- Boomerang: A whip-around and reveal shot that then returns.
You can adjust the size of the focus area by dragging the plus sign. I can just tap on myself to make sure I’m the focus point. You can also press and hold to move the focus point around the screen just press and hold, then drag to position it.
Interactive Icons
Tip number 13 is about the interactive icons in the top right corner, not the three dots, but the icons just to the left of them. These are really handy for quick access to useful information.
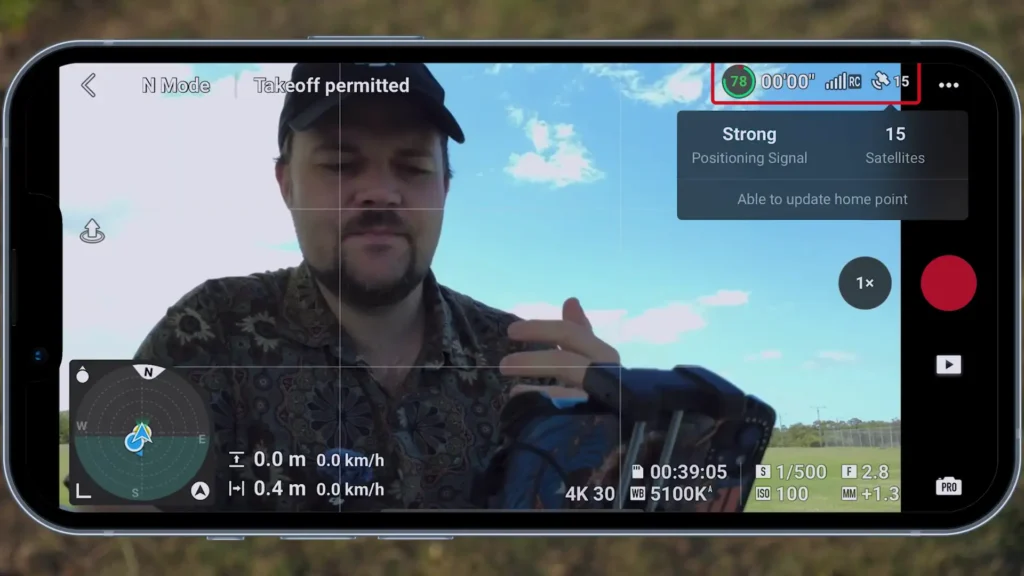
If I tap on ‘Satellites’, it will show me how many satellites are connected and whether the signal is strong or weak. This gives you a quick overview of the drone’s connectivity. Next, if I tap on ‘Remote’, it displays the signal strength from the remote controller. This is also very useful for quickly checking the strength of your connection.
You can also tap on the battery icon, but it doesn’t provide information until the drone is in the air. Let me launch the drone and adjust the camera angle. After a moment, it will populate with data.
Once airborne, tapping the battery icon shows the time remaining until a forced landing or battery depletion. Normally, it would show how long until ‘Return to Home,’ but since I’m flying away, the data is still adjusting. It’s especially helpful to know when the drone will automatically return home, when it will force a landing, and when the battery will be fully depleted.
Touchscreen Camera Controls (Bonus Tip)
Here’s a bonus tip for the flight menu: you can actually adjust the camera movement using the touchscreen on your phone. All you have to do is press and hold in the middle of the screen until you feel a vibration. A small circle will appear, and from there, you can drag your finger up or down to adjust the camera angle.
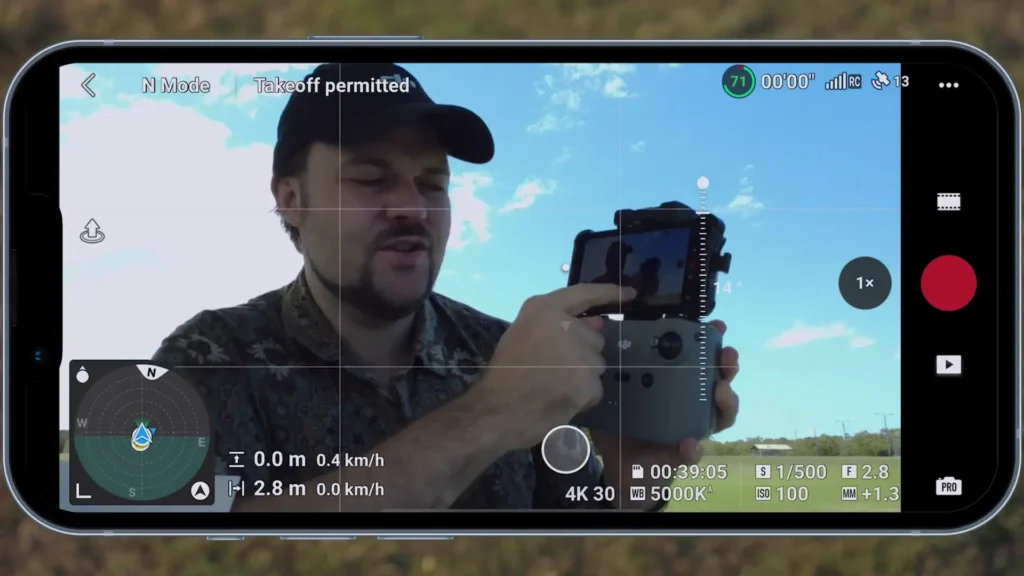
While you can’t move the camera left and right some drones allow this, but on the Mini 4K, it’s only up and down this feature still provides touchscreen controls for precise adjustments. I find myself using it sometimes, even though it’s a hidden feature and not immediately obvious.

Flight Protection
Now, for tip number 14, let’s talk about the flight protection area. You’ll see a subheading that says ‘Flight Protection,’ and there are a few options here. One of the key settings you can adjust is the maximum altitude. Legally, it needs to be set to 120 meters, but you can lower it if you prefer. For example, if you’re practicing and don’t want to fly too high, you can limit the altitude. This essentially creates a geofence for how high you want the drone to fly. This can be especially useful if you’re letting someone else fly it say, if you’re in an open field and you want to limit their flight height.
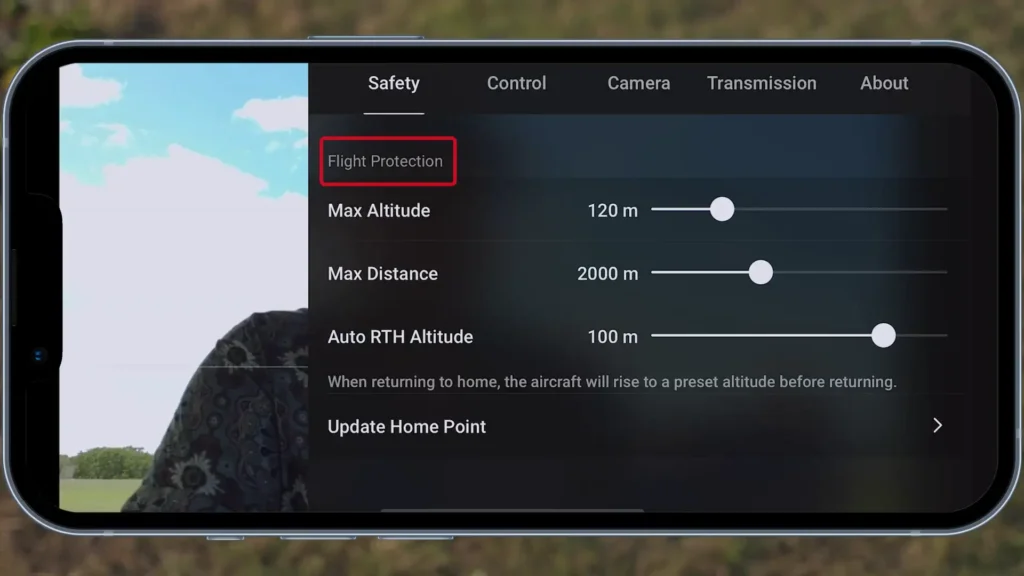
Another important setting is the auto return-to-home altitude. I suggest increasing this to at least 80 meters. By default, it was set to 60 meters, but I recommend 80 meters to ensure the drone avoids obstacles like trees or buildings when returning home. If you’re launching from a low area with trees around, the drone could run into issues if it starts returning to home at 60 meters, especially if there’s an incline.
I recommend setting the return-to-home altitude between 80 and 100 meters, with 80 meters being the maximum for the Mini 4K. You can also update the home point in this area as long as the drone is in flight. I just realized that the reason the auto return-to-home altitude was capped at 60 meters earlier was because of the maximum altitude setting. Now that I’ve increased the maximum altitude, I can set the return-to-home altitude up to 120 meters.
Calibrate Sensors
We’re moving on to tip number 15: how to calibrate the sensors. As you scroll down, you’ll see options for ‘Compass Normal’ and ‘IMU Normal’. If there are any errors, it will let you know. To calibrate, simply tap on ‘Calibrate’, and the app will guide you through the process.
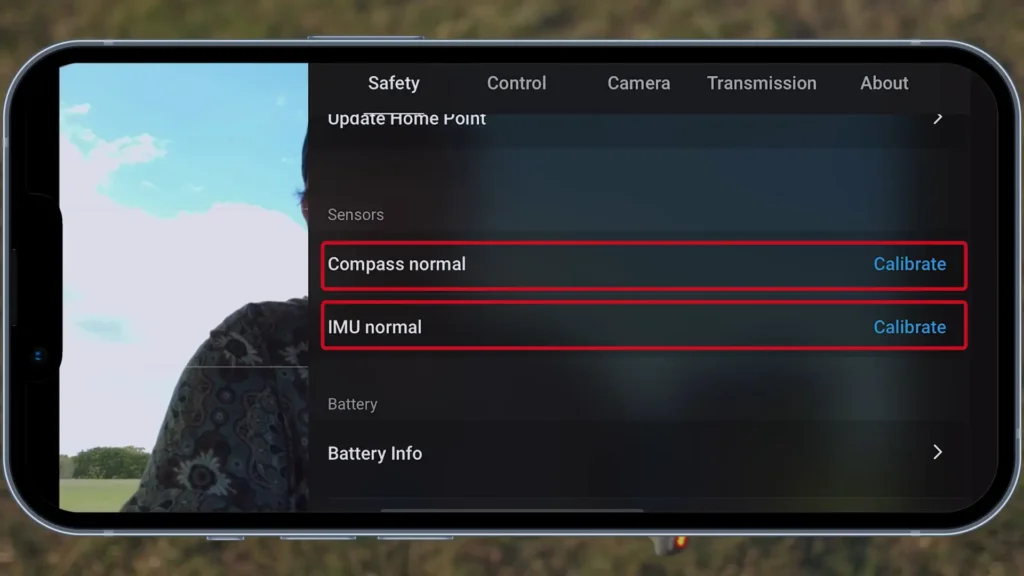
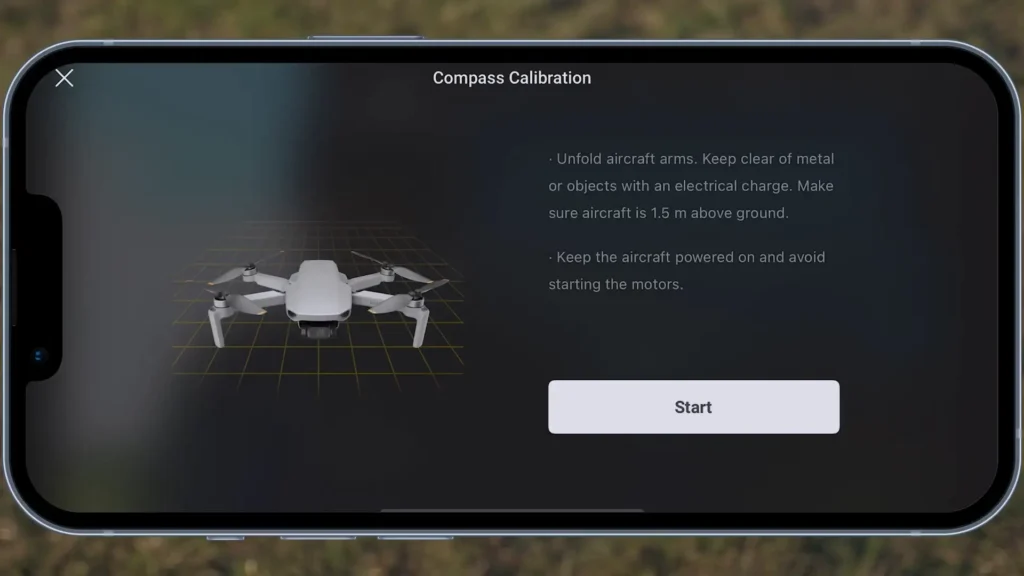
For compass calibration, tap on ‘Compass’, and for IMU calibration, tap on ‘IMU’. The app will display a diagram and a description, and then you can press ‘Start’. It’s a straightforward process.
You can also check here for any errors or issues with the sensors. Additionally, the pre-flight checklist (located where it says ‘Takeoff Permitted’) will also notify you if there are any sensor-related errors before you take off.
Battery Information
Tip number 16 is about battery information. If I tap on it, you’ll get a rough idea of the battery’s condition, including any potentially damaged cells. For example, if the voltage readings are equal like 4.04 volts for each cell everything is fine. However, if there’s a significant variation in the voltage between cells, it could indicate damage.
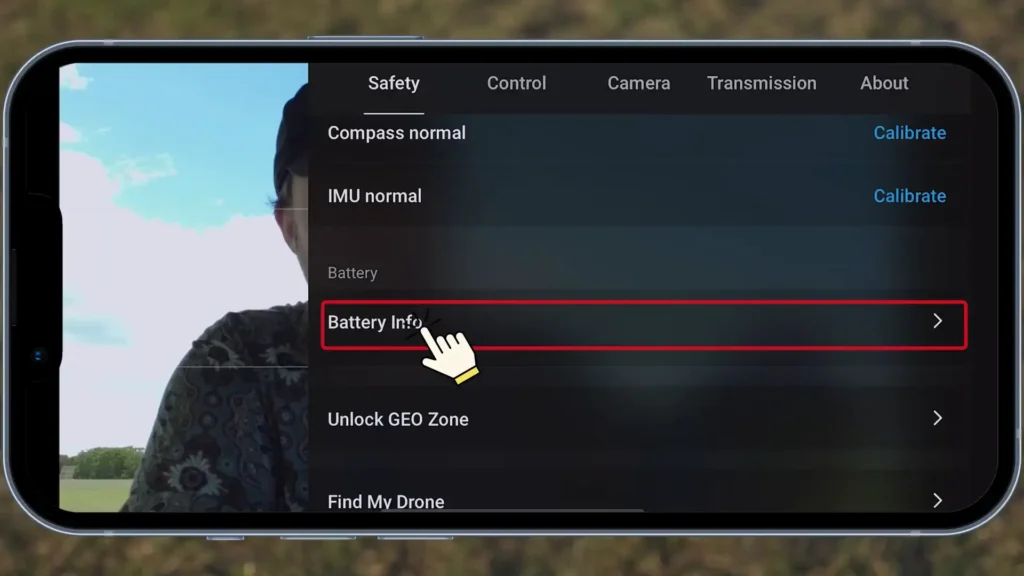
You can also view the battery voltage, temperature, and the number of cycles the battery has gone through. This information is really handy for checking the overall health of the battery at a glance. One key warning sign is the battery temperature. If it’s too high, it could be a red flag
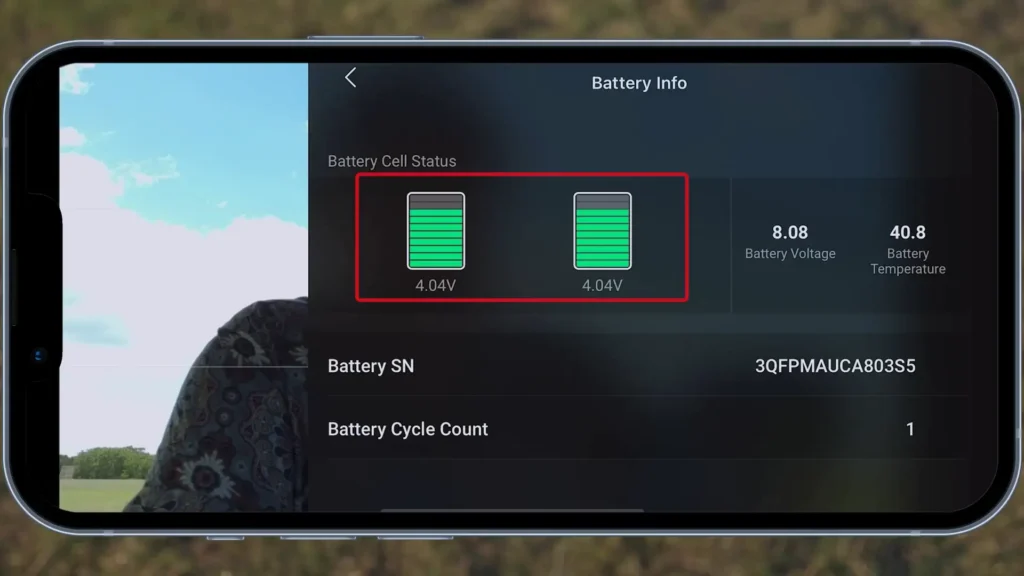
Additionally, if there’s a discrepancy in the cell readings like one cell showing a low yellow indicator while another shows a high green indicator it may suggest there’s an issue with the battery.
Payload Mode
Now, for tip number 17, let’s talk about payload mode. Scroll down to the bottom of the menu, where you’ll find the ‘Advanced Safety Settings’. There are a few options here, but the one we’re focusing on is payload mode.
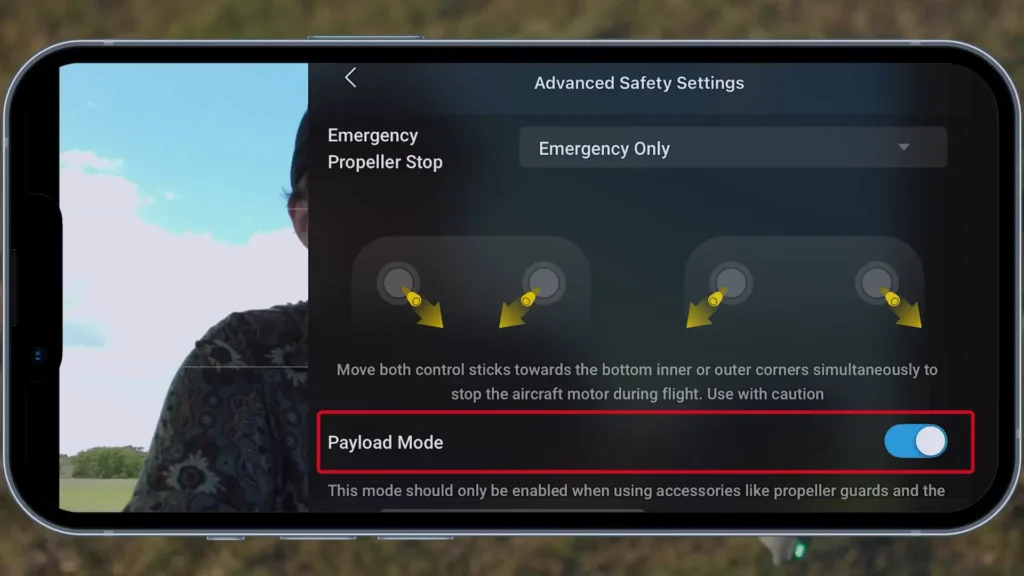
This mode should only be enabled when you’re using accessories like propeller guards. With the Mini 4K, you’re probably not going to be carrying anything heavy, but propeller guards are the most common accessory you’ll use. For example, if you’re flying in tight spaces, such as indoors or through narrow gaps, and you need extra protection for your propellers, enabling payload mode is essential.

Gain And Expo Tuning (Gimbal Customisation)
For tip number 18, let’s dive into the gain and Expo tuning. This is a great feature to help you fine-tune the feel of the drone, as it adjusts several important settings related to both the aircraft and the camera.
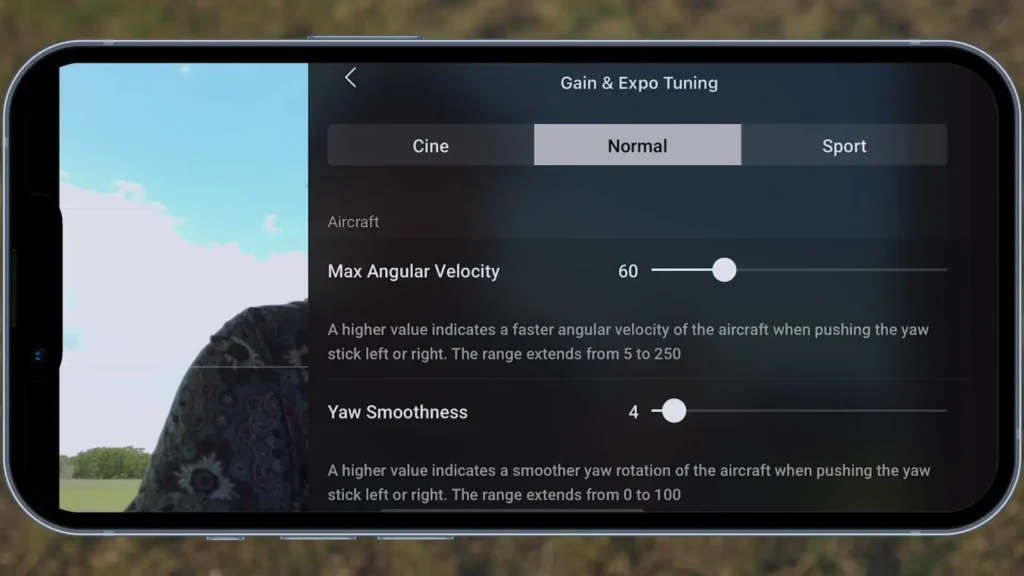
You can adjust the aircraft’s maximum angular velocity and smoothness, allowing you to control how the drone behaves. For example, you can fine-tune how it feels when you turn or fly forward. You’ll also be able to adjust the Expo settings for pitch, roll, yaw, and up/down movements, giving you greater control over the drone’s responsiveness.
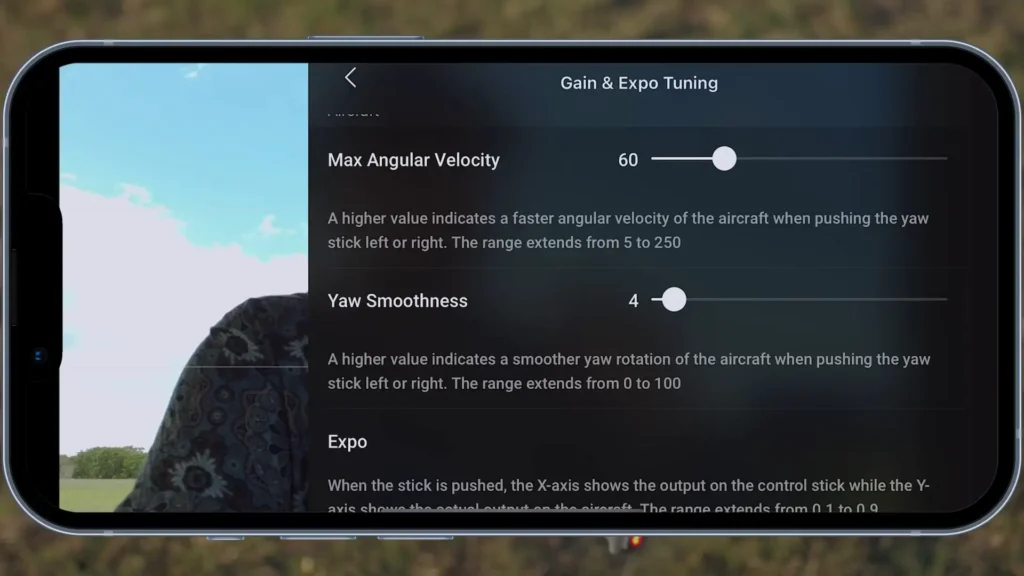
When it comes to the gimbal, this is where you can adjust the control speed and tilt smoothness. Right now, the default setting is where you control the camera’s up/down movement using the wheel, but you can change the speed. For example, when the control speed is maxed out, it can be too fast and jumpy.
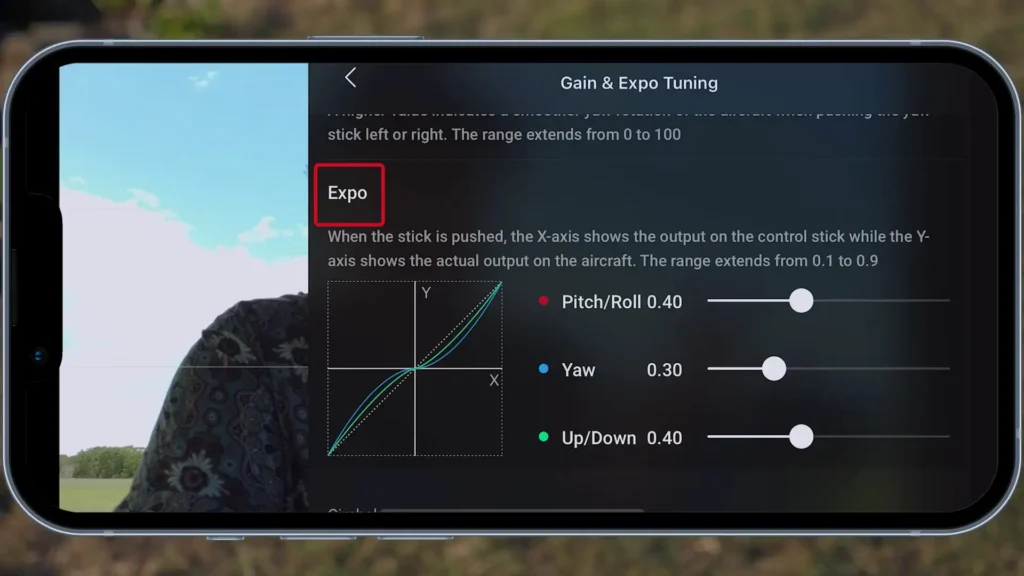
By adjusting the smoothness, you can make the camera movement more gradual. When you move the wheel and let go, the movement will slow down and smooth out, reducing any abrupt or jerky transitions. This makes the camera work more smoothly.
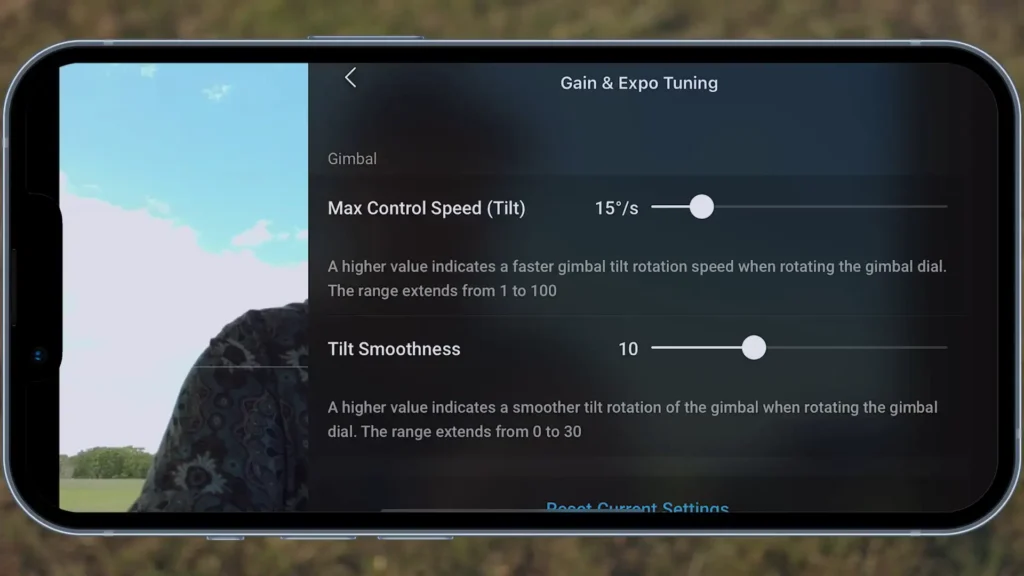
You can experiment with these settings to find what works best for you. If you ever want to reset everything to its default settings, there’s an option at the bottom to do that. You can also adjust the settings for three different modes: Cine, Normal, and Sports. On the controller, you can switch between these modes, and each mode has its own set of parameters that you can adjust individually.
FPV Mode
Tip number 19 is about FPV mode. By default, the drone is in follow mode, which provides smooth footage. Let’s launch the drone again. In follow mode, the movement is nice and smooth, when I fly left or right, the camera keeps everything cinematic. It’s steady, not jumpy or awkward.
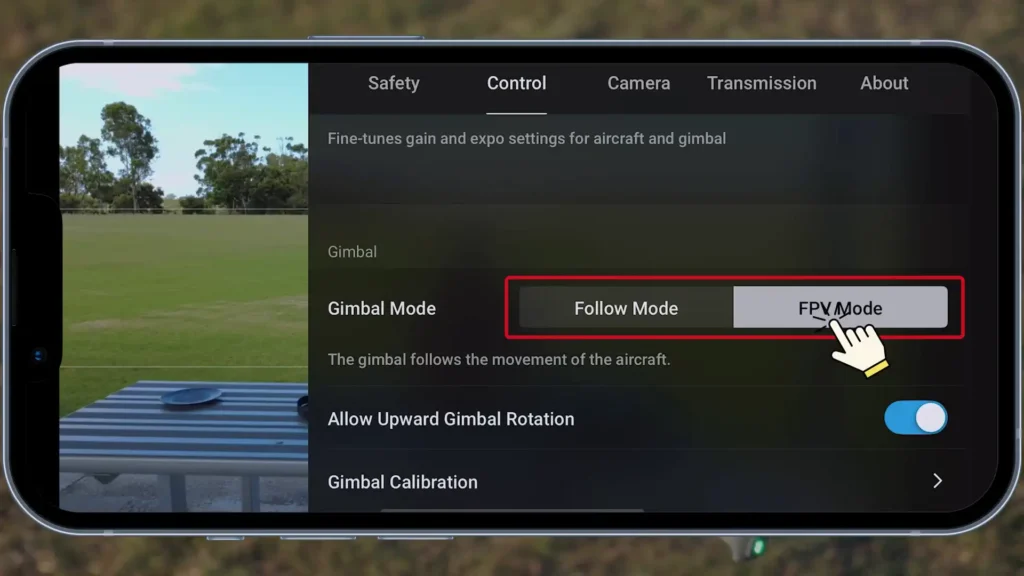
When I enable FPV mode, it changes the effect. As I fly, the camera behaves differently. For example, when I fly this way, the camera starts moving more like a first-person view (FPV). It doesn’t smooth out the camera movement like in follow mode, so you get a more dynamic, real-time perspective. As the drone moves, the camera moves along with it, creating a unique look. You can see this especially when I turn around this FPV perspective adds an exciting twist to the footage.
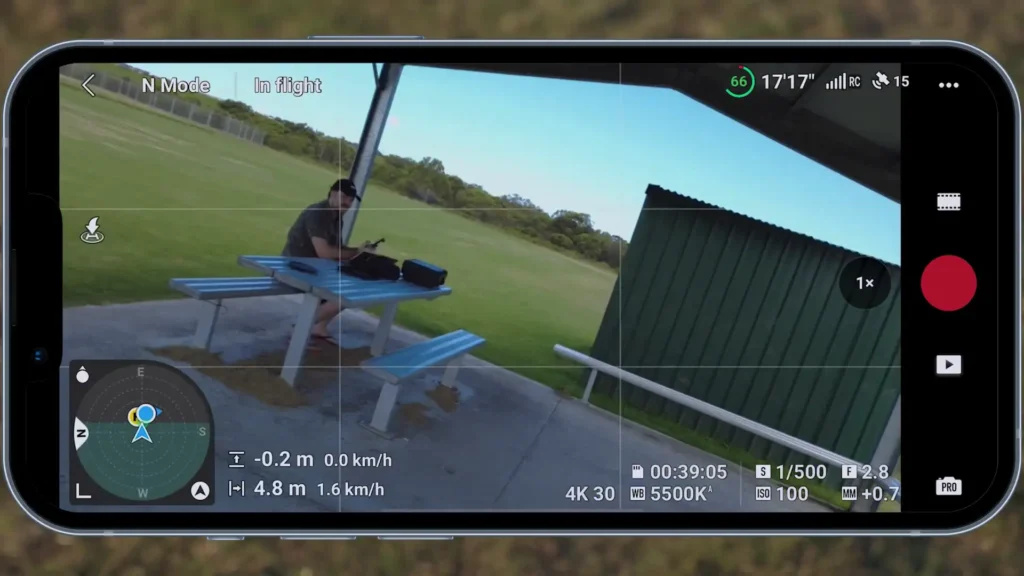
This can make your shots look more dynamic and give them a cool, unique feel, especially when flying faster. It’s fun to experiment with. When you’re ready, you can easily switch back to follow mode, and the footage will return to its smooth, cinematic style.
Upward Gimbal Rotation
Tip number 20 is about upward gimbal rotation. I’ve already enabled it to angle the camera for this video. If I disable it, the gimbal locks in place at a fixed position. For example, if I left it like this for the entire video, it would look awkward because it wouldn’t allow for any upward movement. With the upward rotation disabled, it stays locked at 0°, which is perfectly centered, but I can’t tilt it any higher.
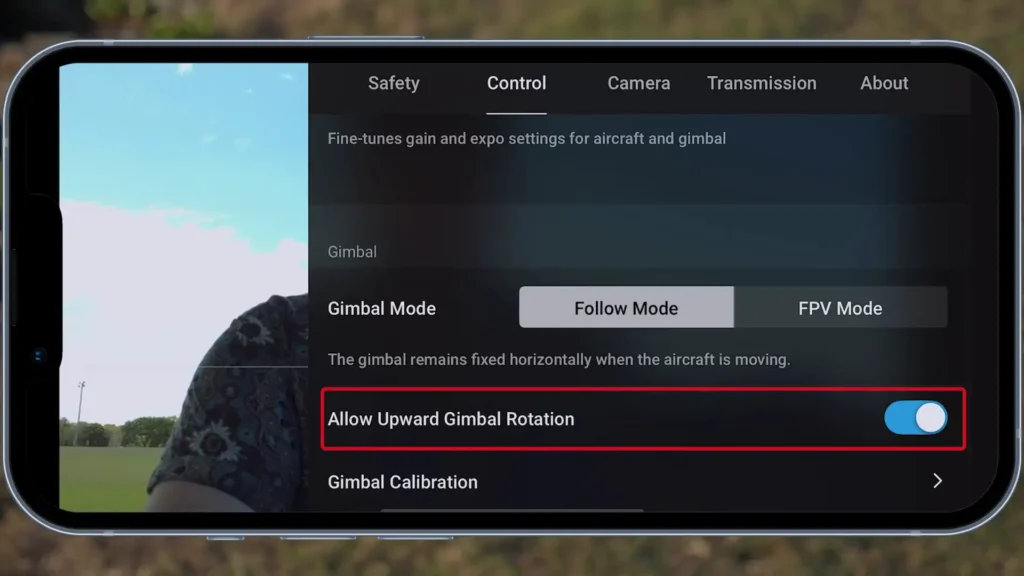
When I enable upward gimbal rotation, I can tilt the camera all the way up to 20°. That’s what I’ve done here to frame myself in the shot. I highly recommend enabling this feature, as it allows for some great low-angle shots where you can look slightly upward, giving your footage a unique perspective.
Gimbal Calibration
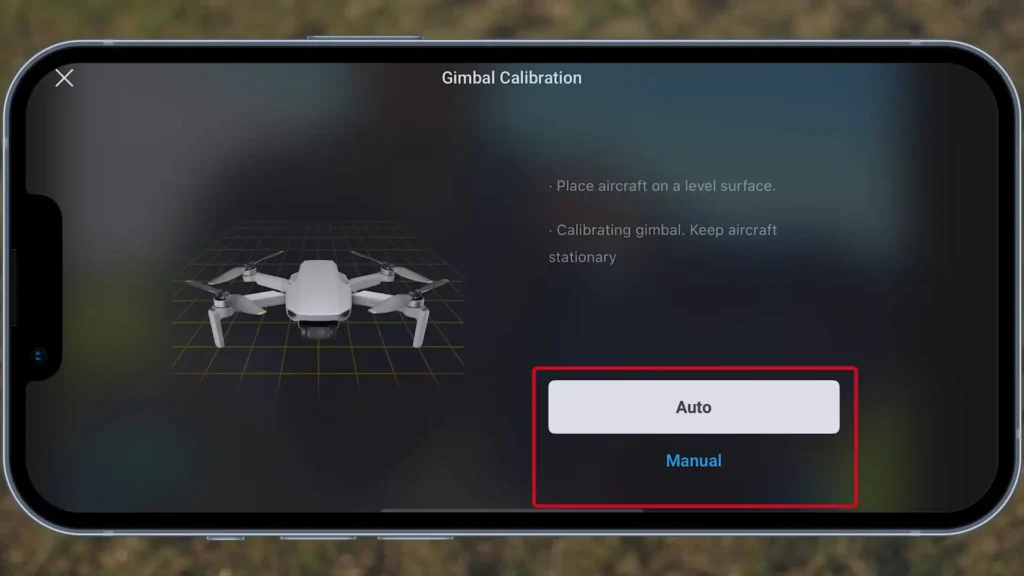
Tip number 21 is gimbal calibration. As you scroll down, you’ll find the option for gimbal calibration. You can also re-enter the gimbal settings, which will send it directly downward, facing down. Once done, it will return to the center position. If I click on gimbal calibration again, the process will repeat, and you can choose between Auto or Manual mode. It will guide you through the steps for calibrating the gimbal, which is useful if you encounter any issues with it.
Phone Charging (iOS Only)
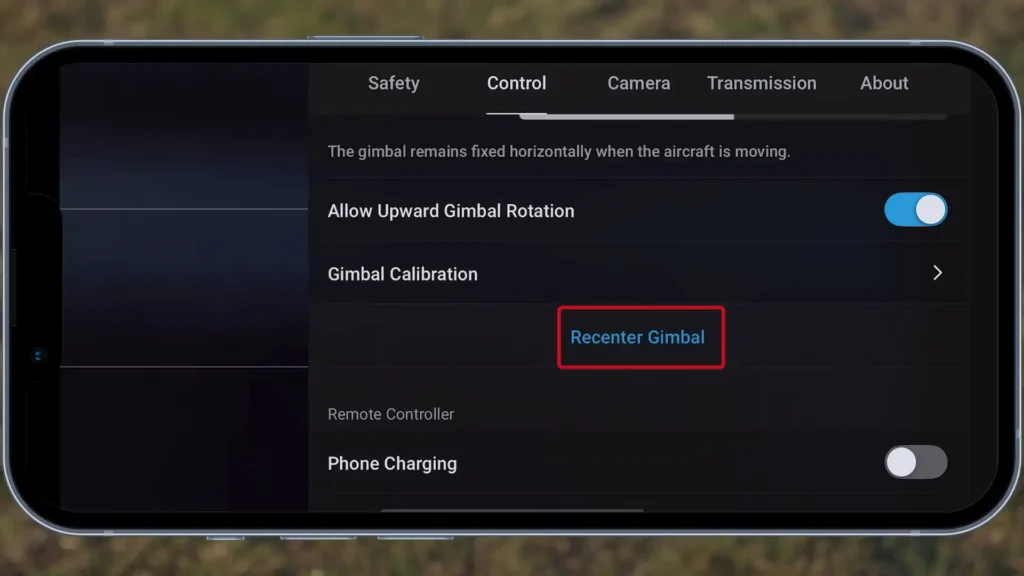
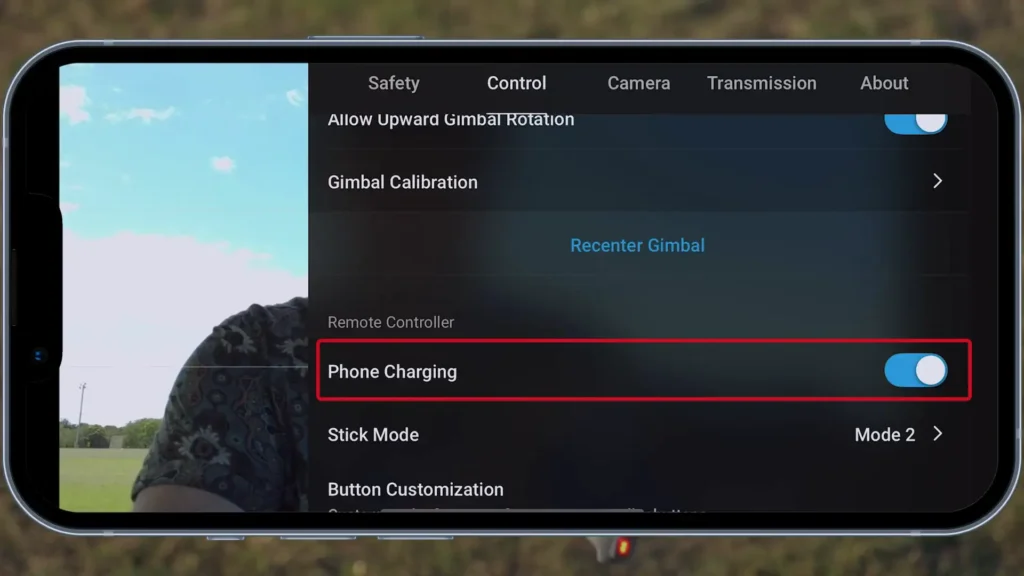
Tip number 22 seems to be exclusive to iPhone or iOS devices. It’s the option to enable phone charging. When I enable this feature, I feel the controller vibrate, and my phone starts charging from the controller’s battery. This is especially handy since your phone’s battery is used to power the video feed and control the drone. On Android devices, I believe phone charging is automatically enabled, but on iOS, you need to enable it manually for each flight. So, if I come back tomorrow, it won’t be enabled by default, and I’ll have to enable it again. You can easily disable it, causing your phone to stop charging, and then re-enable it to start charging again.
Button Customisation
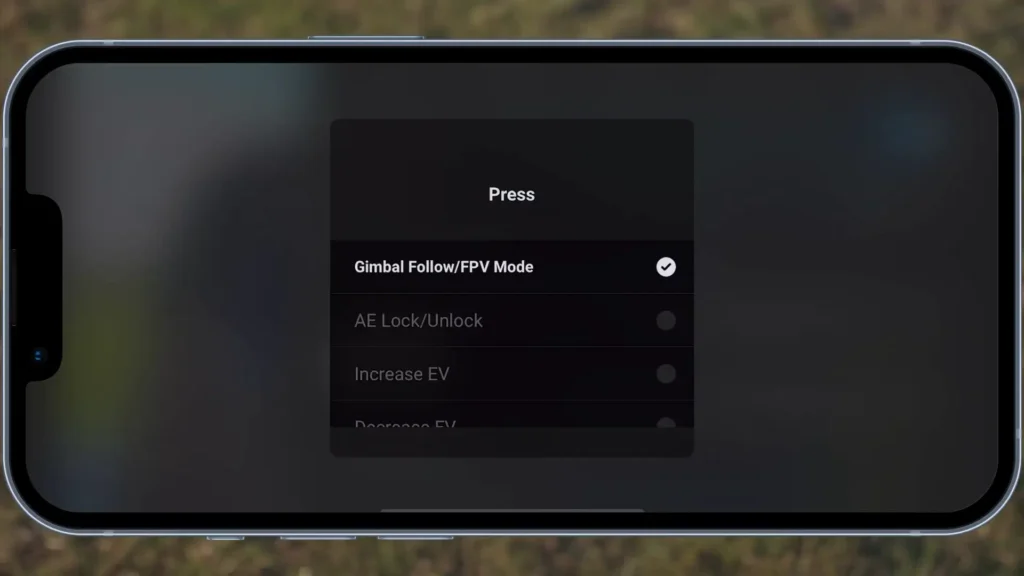
Tip number 23 is button customization, and it’s one of my favorite features. It allows you to adjust the FN button on the controller. By default, pressing it will re-enter the gimbal settings. Pressing it again will send the gimbal back up, and a double press will do the exact same thing, which is a bit redundant. However, if I tap on it, I can bring up more options. For example, I can adjust the gimbal mode. If I want it in FPV mode, I can press the button once, and it will switch to FPV mode. Press it again, and it will return to follow mode.
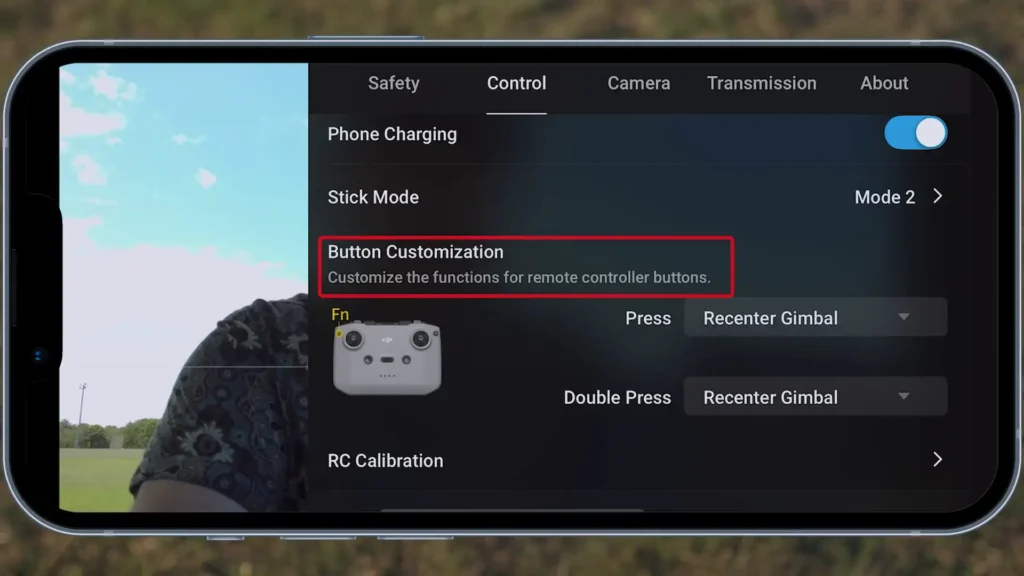
You can also adjust the EV, decrease it, or access the camera settings. If I press the FN button, it takes me straight to the camera settings, and I can easily navigate back from there. Typically, I go for “re-enter gimbal” for a single press, and for the double press, I have other options. For instance, I could set it to bring up the camera settings, so now, with this customization, pressing it once will re-center the gimbal, pressing it again will send the gimbal back up, and a double press will open the camera menu.
Re-Pair To Aircraft
Tip number 24 in the control menu is how to repair the aircraft. You can either tap the “Repair to Aircraft” button or press and hold the power button on your controller and then press and hold the power button on the drone. You’ll hear a distinctive beeping sound when the drone enters pairing mode. Alternatively, you can force the pairing by pressing “Repair.” Once it starts beeping, pick up the drone and press and hold the power button until you hear another unique beep, indicating it’s connecting. Once the connection is established, you’ll hear a final beep.
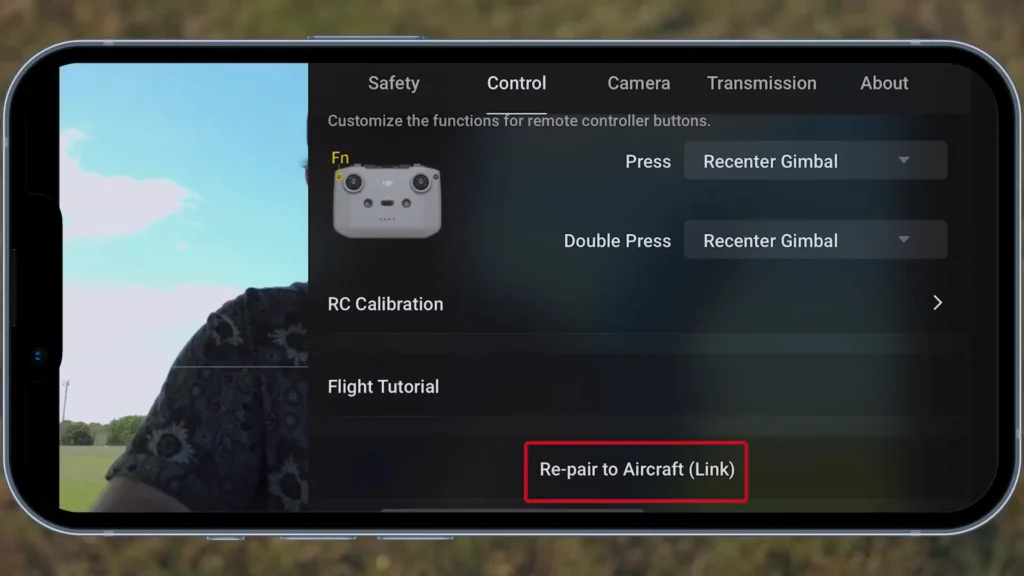
This is especially useful if you have multiple drones and need to switch between them. If you’re in the menu and there’s no G-Fly option, it will show something like “Connection Guide.” Tap on it, and then you can press into the camera view. Even without the camera feed, you can access the three dots, navigate to the control menu, and then scroll down to “Repair to Aircraft” to force the pairing process.

Histogram
Tip number 25 is the histogram. To enable it, simply tap on the histogram option, and it will appear on your screen. The histogram is draggable, so you can move it around to your preference. It provides a visual representation of your exposure, giving you a rough idea of whether your shot is overexposed or underexposed. For example, today’s weather is a bit strange overcast with periods of sunshine. You can see that the clouds in the background are overexposed, appearing too white.
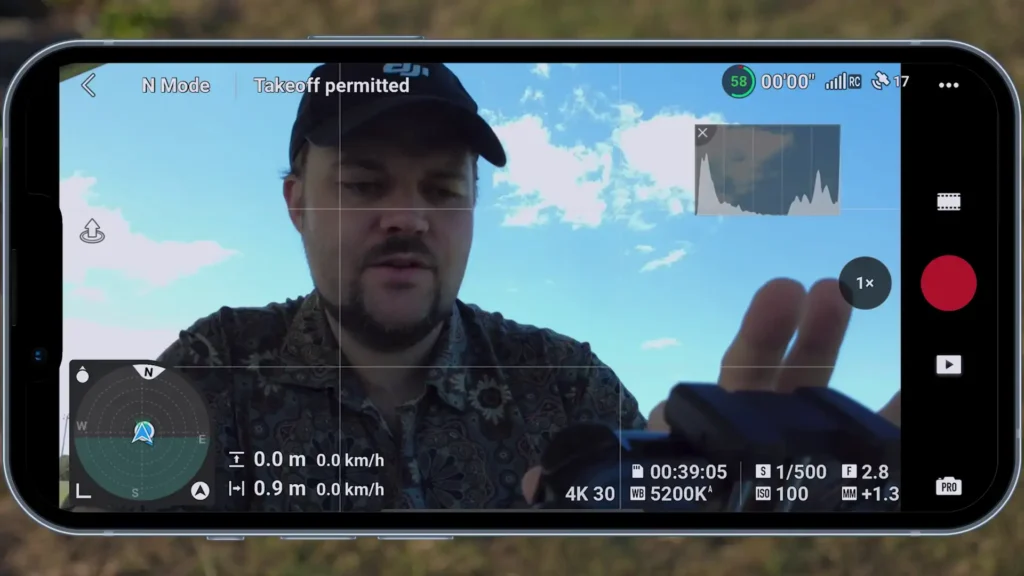
If I switch to auto mode, you can see how the drone adjusts the exposure. Right now, the sky looks great, but I’ve become quite dark in the shot. This is why I had to switch to pro mode to make myself the focal point of the image. The histogram helps you understand these adjustments, and if you enable it in auto mode, you’ll also see how DJI has programmed the system to balance the exposure. This feature is incredibly helpful for learning how to properly expose your shots.
Overexposure Warning
In extension of that, tip number 26 is the overexposure warning. When I tap on it and enable it, it will alert me if anything in the shot is overexposed. For instance, if I switch to auto mode, you’ll notice the system adjusts the exposure, but you can still see that the clouds are slightly overexposed, along with some elements in the background. However, in pro mode, since I am the focus of the shot, the background becomes completely overexposed, which is highlighted by the warning.
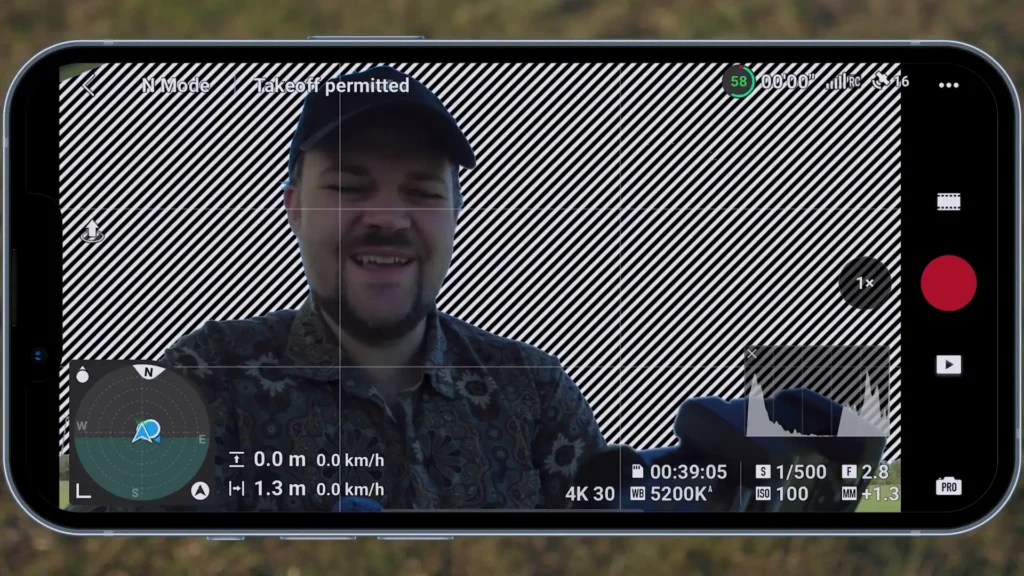
This feature is really useful when flying the drone, as it gives you a clear indication of how your shot is exposed and helps ensure your footage looks balanced.
Gridlines
Tip number 27 is the grid lines. I prefer to enable just the middle one, which is the rule of thirds. This grid helps you see what’s aligned with the rule of thirds in the frame. For example, you can angle the camera down to see how the grid helps with composition.
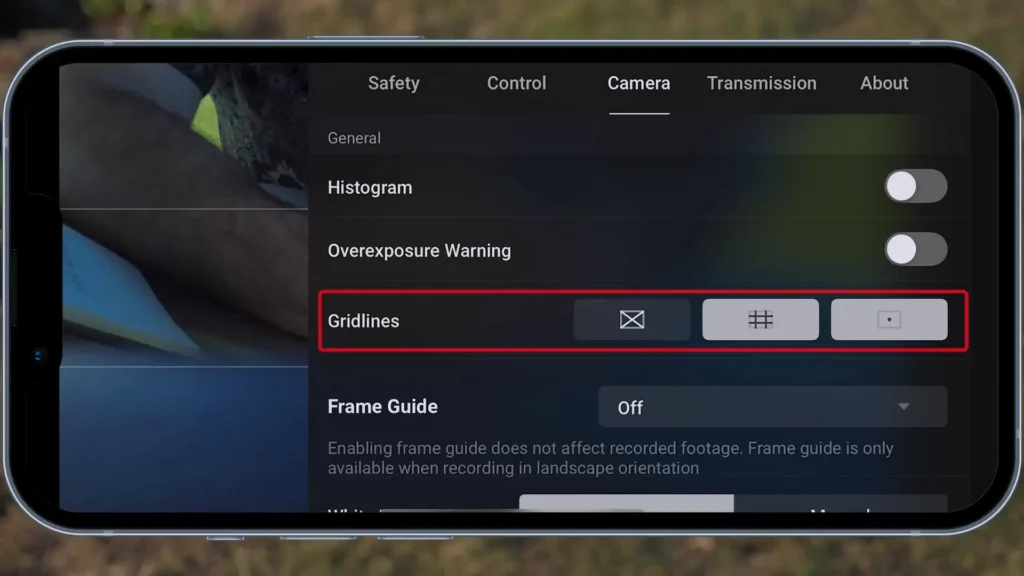
You can also enable all three grid lines, including the horizontal, vertical, and diagonal lines. The diagonal lines are particularly useful for FPV (First-Person View) flying, as well as for framing shots in a different way. Additionally, there’s an option to enable a center point.
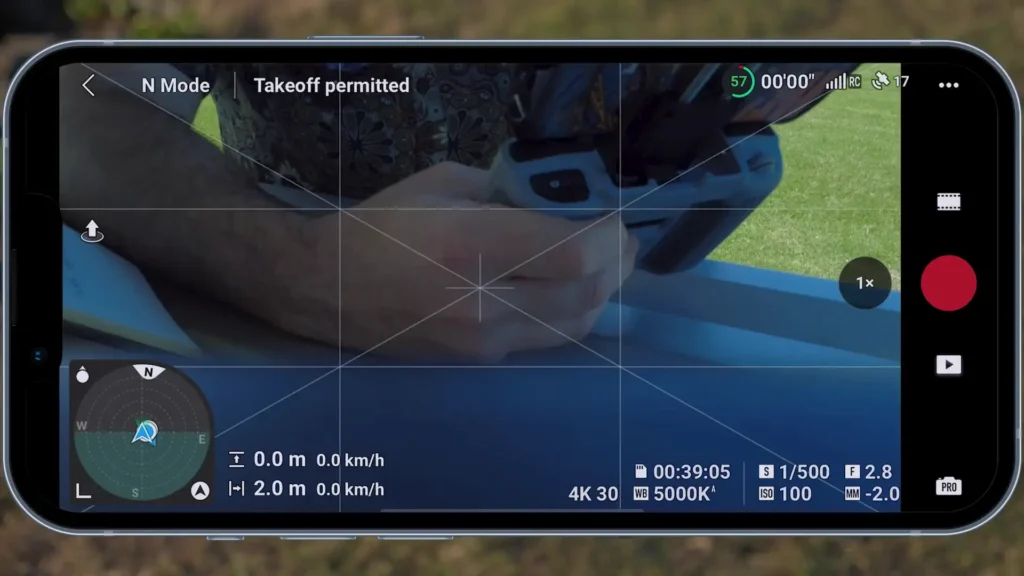
For me, however, I find that just the rule of thirds grid line works best. It keeps things simple and effective for framing the shot.
Frame Guide
Tip number 28 is the frame guide, located just below the grid lines. When you tap on it, it provides a variety of options. This is especially useful if you want to use your content for social media. For instance, the 9×6 option is for vertical formats, ideal for creating vertical content for social platforms. Although the entire shot is still recorded, the guide highlights the area that fits within the 9×6 frame.
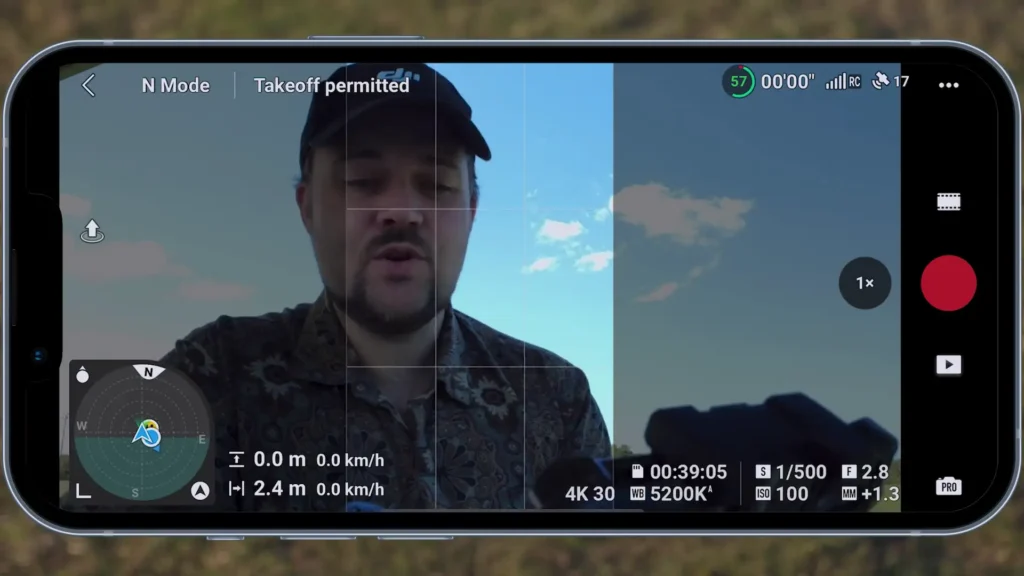
If you select the 9×16 option, it shows exactly where the center of that frame would be, giving you a clear guide for vertical video. There’s also the 1×1 option, which is a square format commonly used for social media posts.
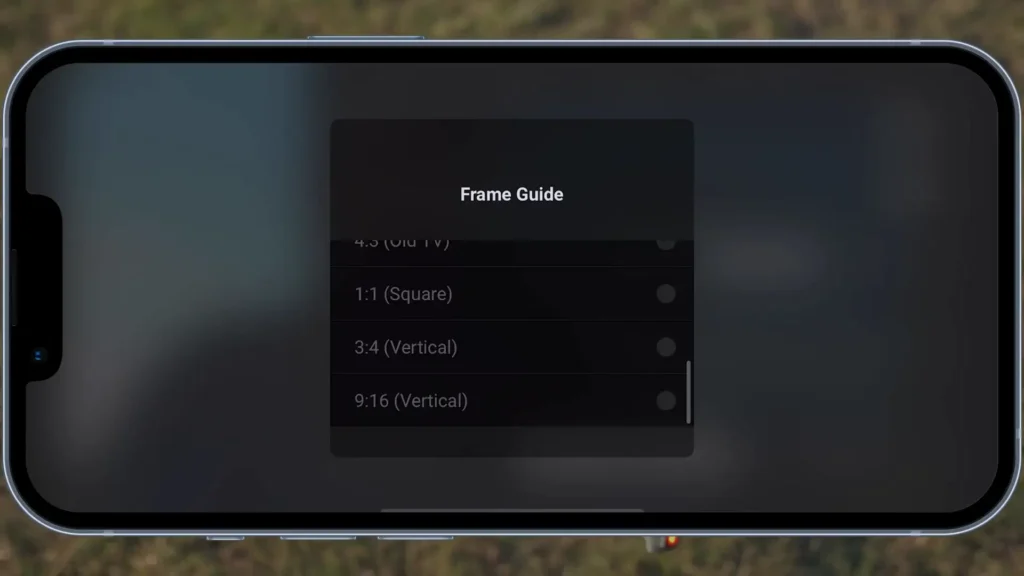
This feature is great for repurposing content. If you’re recording the full scene but want to ensure the main subject is framed for social media, selecting 9×16 will help you identify the center while still recording everything around it. The grayed-out areas on the sides indicate parts of the frame that won’t be visible in the final crop but are still recorded.
White Balance
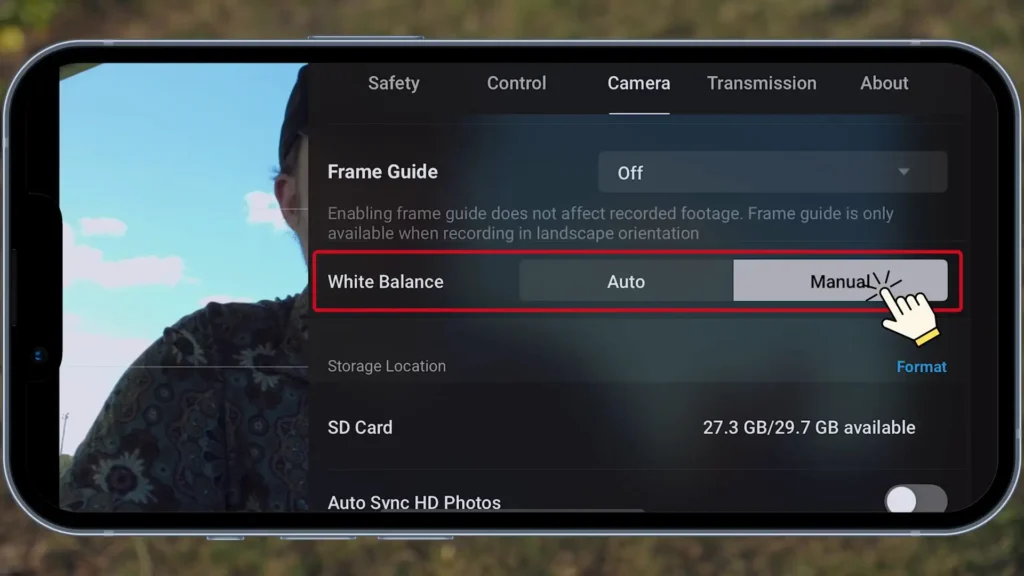
Tip number 29 is the white balance. By default, it is set to auto, but if I switch to manual, I can adjust everything manually. If I press and hold, it temporarily removes the menu to show me what the footage looks like without any adjustments. When I release it, the menu reappears.
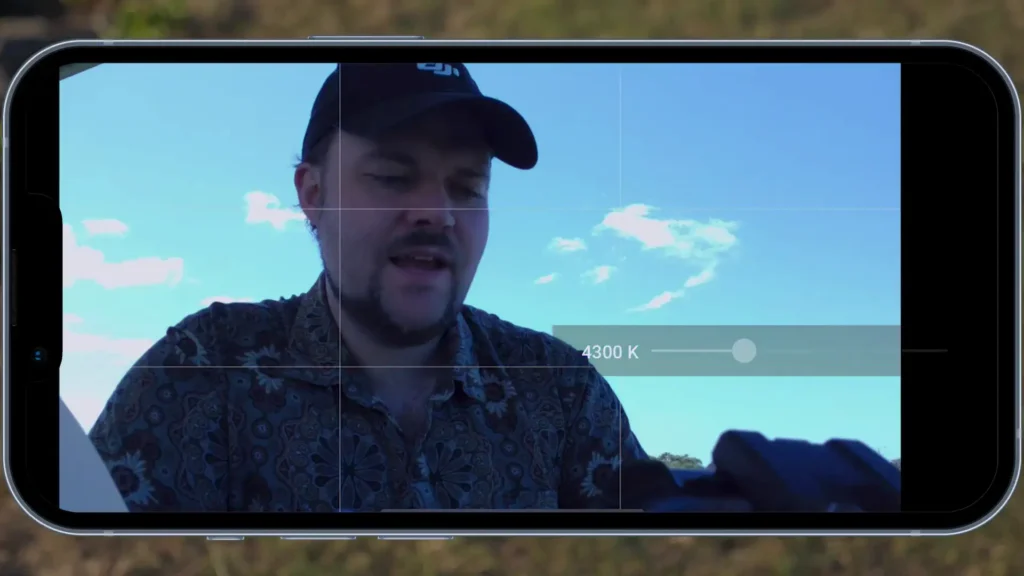
You can press and hold to drag the settings, which will hide the menu, allowing you to see the footage clearly. Once you release, the menu will reappear so you can fine-tune the settings. You can leave the white balance on auto, or switch to manual and adjust it slightly for a more customized look if you want to enhance the footage.
SD Card
tip number 30 is just a little bit further down and it is the SD card and how you can format so you can see just above the storage I can click on format and then I can format the storage for me I’ve got some footage on there I want to keep but that’s how you format it through the menu nice and simple

View Frequency
Tip number 31 is how to view the frequency and channel. As you scroll down, you’ll see the various channels. By default, it’s set to Auto, so you can’t make adjustments in this mode, but you can still view the information.
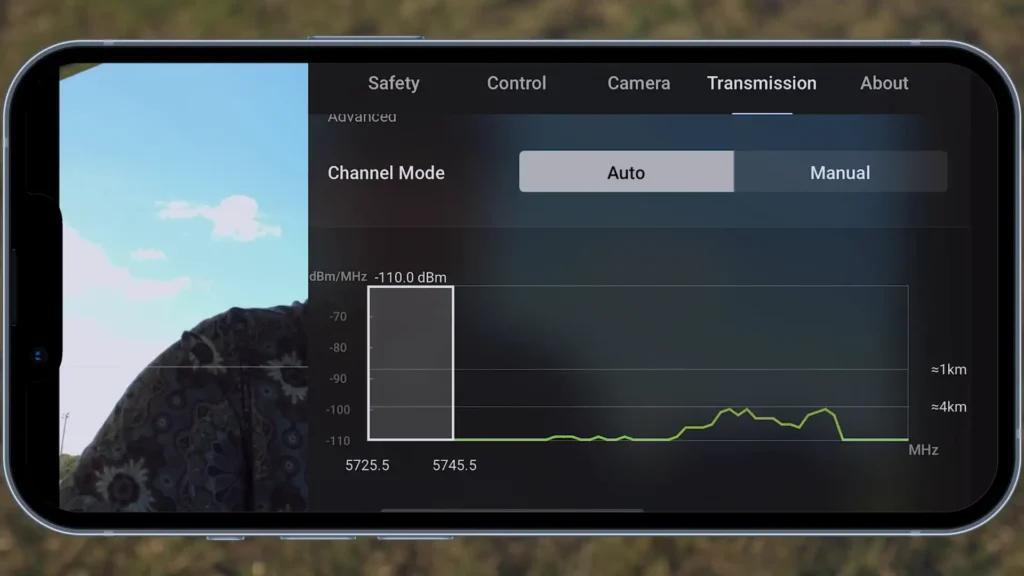
To access this, the drone must be grounded it cannot be in flight. This view will show you the interference and the channels in the area. If you’re in an environment with a lot of interference, you’ll notice more spikes further down the graph.
This feature is really useful for understanding the signal environment and assessing potential issues with interference.
Change Frequency
Tip number 32 is how to change the frequency manually. By clicking on “Manual”, you’ll be given the option to choose between 2.4 GHz and 5.8 GHz.
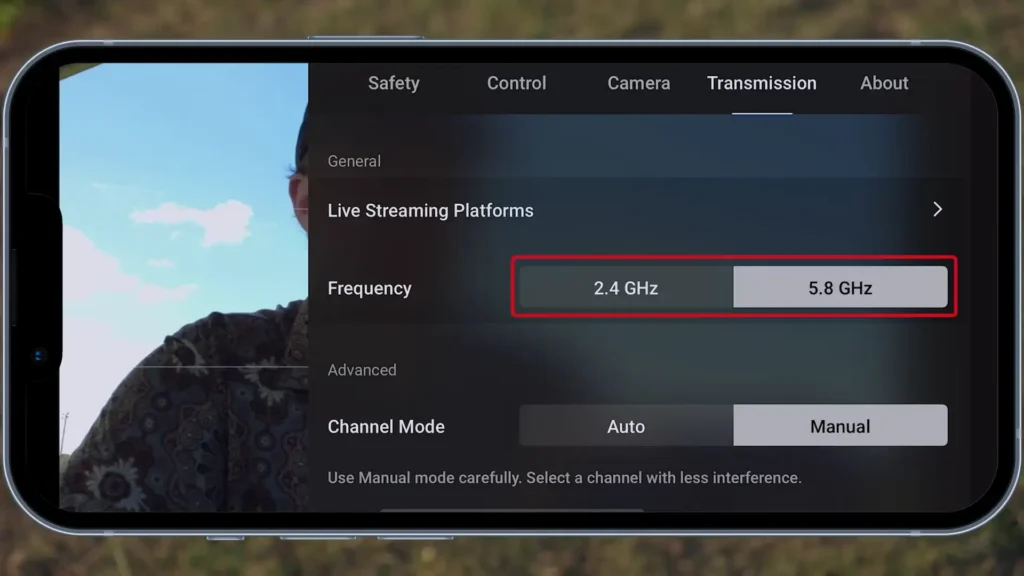
When you pull it down, you can see the interference levels at 5.8 GHz. If you switch to 2.4 GHz, you’ll notice there’s more interference at that frequency. However, you can manually adjust the channel by pressing and holding the rectangle and dragging it to a less cluttered one.
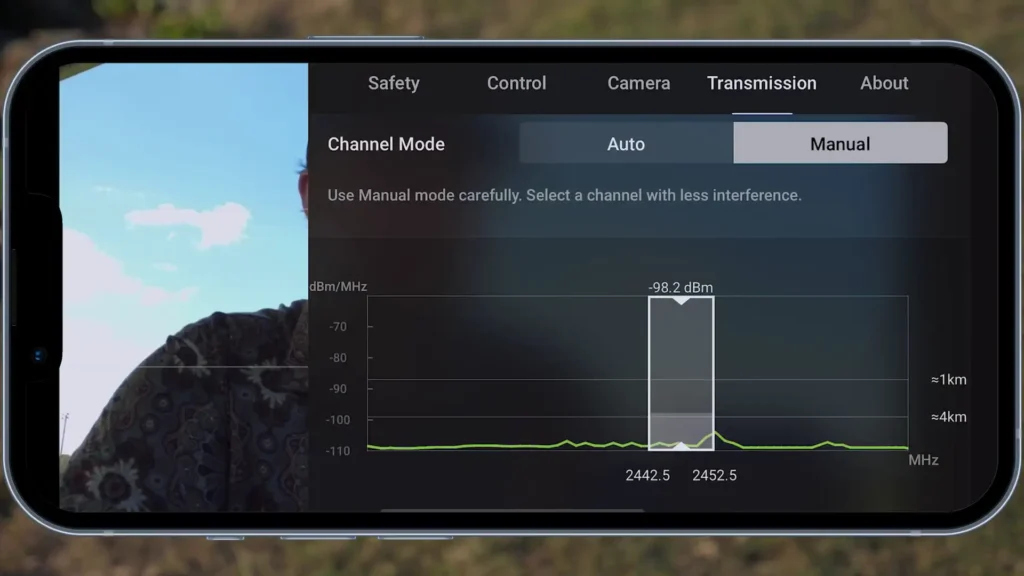
You can do the same with 5.8 GHz by dragging the selection across to find a better channel. This feature is especially useful if you’re experiencing interference and other options aren’t working. However, in most cases, leaving it on Auto and using Dual Band will be the best choice.

Check Updates Manually
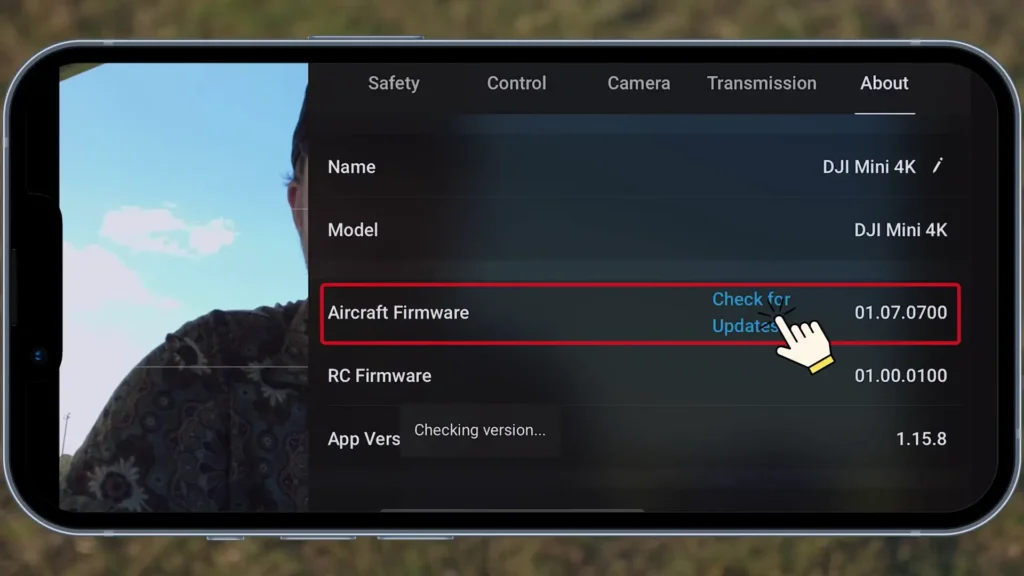
Tip number 33 is how to manually check for updates. You can see the aircraft firmware listed right away. By pressing the blue text, it will check for updates, and the system will confirm if the firmware is up to date. If there is an update available, a prompt will appear notifying you.
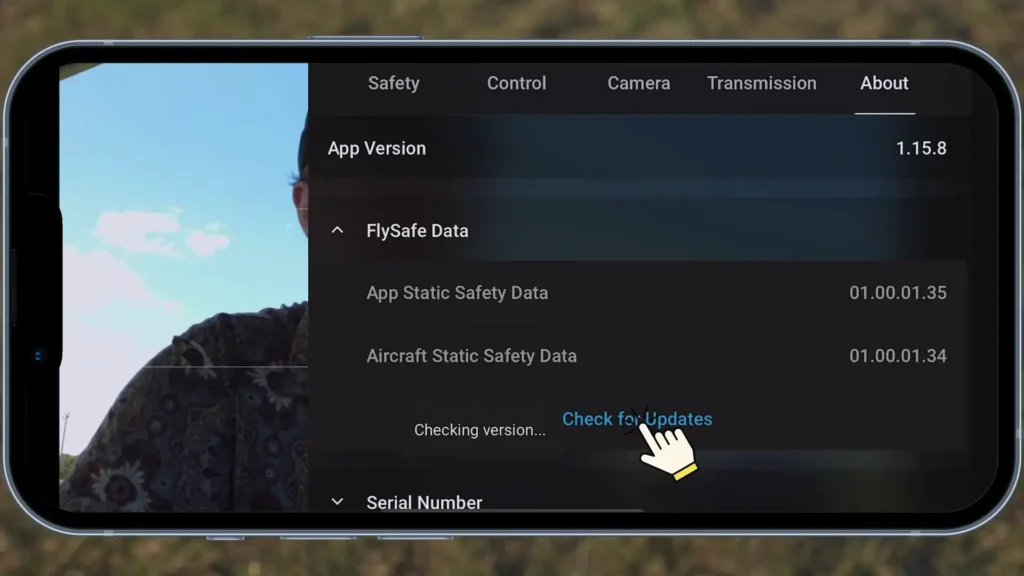
Next, you can scroll down to the FlySafe data section. By doing the same thing, you can check for updates related to FlySafe data. The system will check the version and let you know whether it’s up to date or if there’s a new update ready to be installed. Once everything is checked, it will confirm if the firmware and FlySafe data are up to date.
Reset All Settings/Clear Data
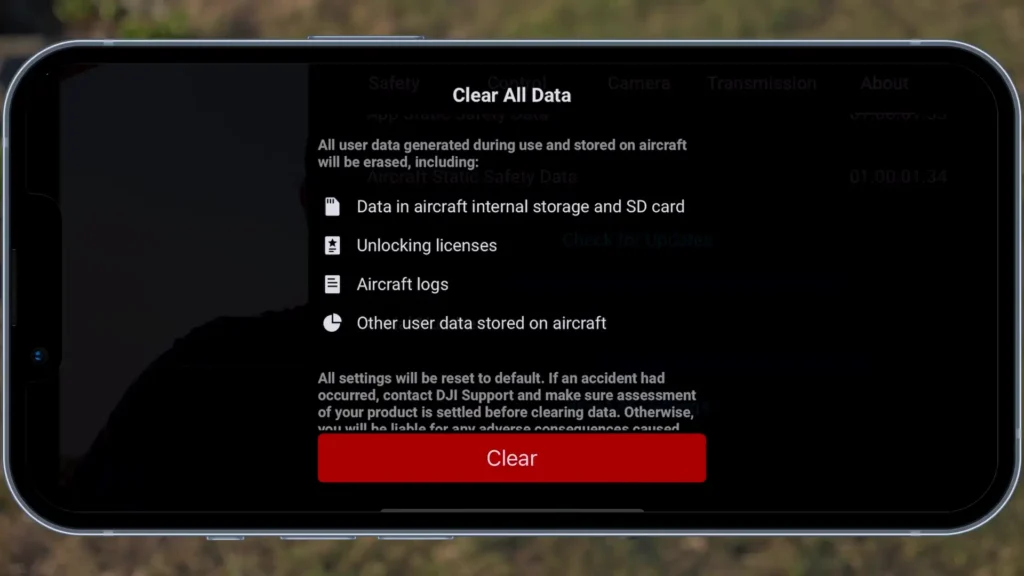
Tip number 34, the final tip for the DJI Mini 4K, offers a few options at the bottom. One option is to reset all settings, which will restore everything to factory defaults. If you’ve been experimenting with various settings throughout this video and can’t remember the original configuration, you can simply press this option to return everything to the default settings.
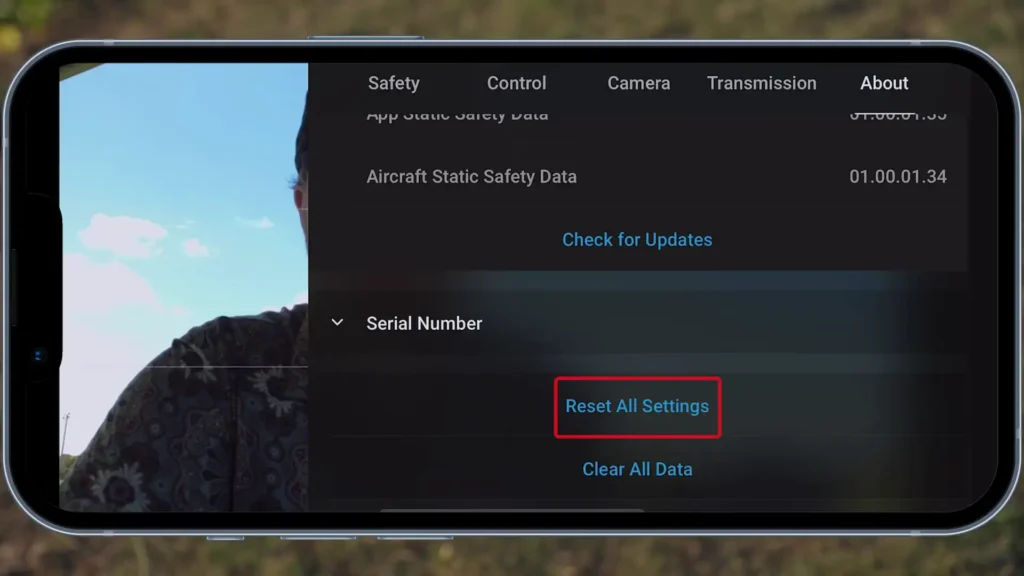
Another option is “Clear Data”, which will erase all data. This is especially useful if you plan to sell the drone or want to clear everything for other reasons. Both of these settings are easy to access and use.
Quick Jump To Top
Read More : Potensic Atom 2 Review


