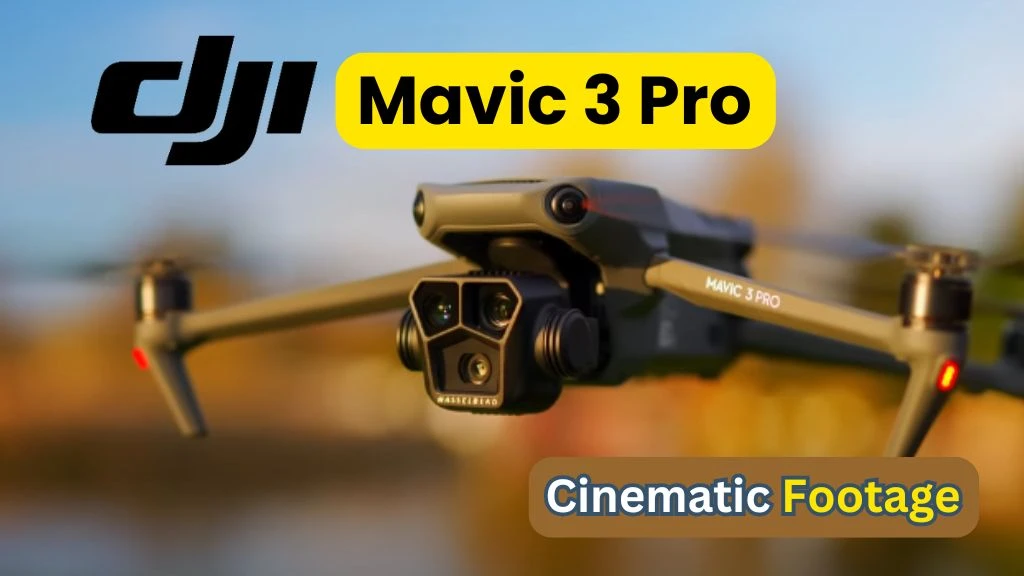
The DJI Mavic 3 Pro is a professional drone designed for drone enthusiasts. To capture cinematic footage with the Mavic 3 Pro, the following settings are crucial for achieving high-quality results and enhancing your experience as a drone operator.
Table of Contents
1. Camera Settings
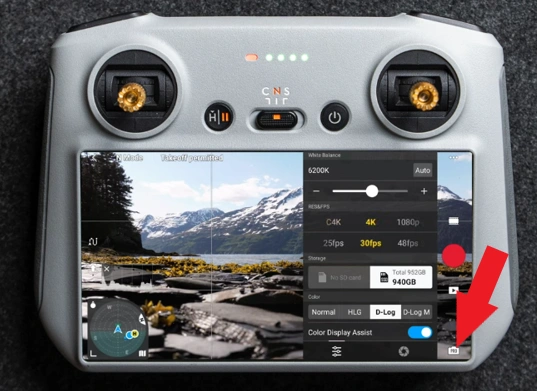
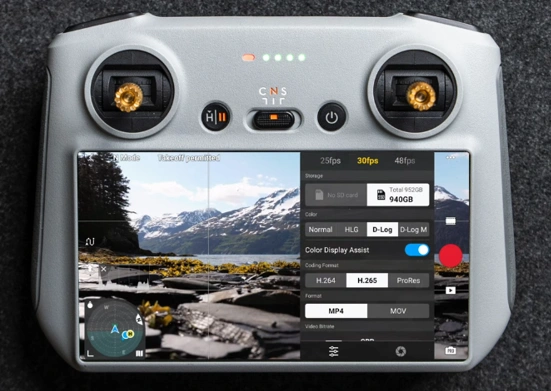
You can tap anywhere to access settings like white balance, resolution, frame rate, and color profiles. For white balance, Auto does a good job, but lock it to prevent changes as you move. Resolutions like 4K and Cinema 4K are available, but 4K 120fps is limited to slow-motion modes.
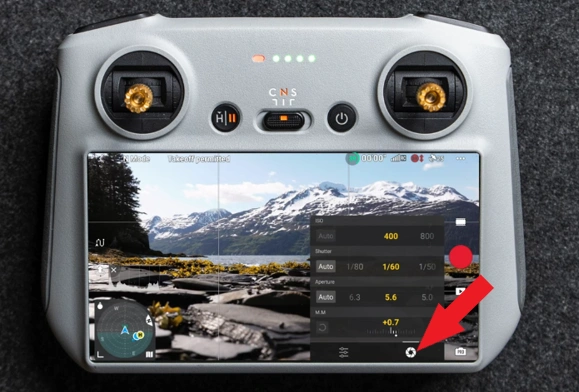
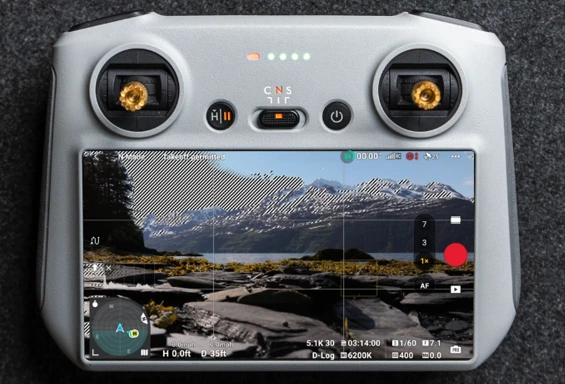
The shutter or aperture icon to adjust ISO, shutter speed, and aperture. Keep the shutter speed at twice your frame rate for optimal results. You can set the aperture manually or use auto mode to let the drone decide.
2. RTH Options
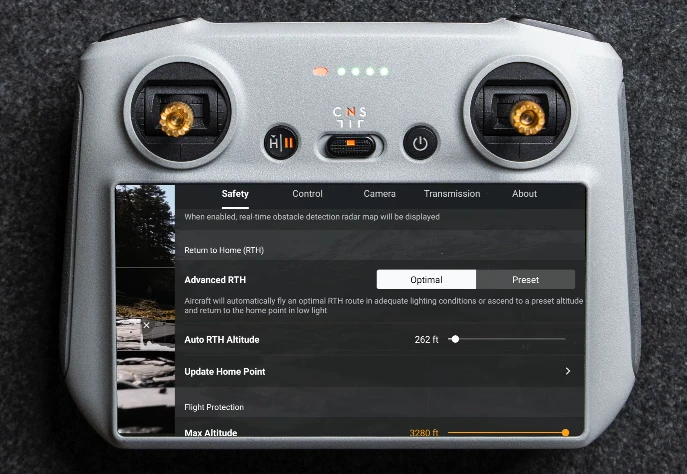
You can preset your drone to return to the home point in a straight path or find an optimal route if obstacles are present. Set the return-to-home (RTH) altitude and update the home point regularly, especially when in motion, such as in a vehicle or on a boat.
If using a remote without GPS, hotspot your phone for location updates. Regularly updating the home point ensures accurate battery calculations and prevents the drone from flying back to the original takeoff point.
Go to Setting Menu > Safety > RTH
3. AirSense Options
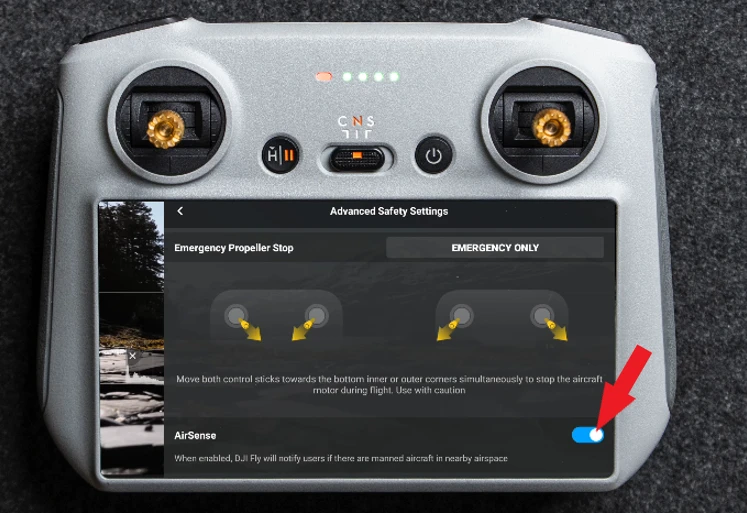
You can turn AirSense on and off. AirSense works by detecting ADS-B signals transmitted by manned aircraft. It alerts you if a manned aircraft is in the area, showing how close it is and prompting you to move out of the way.
The cool feature of AirSense is that when it’s enabled, and there is a manned aircraft nearby, it displays the aircraft’s position on the map relative to your drone. It also shows the aircraft’s heading, which can be quite handy.
You can use AirSense often because it interferes with your activities, and you’re already aware of the aircraft around you. However, if you’re flying in a heavily trafficked area, it’s a useful tool for enhancing safety.
DJI Mavic 3 Pro Accessories
| Image | Product | Features | Price |
|
1
 |
DJI ND Filter |
|
|
|
2
 |
BRDRC ND Filter |
Brand: HeiyRC |
|
|
3
 |
Honlyn ND Filter |
Brand: Honlyn |
4. Peaking Levels
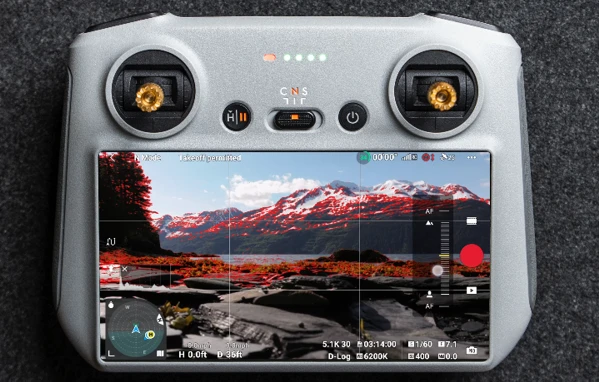
The peaking level for focus helps indicate what’s in focus and what’s not. You need to set the camera to manual focus to use this feature. Once enabled, it highlights the areas in focus, making it easier to adjust.
5. Overexposure Warning
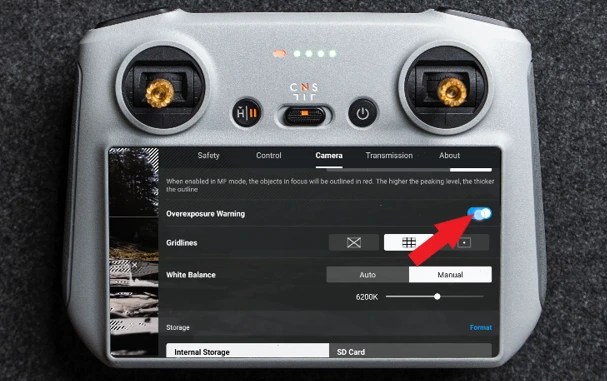
You can also turn on your overexposure warning, which is especially helpful on bright days. When enabled, you’ll notice a lot of overexposure warnings, indicating that some whites are slightly overexposed.
However, if you’re filming in D-Log, you find the overexposure warning to be inaccurate and not very useful. This is because D-Log has a much wider dynamic range. For normal color profiles, though, the overexposure warning provides a good indication of what is overexposed and what isn’t. This is one of the reasons We typically prefer filming in D-Log.
Additionally, you can toggle your grid lines, center point, and diagonal points on or off. These features are especially useful when performing manual movements around an object, as they help you maintain proper alignment and framing.
Go to Setting Manu > Camera > Overexposure Warning
6. Histogram
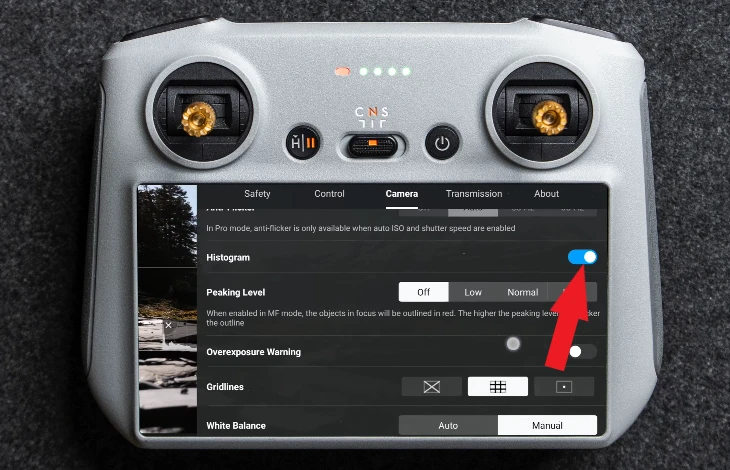
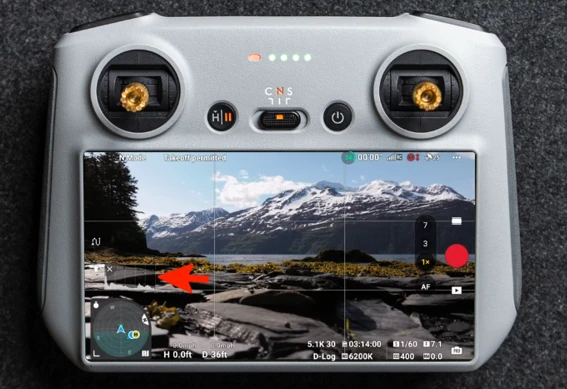
The histogram is a small white square that appears on the screen. It shows the distribution of light and dark areas in your image or video. The left side of the histogram represents the darkest tones, while the right side represents the brightest tones. The middle section shows where all the other tones in your photo or video fall.
If you notice everything stacked up on one side of the histogram, you’ll need to adjust your exposure. You can turn the histogram on to help you fine-tune your settings.
Go to Setting Menu > Camera > Histogram
7. USB Mode
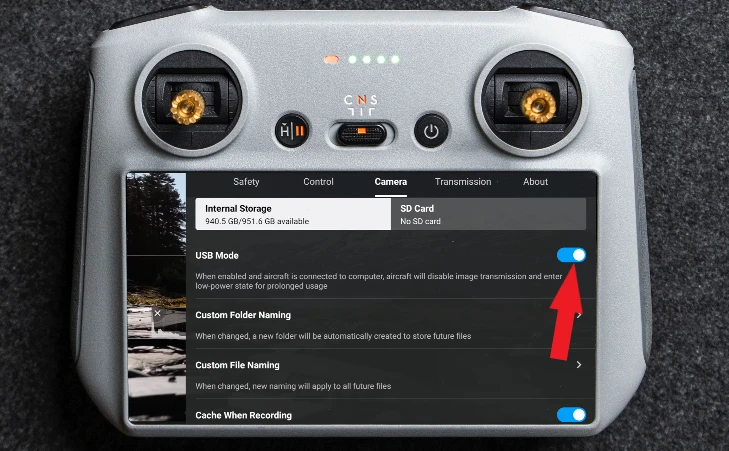
Using the USB mode, especially if you’re using the Cine version, is a great feature. When you turn on USB mode, as it connects the drone to a computer to transfer footage from either the SSD or SD card, the drone powers everything else down. This means it stops transmitting, the motors aren’t running, and the internal flight controller operates in a low-power state.
This feature prevents the drone from overheating and makes managing file transfers much easier, particularly if you’re pulling footage off the drone for an extended period.
You can also create custom folders and rename files. I need to update my file naming convention because it’s currently quite long. By default, it includes the DJI prefix, the month, day, year, and file number. While this can be useful for an organization, it might not suit everyone’s needs.
Go to Setting Manu > Camera > USB Mode
8. Cache Recording
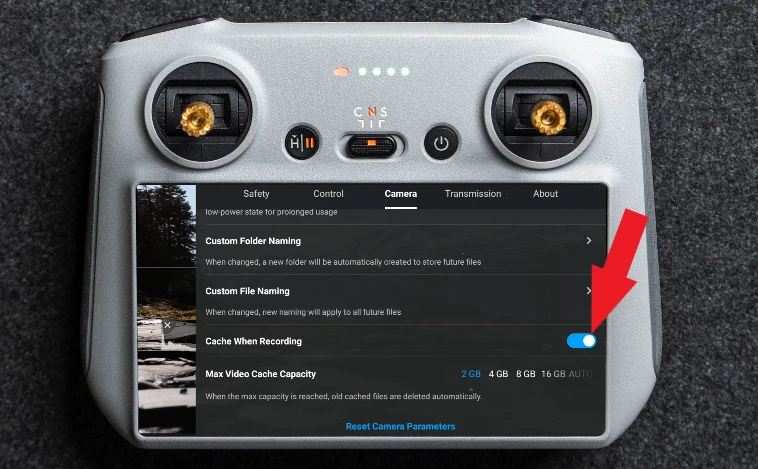
You can cache one recording, meaning that what you’re viewing on the screen gets stored on your remote controller or phone, depending on which device you’re using. This feature can be particularly useful if you lose the drone for some reason, as you’ll still have a recording of whatever you were filming, which might help you locate the drone.
In case, when we were unable to retrieve my drone because it went down inside a glacier, we at least had the recordings from that day in 1080p resolution. The device allows you to set a maximum memory limit for cached recordings before it starts overwriting older files.
Go to Setting Manu > Camera > Cache Recording
DJI Mavic 3 Pro Accessories
| Image | Product | Features | Price |
|
1
 |
Freewell ND Filter |
Brand: Freewell |
|
|
2
 |
StartRC ND Filter |
Brand: StartRC |
|
|
3
 |
K&F Concept ND Filter |
Brand: K&F Concept |
9. Button Customization
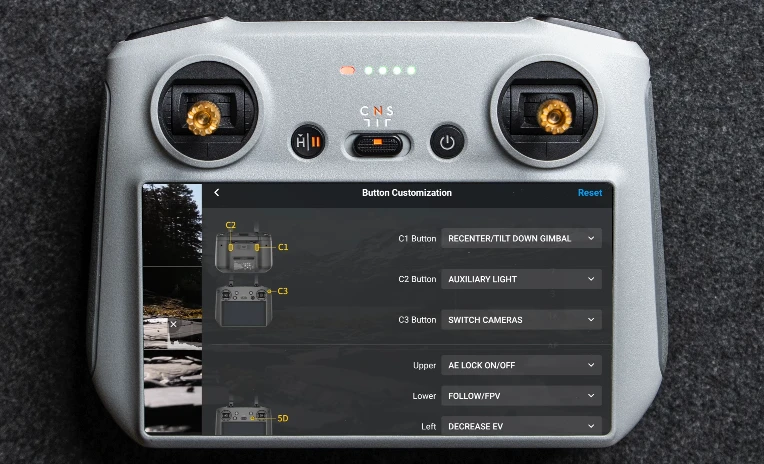
You can also customize the buttons here, such as the C1, C2, and C3 buttons, or other buttons depending on the remote you have. Customization options are available in this menu.
Additionally, you can calibrate the RC, repair it, or re-link the aircraft with the remote. To re-link the drone, first turn it on completely. Then, press and hold the power button for about seven seconds until the drone starts beeping. At that point, you can re-link it to the remote.
10. Obstacle Avoidance
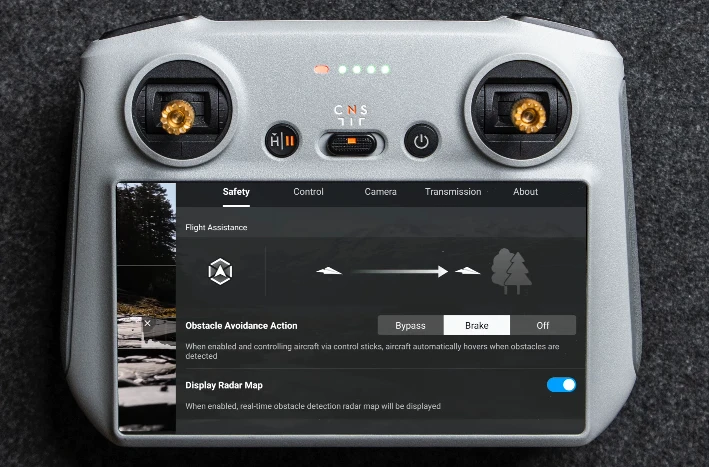
By tapping the three little dots in the top-right corner of the screen, you’ll access a much deeper menu. Here, you can decide how you want your obstacle avoidance to function. You can set it to bypass objects by finding an alternate flight path, use Normal Mode, or switch to Nifty Mode, which tends to create smoother movements for a more cinematic look.
For example, if you’re filming while having the drone track you as you walk through trees, Nifty Mode can make the footage look more polished. Alternatively, you can set the drone to stop and brake when it encounters obstacles or turn obstacle avoidance off entirely (at your own risk).
You can also choose whether or not to display the radar map, which shows everything the drone is sensing in its surroundings. This feature is particularly useful when starting very close to an object, as it provides a clear idea of how close you are. This is especially helpful because the wide-angle lens can make distances appear deceiving.
Go to Setting Manu > Safety > Obstacle Avoidance


