
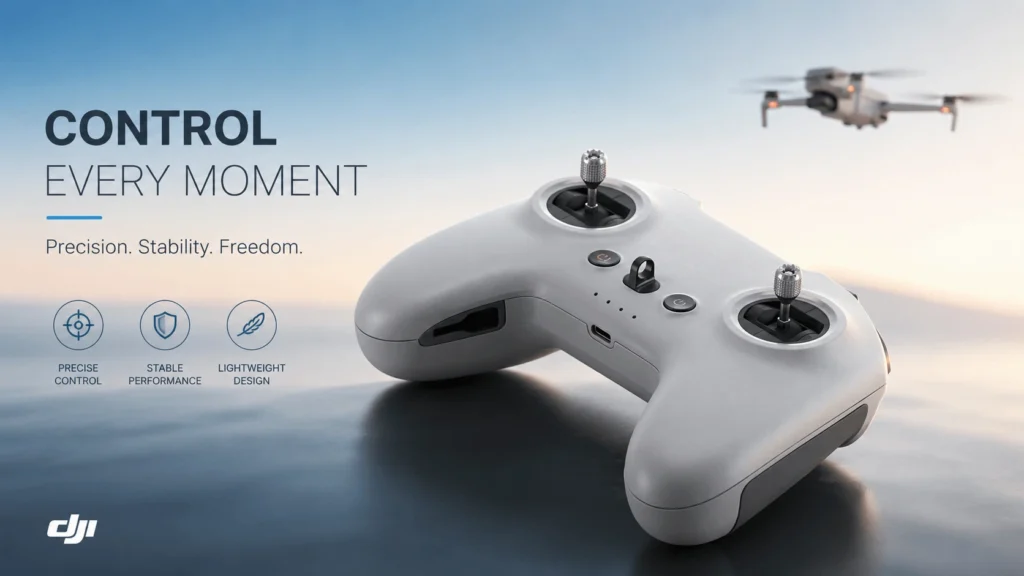
If you’ve searched for the DJI FPV Remote Controller 3, you’re probably trying to answer one of two questions: should you add it to your Avata 2 kit instead of (or alongside) the RC Motion 3, or can you actually use it to fly a freestyle FPV quad on DJI’s O4 system? This review covers both, plus the setup steps most articles skip.
Table of Contents
What Is the DJI FPV Remote Controller 3?
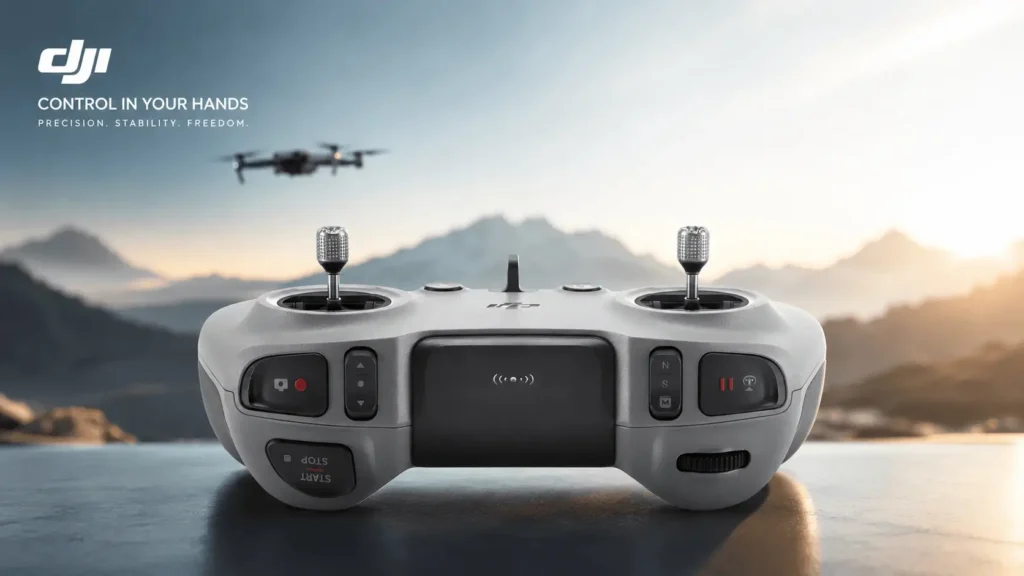
The DJI FPV Remote Controller 3 is DJI’s traditional two-stick transmitter for the O4 video system. Unlike the RC Motion 3, the wrist-tilt controller bundled with the Avata 2 Fly More Combo, this is a proper joystick radio built for pilots who want direct, precise control rather than motion-based flying.
It’s sold as a standalone accessory rather than included in the standard combo, and it’s aimed at two groups: Avata 2 or DJI Neo owners who want to graduate from motion control to real stick skills, and freestyle/cinewhoop pilots who already own the remote and want to wire it into a custom quad running the O4 air unit.

Key Specs at a Glance
| Spec | Detail |
| Weight | Approx. 240 g |
| Dimensions | 165 × 119 × 62 mm |
| Operating time | Approx. 10 hours |
| Charging time | Approx. 2 hours |
| Flight modes | Normal, Sport, Manual |
| Antenna | Integrated (internal) |
| Control link | O4 OcuSync, transmitted via SBUS from the air unit |
| Control range | Up to roughly 8.1 miles (unobstructed, open-field conditions) |
| Price | $199 (21% Discount Running) $156 |
| Compatible drones | DJI Avata 2, DJI Neo, and custom builds with an O3 or O4 air unit |
Design and Build Quality
Compared to the older FPV Remote Controller 2, this version is lighter and noticeably more comfortable for longer sessions. The gimbal sticks have been extended by about 2 mm, which helps whether you fly with two fingers or four. Because the antenna is built into the body instead of sticking up, the whole unit is more compact and easier to pack.
One important design detail that trips people up: the antenna placement isn’t just cosmetic. It changes how the remote actually communicates.
Compatibility: Which Goggles Does It Actually Work With?
This is the part most product listings gloss over, and it matters a lot if you’re buying secondhand or mixing gear.
- DJI FPV Remote Controller 3 is built to pair with DJI Goggles 3 (and Goggles N3). Because the antenna is internal, the remote only needs to reach the goggles, and the goggles then relay that control signal over the air to the drone or air unit.
- The older FPV Remote Controller 2 is built to pair with DJI Goggles 2 or Integra, and it uses an external antenna because it has to transmit its signal all the way to the aircraft directly, not through the goggles.
You cannot mix and match. Remote 2 will not bind properly with Goggles 3/N3, and Remote 3 won’t bind with Goggles 2/Integra. If you’re buying used gear, always match the remote generation to your goggles generation first.
Flight Modes: Normal, Sport, and Manual
Alongside the everyday Normal and Sport modes, the Remote Controller 3 adds a Manual mode. This is the mode that matters if you’re moving up from a beginner drone to freestyle flying, since it hands you direct control over the aircraft’s attitude, similar to acro mode on a standard FPV radio, rather than the self-levelling behaviour most new pilots start on.
Using It With a Freestyle FPV Quad (Betaflight Setup)
Here’s the part that separates this controller from a typical “unboxing” review: how to actually get it working on a custom build.
One of the best features of DJI’s O4 system is that it has a built-in RC control link. Instead of running a separate radio system like ExpressLRS or Crossfire, the O4 air unit can output control data directly to your flight controller over SBUS, riding on the same OcuSync connection as your video feed. That’s exactly what makes it possible to fly a scratch-built quad with a DJI FPV Remote Controller.
A few things to get right before you fly:
1. Wiring the air unit correctly. The O4 air unit needs its SBUS pins wired to your flight controller, specifically the two wires that carry the RC signal. If you bought a pre-configured, DJI-ready drone, this is usually done already. If you bought a bind-and-fly quad that shipped set up for ExpressLRS or Crossfire instead, there’s a good chance the manufacturer only wired four of the six pins, leaving the SBUS connection out entirely. You’ll need a replacement harness to use the DJI remote on that frame. Always check this before you buy a bind-and-fly if you’re planning to fly it with a DJI remote.
2. Confirming the pinout. Before connecting anything, double-check that the positive and negative pins on your flight controller’s port line up with the harness DJI includes. Getting this wrong can damage your air unit.
3. Flashing SBUS on your flight controller. In Betaflight, having “SBUS” appear as an option in the receiver menu doesn’t guarantee the firmware actually supports it. You may need to reflash your flight controller and explicitly select the SBUS radio protocol during that process.
4. Setting the correct UART. In Betaflight’s Ports tab, assign the UART connected to your digital VTX port to Serial RX. Check your flight controller’s documentation, since this often isn’t the same UART used for a standard analog receiver.
5. Start in Normal SBUS mode, not SBUS Fast. In your goggles’ Settings > Control menu, you’ll find a Protocol option toggling between standard SBUS and SBUS Fast (lower latency, but pickier about setup). Get everything working on the standard protocol first, confirm your sticks respond correctly in Betaflight’s Receiver tab, then switch to SBUS Fast in the goggles and enable it on the flight controller side via the CLI command below:
set sbus_board_fast = on save
Reboot the flight controller, and your receiver inputs should reappear, now running on the lower-latency link.
6. Switch and button mapping. The Remote Controller 3’s auxiliary channels are fixed by DJI and can’t be reassigned: the top-left three-position switch is AUX1, the top-right switch is AUX2, the pause button is AUX3, the start/stop button is AUX4, and the C1 dial is AUX5. The rear scroll wheel and the record button aren’t mapped to anything.
If you’re setting this up on INAV or ArduPilot instead of Betaflight, the SBUS wiring and pin-checking steps are identical. Only the software-side configuration screens look different.
Simulator Compatibility
Away from the field, the Remote Controller 3 doubles as a USB flight-sim controller. It works with several popular FPV simulators, including Liftoff, Uncrashed, DCL – The Game, and The Drone Racing League simulator, which makes it a genuinely useful way to practice Manual-mode stick skills indoors before risking a real drone.
Pros:
- Real joystick control with a proper Manual (acro) mode
- Works with both DJI’s consumer drones and custom O4-equipped freestyle builds
- Lighter and more comfortable than the previous generation
- Roughly 10 hours of battery life
- Doubles as a simulator controller
Cons:
- $199 add-on cost, not bundled with the standard Avata 2 combo
- Limited customization: switch/button mapping is fixed by DJI
- Not the most feature-rich radio on the market compared to third-party options like RadioMaster
- Bind-and-fly quads not pre-wired for DJI often need a harness swap
Who Should Buy the DJI FPV Remote Controller 3?
If you’re brand new to FPV, DJI’s own ecosystem (Avata 2 plus RC Motion 3) is usually the easier and cheaper starting point. This controller doesn’t add much value until you’re ready for Manual mode. But if you already own a Remote Controller from a DJI Neo or Avata setup and you’re building or buying a freestyle quad with an O4 air unit, it makes a lot of sense: you get to reuse gear you already own, skip buying a separate radio system, and rely on DJI’s built-in SBUS link instead.
Price and Availability
The DJI FPV Remote Controller 3 carries an MSRP of $156, sold separately from the Avata 2 Fly More Combo (which ships with the RC Motion 3 instead). It’s available through the DJI Store and major retailers such as B&H, Best Buy, Amazon, and specialty FPV shops like GetFPV and RaceDayQuads. Prices can vary slightly by retailer, so it’s worth comparing before you buy.
FAQ
Is the DJI FPV Remote Controller 3 compatible with DJI O4?
Yes. It’s built specifically for O4 video transmission and communicates with the air unit via SBUS over the OcuSync link, either directly (older remotes) or relayed through the goggles (Remote Controller 3 with Goggles 3/N3).
Does the FPV Remote Controller 3 work with Goggles 2?
No. Remote Controller 3 is paired with Goggles 3 and Goggles N3 only. If you’re using Goggles 2 or Integra, you need the FPV Remote Controller 2 instead.
Can I use the DJI FPV Remote Controller 3 on a custom freestyle quad?
Yes, as long as the drone’s flight controller is wired for SBUS from the O4 air unit and flashed with the SBUS protocol. Many bind-and-fly quads built for ExpressLRS or Crossfire need a rewired harness first.
How long does the battery last?
DJI rates it at approximately 10 hours of operating time, with roughly a 2-hour full charge.
Is it worth $156?
For pilots who want Manual mode or are integrating it into a custom O4 build, yes. For casual Avata 2 flyers happy with motion control, the bundled RC Motion 3 is likely enough.
Final Verdict
The DJI FPV Remote Controller 3 isn’t the flashiest transmitter on the market, and it won’t compete with dedicated freestyle radios on customization. But it does exactly what it needs to: give DJI O4 users a real stick-based Manual mode, extend battery life over the previous generation, and, thanks to O4’s built-in SBUS output, let freestyle pilots skip buying a separate RC system entirely.
If you already own one from a DJI Neo or Avata 2 setup and you’re stepping up to a scratch-built quad, it’s absolutely worth wiring in rather than buying new hardware.
Read More: GEPRC DarkStar22 vs BETAFPV Pavo20 Pro II: Which Should You Buy?