
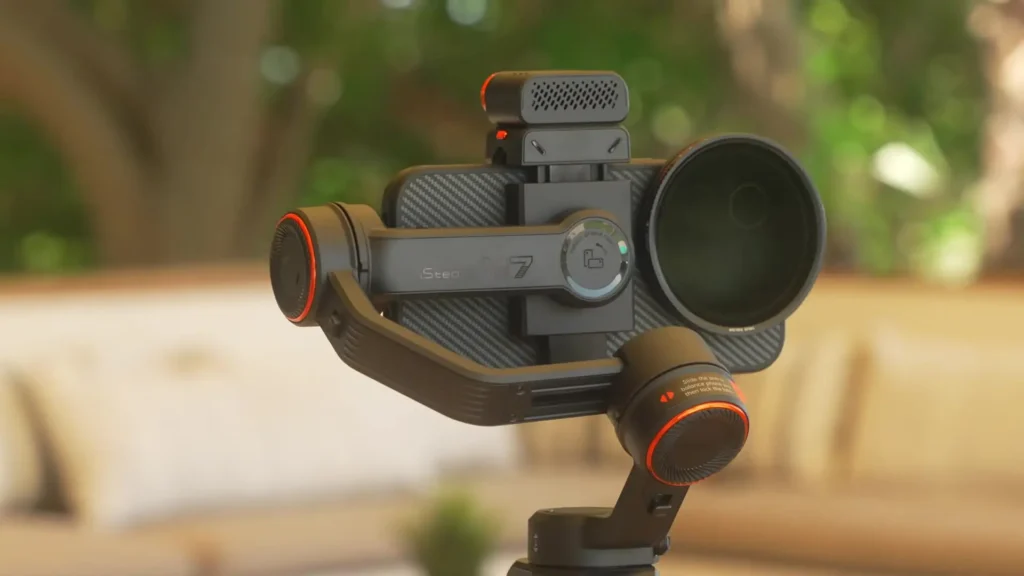
This is everything you need to know about the Hohem iSteady M7. In this guide, we will be covering everything from what is in the box, setup and balancing, all the functions and features and what they do and how they work, including the AI tracking features and some real world examples and how to use this gimbal. We will also be looking at some of the mobile apps that you can use alongside this to help elevate your mobile filmmaking.
Table of Contents
What Is in the Box
There is a standalone version of the gimbal available, though other options exist online such as the one with a briefcase handle, a light, microphone, and a quick release tripod. The standalone version comes in a nice case with a bright M7 logo on the front and a rigid pattern on the top. It opens and closes with a zip and comes with a handle as well.
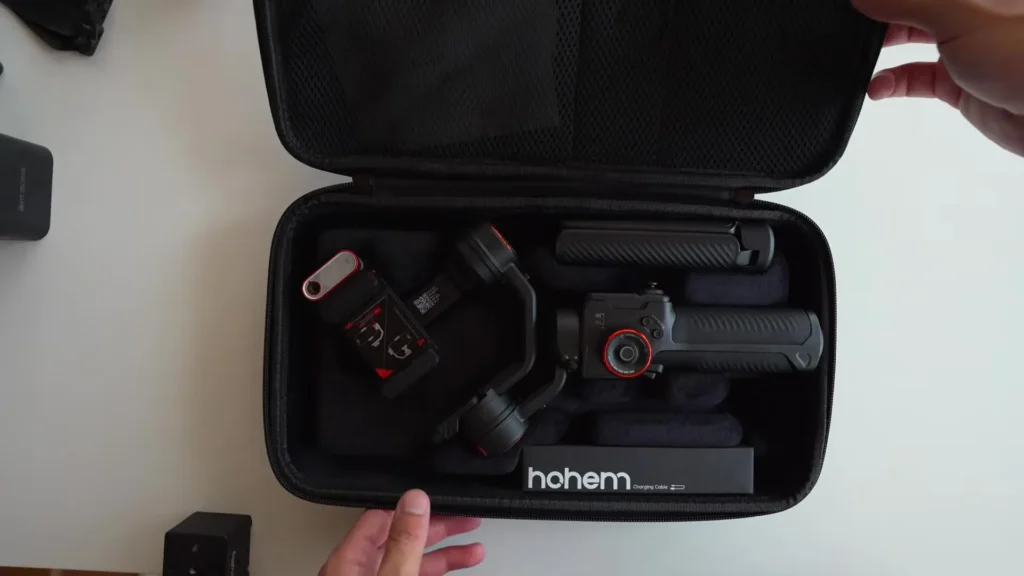
Inside the case, you have netting for your documents or cables, a quick start guide covering AI tracking, safety, and warranty information, the gimbal itself, and the tripod legs. You also get two cable accessories. One is a USB-A to USB-C cable for charging, and the other is a USB-C to USB-C cable for charging the phone on the go while using the gimbal, which will be covered later in this guide.

Key Features of the Hohem iSteady M7
The Hohem iSteady M7 is packed full of technology and features. Here is a breakdown of what makes this gimbal stand out.
AI Tracking Module
The main highlight here is the AI tracking module, which can track multiple subjects such as people, cars, pets, and more. This module is reversible, so you can use the two pins to remove it and then rotate it either towards you or away from you depending on what subject you want to track. The AI tracking module also doubles up as a CCT and RGB fill light, which is fully adjustable with brightness and RGB control.
Detachable Touchscreen Remote
The Hohem iSteady M7 comes with a detachable touchscreen remote that works up to 10 meters away. You can even use it for framing through the AI tracking module camera, which makes solo shooting much more manageable.
Built-In Extension Pole
There is a built-in extension pole for low angle and high angle shots, which is a feature you might not know about unless someone actually showed you. It is genuinely one of the standout features of this gimbal.
500 Gram Payload Limit
The 500 gram payload limit is another favorite feature. This means you can add additional accessories such as lights, microphones, Freewell ND filters, or an anamorphic lens, and the gimbal will support that weight without any problems, as confirmed throughout testing for this guide.
Ports and Mounting Options
The gimbal has a USB-C input, a quarter-inch screw mount hole on the body, a USB-C output for charging the phone on the go, and an additional quarter-inch screw mount on the top of the tilt arm for accessories.
Setup and Balancing the Hohem iSteady M7
Getting the Hohem iSteady M7 set up and balanced is really straightforward. Once you have attached the tripod legs to the gimbal, place it on a flat surface. Then unlock the axis of the gimbal.
For the pan, flick up and rotate. You want both down and tilt also down. This will unlock all the axes. It is easier to lock the pan and tilt function in place by flicking those down first and then rotating everything until it is locked, as this makes balancing simpler.
If you want to film in vertical format, all you need to do is rotate the phone mount to the vertical position. If you want to film in landscape, rotate it back into the landscape position. For most use cases, landscape mode is the starting point.
Grab your phone, open up the phone mount holder, and place the phone in by pushing it all the way to the end. Because only the rotate axis is unlocked at this stage, it will balance to one side. Simply go the opposite direction by unlocking the lever and pushing until the gimbal is balanced, then lock it. Hold the power button down until it switches on, remember to unlock the other axes, and your gimbal is balanced.
To auto-calibrate, press the power button five times and the gimbal will automatically calibrate itself. Make sure it is on a flat surface when you do this.
Balancing With the Charging Cable and Accessories
If you are going to use the included cable to power the phone while it is being used, a small adjustment to balancing is needed. Push the phone slightly back, connect the black USB end into the phone, and plug the gray end into the USB-C out port on the gimbal for power. Then push the phone all the way back until it needs rebalancing.
If you are also attaching an ND filter such as Freewell’s magnetic ND filter, attach it until you hear a click, unlock the lever, and push it in the opposite direction until balanced again. Hold the power button and the gimbal will automatically balance. That is genuinely how easy the setup process is.
Buttons and Functionality
The Hohem iSteady M7 has a lot of buttons and functionality, and it can be really overwhelming for new gimbal users. From single presses to double, triple, quadruple, and even five presses, they all do different things. A free downloadable PDF cheat sheet of all the functionality is available so that when you are out in the field and need a quick reference, you have it ready.
Power Button
A long press of 3 seconds turns the gimbal on and off. A double press puts the gimbal into standby mode, which is really useful when moving between locations. Pressing it five times when the gimbal is on will trigger balance and auto-calibration. When the gimbal is off, a single press of the power button starts reverse charging from the gimbal to the phone.
Trigger Button
Holding the trigger puts it into lock mode where none of the axes move. A single press followed by a long press hold activates sports mode. A double press re-centers the gimbal. A triple press rotates the gimbal 180 degrees, toggling between forward facing and backward facing. Pressing the trigger four times activates wide angle mode, which rotates the gimbal away so it does not appear in the shot when using the wide angle lens.
Side Roller
A long press on the side roller turns the fill light on and off. A triple press puts it into either CCT or RGB mode, and triple pressing again switches between the two. When in CCT or RGB mode, a single press toggles between brightness and temperature or brightness and RGB mode. A double press switches between focus and motor control. When under motor control, a single press toggles between tilt, roll, and pan.
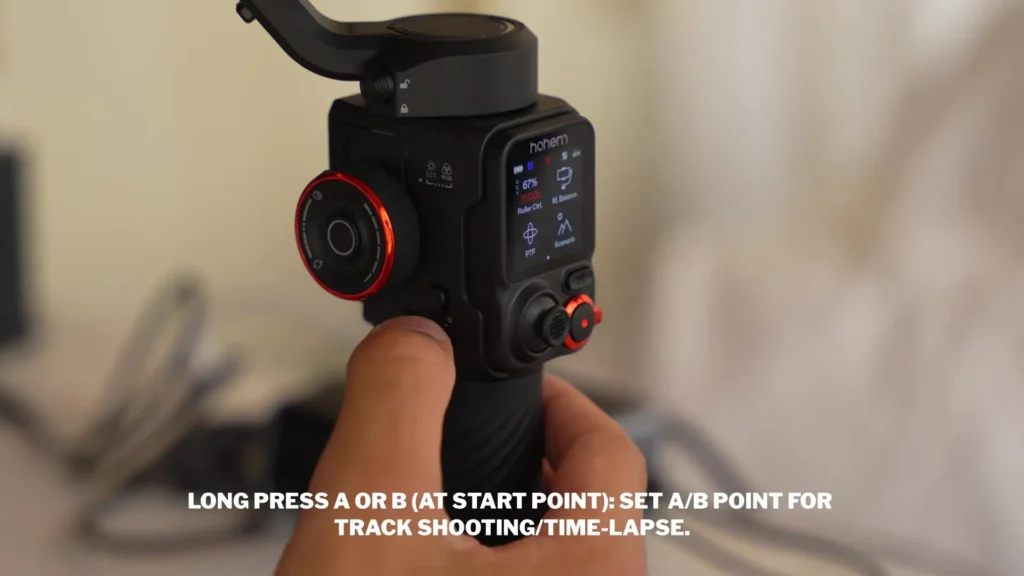
AB Button
Underneath the roller control, there is an AB button. A long press on A or B sets that point. Pressing A or B instantly moves the gimbal to that position. A double press on A or B starts the motion at the defined speed, which can be adjusted on the LCD screen.
Detachable Remote Controls
When the touchscreen remote is detached, a double press of the side button centers the gimbal. A triple press rotates the gimbal 180 degrees forward or backward. Four presses activate wide angle mode. Seven presses disconnect the remote from the gimbal. To reconnect, simply place it back in.
On the remote, a single press of the mode button switches between pan, tilt, and follow modes. A triple press puts it into ICT mode with speed adjustable on screen. Five presses auto-calibrate the gimbal.
The shutter button includes zoom control, which only works with the Hohem app. A single press starts recording or takes a photo. A double press toggles between photo and video. A triple press switches between the rear and front facing cameras. A long press powers off the remote, and to power it on again, simply place the remote back into the gimbal. The joystick is used to move the gimbal up, down, left, and right.
AI Tracking Features
The AI tracking module has an on and off switch. When switched on, it shows a red light and flashes twice. The LCD screen will also show red, indicating it is on but not actively tracking anything.
Gesture Controls
To start tracking a subject using gestures, make an okay sign with your hand. The light on the tracking module will turn green, and the LCD screen will also turn green to confirm tracking is active. To stop tracking, make a stop sign gesture, and both the light and screen will return to red.
To start recording, make a specific hand gesture and the light will start flashing green before the camera app begins recording. This works with the native camera app as well. To stop recording, use the same gesture again, the light will flash green, and recording will stop.
When in tracking mode with the gimbal following you left and right, you can reframe yourself by using the framing gesture symbol. The light will start flashing green, allowing you to reposition yourself. Use the framing symbol again to confirm your new position. This is easier with the front-facing camera unless you have someone with you to help reposition when using the rear camera.
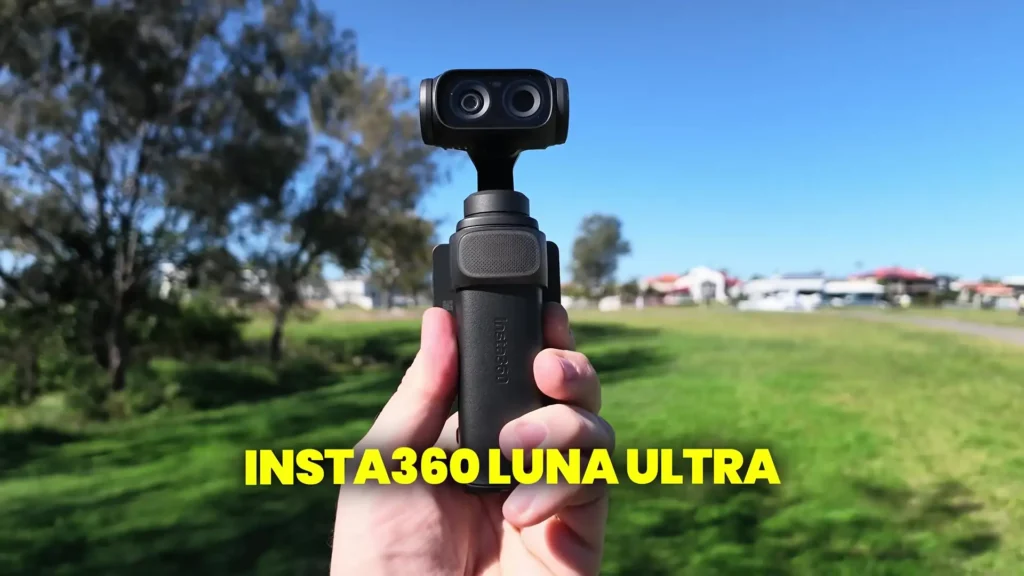
Also Read: Insta360 Luna Ultra Review
LCD Screen Tracking
If you prefer using the LCD screen for tracking, you can either double tap the subject to automatically start tracking, or drag a box over what you want to track and press on the screen to confirm the selection. You can also confirm selection by pressing the side button or the trigger on the gimbal. Pressing the trigger or side button during tracking pauses or continues it. A triple press on the screen clears the subject tracking.
A long press on the detachable remote enters calibration mode, where you can calibrate the AI tracking module to match your camera. This will differ depending on whether you are using the front or rear facing camera.
If you are using the rear camera, you may need a friend to help calibrate. With the front-facing camera, it is a bit easier. Using the remote while the gimbal is placed down gives you some guidance on how your phone camera view compares to what is displayed on the LCD screen.
Gimbal Modes
The Hohem iSteady M7 comes with a full range of standard gimbal modes.
Pan Follow Mode
Pan follow mode is great for orbits, panning scenery, and side to side tracking shots.
Pan Tilt Follow Mode
This mode is ideal for reveal shots, push in or out movements, and jib or crane style shots.
POV Mode
POV mode can actually be easier for beginners because you can do things like orbit tracking by tilting the gimbal from left to right as you orbit around a subject. You can also do push in or push out movements, barrel rolls, or fast action shots.
FPV Mode
FPV mode is activated by pressing the M button three times. From there, adjust the speed and walk in a straight line to get a cool dynamic shot.
LCD Screen Overview
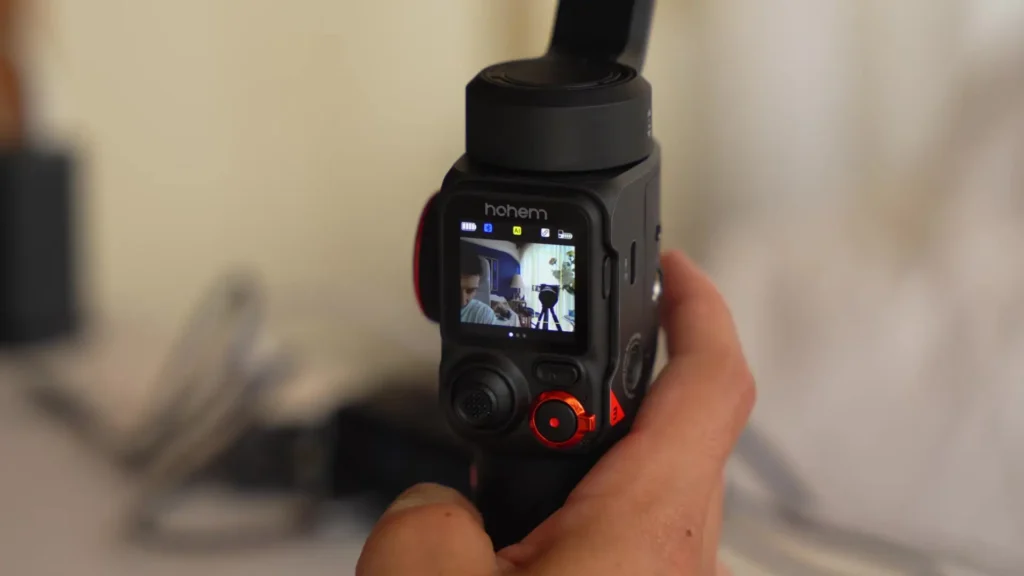
On the main screen of the Hohem iSteady M7, you can select whether you want to control focus, tilt, roll, pan, or CCT mode for the light. You can change the direction of the roller, adjust the light brightness and RGB color, and turn the light on and off. The motor balance indicator shows whether the gimbal is balanced, and you can use it to fix any imbalance.
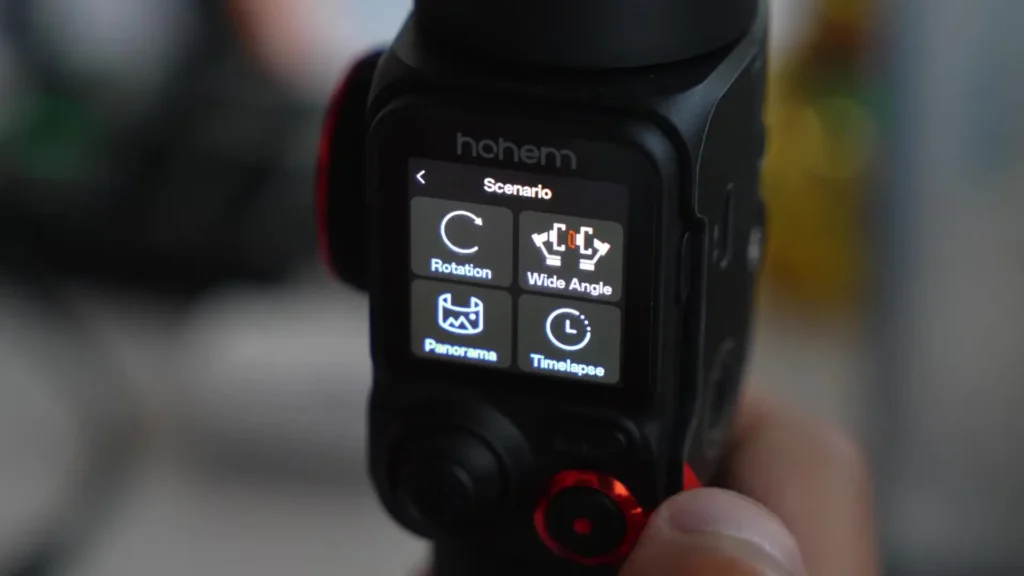
You can select your shooting mode from pan, pan tilt follow, POV, and more, or set a custom mode. The scenarios section lets you adjust the speed of ICT or FPV mode, set tilt deflection, and configure custom FPV behavior such as a single clockwise or anticlockwise rotation or infinite rotation in either direction.
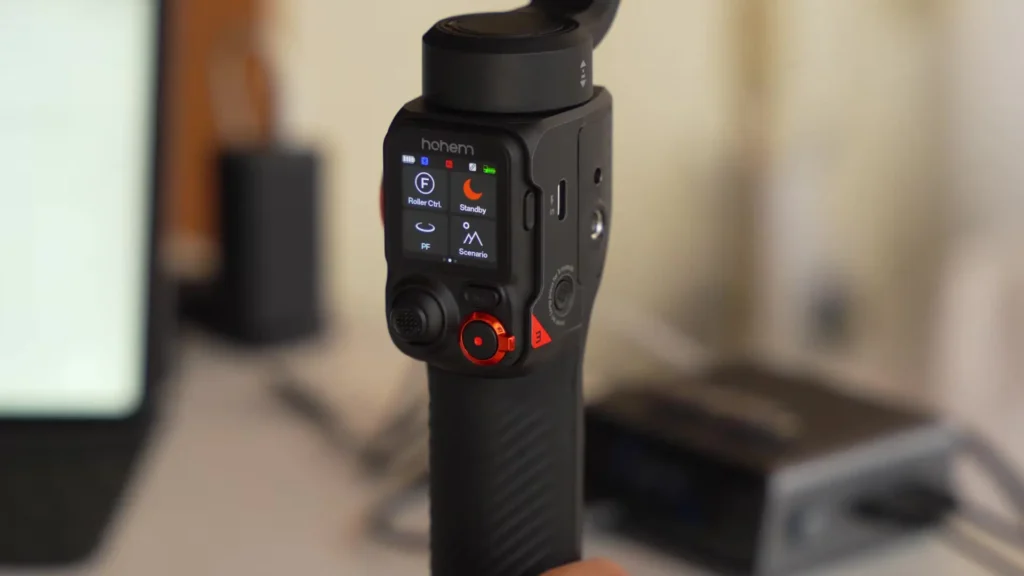
Wide angle mode can be toggled on and off directly from the screen, and panorama shooting is also available here. You can choose to manually stitch your photos or use the Hohem app, which will stitch them automatically.
There is also a time-lapse feature you can manually adjust by pointing the gimbal using the joystick, adding set points, and defining the duration. Swipe to the left on the LCD screen and you have joystick speed and direction controls, pan direction settings, and the AB functionality all accessible on screen. You can also adjust the motion duration here, from 15 seconds all the way up to 1 hour.
Follow speed can be set to slow, medium, or fast. Under more settings, you can change the language, toggle gimbal sound, adjust motor strength, and run a level calibration.
Swiping all the way to the right brings up the tracking module LCD view where you can tap subjects, drag and drop, confirm or cancel subjects, and calibrate the module to match what your camera is seeing.
Smoothing Settings and Cinematic Tips
Follow Speed
Depending on your shooting scenario, if you want smooth and steady shots, set the follow speed to slow. For more dynamic and fast-paced footage, set it to fast. The right setting will depend entirely on the situation, as there is no one-size-fits-all approach here.
Camera App Options
You are not limited to Hohem’s own app. You can use the iPhone’s native camera app or the Blackmagic app, both of which work alongside the Hohem iSteady M7.
The native camera app is straightforward, though not all functionality is available within it. For example, switching between front and forward-facing cameras and toggling between photo and video requires the Hohem app.
Focus control, which allows you to pull manual focus using the side roller, is also a feature exclusive to the Hohem app. Note that when seamless zoom is toggled on, focus control will not work and needs to be turned off within the settings.
The Hohem app also lets you adjust video resolution and frame rate, toggle flash, apply filters, use gesture controls, adjust white balance, enable seamless zoom, view a histogram, and access photo mode, panorama, live stream, time-lapse, time warp, slow motion, and a moments section.
The moments section includes guided scenarios such as raindrop control and dolly zoom, with the app guiding you through filming and then allowing you to share the result. The Hohem app works in full harmony with the gimbal so you can control all gimbal functions without physically touching the device.
Using the Blackmagic App With the Hohem iSteady M7
For those who want a greater level of cinematic control, the Blackmagic app is a fantastic option. It can feel overwhelming at first but is genuinely powerful for mobile filmmaking.
Instead of recording in H.264, you can record in Apple ProRes, including Apple ProRes 4:22 HQ. You can also shoot in Apple Log and then color grade the footage later in DaVinci Resolve or your editing platform of choice.
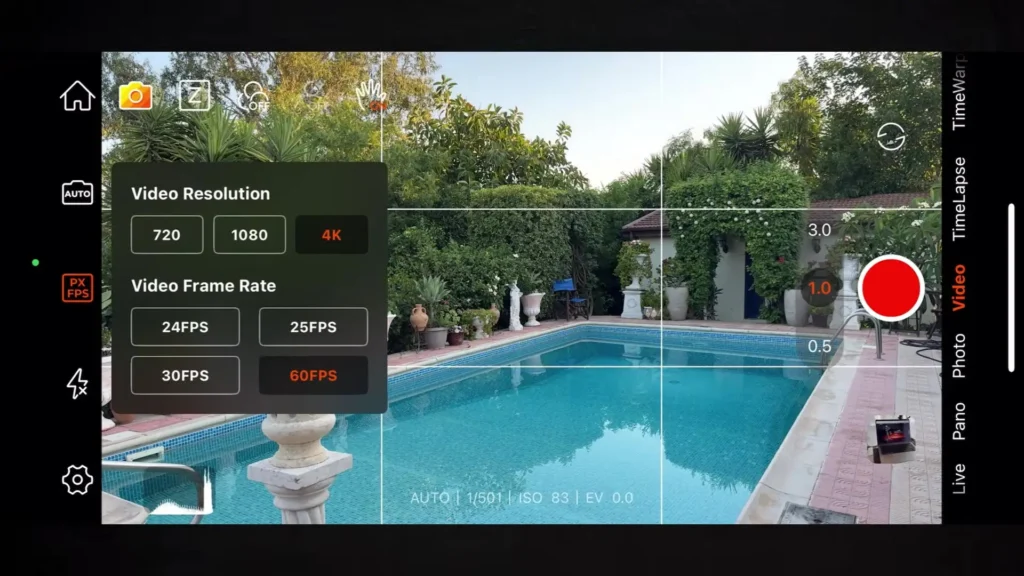
You can control your shutter speed manually, for example setting it to double your frame rate such as 1/50 when shooting at 25fps, and then use Freewell’s ND filter to achieve correct exposure. You can lock the ISO, white balance, and tint for a consistent look across your footage.
Using Freewell Accessories With the Hohem iSteady M7
ND Filters
Freewell’s magnetic ND filter kit is a great companion to the Hohem iSteady M7, especially when using the Blackmagic app, because it allows you to control your shutter speed for natural looking motion blur.
One thing to note is that the ND filter will block the front microphone on an iPhone, so if you are using the Blackmagic app, you need to make sure you are using a different microphone, either the bottom microphone, the one facing toward you, or an external microphone. Leaving it on auto will result in muffled audio.
Anamorphic Lens
The anamorphic lens from Freewell is a great option if you want a wide field of view with that distinctive cinematic curve. It features a bubble level at the top so you can get it perfectly centered. Unlike the ND filter, it does not block the microphone due to a gap in the design, though it is still worth being mindful of audio pickup.
One limitation is that you cannot use the ND filter on top of the anamorphic lens, which means you will need to rely on automatic exposure settings in the Blackmagic app when using it.
Within the Blackmagic app settings, scroll down to camera settings and set the anamorphic desqueeze to 1.33, and your footage will automatically come out correctly formatted whether you are shooting in Apple ProRes or H.264.
Real-World Testing Notes and Observations
After extensive testing with the Hohem iSteady M7, here are some honest observations and discoveries worth sharing.
AI Tracking and Lighting Conditions
Hohem does mention that good lighting is needed for the AI tracking module to perform well. During testing in Greece in the morning with bright and challenging lighting conditions, the tracking module would occasionally lose the subject.
This is expected behavior in difficult light, and the same could happen in low light as well. Being aware of this helps manage expectations.
Learning Curve for New Users
This gimbal is really advanced. If you are completely new to gimbals, the number of buttons and functions can feel overwhelming. However, sticking with it and persevering is absolutely worth it, because mastering this gimbal can genuinely take you from a beginner level to an enthusiast or even a professional level, especially with all the available adapters and compatible apps.
AB Mode Behavior
During testing of the AB mode, even though you can set the points and double press to start the motion, the gimbal will not automatically start recording. This is a little frustrating, as it would be much better if this worked in harmony with the Hohem app or at least the native camera app. This is something that could benefit from a firmware or software update.
AI Screen Calibration
The AI tracking screen will differ from what your camera actually sees, but calibration mode addresses this. For rear cameras, calibration may require a second person to help. Front-facing cameras are a little easier to calibrate solo.
Extension Pole
The built-in extension pole for high and low angle shots is genuinely impressive and one of those features that really stands out once you know it is there.
Payload Capacity
The 500 gram payload limit makes this gimbal extremely versatile. Being able to add lights, microphones, ND filters, and anamorphic lenses without any balancing issues is a significant advantage for mobile filmmakers who want to build out their kit.
SSD Mounting Suggestion
One upgrade that would make the Hohem iSteady M7 truly the ultimate mobile filmmaking gimbal would be having a dedicated space or mount at the back to attach an SSD, allowing you to record high quality Blackmagic footage directly from your phone to external storage.
The gimbal would certainly handle the weight, but the challenge is managing both power delivery and data recording simultaneously. Perhaps a splitter solution or Bluetooth-based SSD connectivity could address this in a future version. The quarter-inch screw hole does provide some options via adapters, but a more purpose-built solution would be a welcome addition.
Specification Table
| Feature | Details |
|---|---|
| Product Name | Hohem iSteady M7 |
| Payload Capacity | Up to 500 grams |
| AI Tracking Module | Yes, reversible, multi-subject tracking |
| Tracking Subjects | People, cars, pets, and more |
| Fill Light | CCT and RGB, adjustable brightness |
| Detachable Remote | Yes, touchscreen, works up to 10 meters |
| Extension Pole | Built-in, supports low and high angle shots |
| Charging Port (Input) | USB-C |
| Charging Port (Output) | USB-C (for charging phone on the go) |
| Mounting Options | Quarter-inch screw mount (body and tilt arm) |
| Gimbal Modes | Pan Follow, Pan Tilt Follow, Lock, POV, Inception, FPV, Sports |
| Compatible Apps | Hohem App, Native Camera App, Blackmagic Camera App |
| Gesture Controls | Yes (okay sign to track, stop sign to stop, call sign to record) |
| LCD Screen | Yes, fully interactive touchscreen on remote |
| Panorama Mode | Yes |
| Time-Lapse | Yes, manual and adjustable |
| AB Mode | Yes, set point A and B for motion control |
| Follow Speed Settings | Slow, Medium, Fast |
| Compatible Accessories | ND Filters, Anamorphic Lens, Microphones, Lights |
| Case Included | Yes, rigid zip case with form fitting interior |
| Tripod Legs | Included |
| Cable Included | USB-A to USB-C (charging), USB-C to USB-C (phone power) |
Final Thoughts on the Hohem iSteady M7
The Hohem iSteady M7 is a feature-rich, capable, and versatile gimbal that suits a wide range of mobile filmmakers, from beginners who are just starting out to enthusiasts who want to push their footage further with professional apps, ND filters, and anamorphic lenses. The AI tracking module, detachable touchscreen remote, built-in extension pole, and 500 gram payload limit are all genuinely useful and well-implemented features.
There are a few areas that could be improved, such as the AB mode not triggering automatic recording and the AI tracking module needing good lighting conditions to perform consistently. But these are relatively minor compared to everything the gimbal does well.
Read More: DJI Pocket 4 vs Insta360 Luna Ultra