The DJI Mavic 4 Pro has some incredible features, and with so many settings available, it can be overwhelming. But don’t worry, you’re not alone. Whether you’re a beginner or an experienced drone enthusiast, this comprehensive guide is here to help you navigate the various tips and settings that will help you get the most out of your Mavic 4 Pro. In this article, we’ll break down DJI Mavic 4 Pro 50 tips & settings for the Mavic 4 Pro, organized by different categories and menus. So, grab your drone, and let’s dive in!
General Tips
1. Auto Power On
One of the most convenient features of the Mavic 4 Pro is the auto power-on function. As soon as you unfold the screen or the drone, it powers on automatically. This makes it incredibly easy to get in the air quickly—no need to fumble around for the power button.
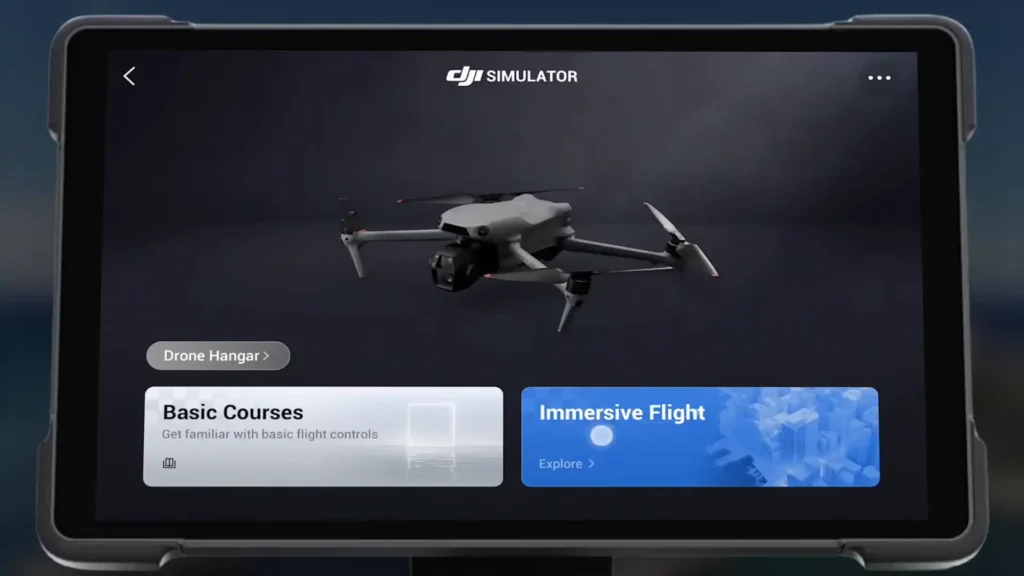
2. DJI Simulator
The DJI simulator is a fantastic way to practice flying without risking your drone. To access it, power off the drone and tap on the “DJI Simulator” button. The simulator offers realistic flight experiences with various maps, including a 3D reconstruction of Stonehenge. It’s a great way to hone your skills in a risk-free environment.
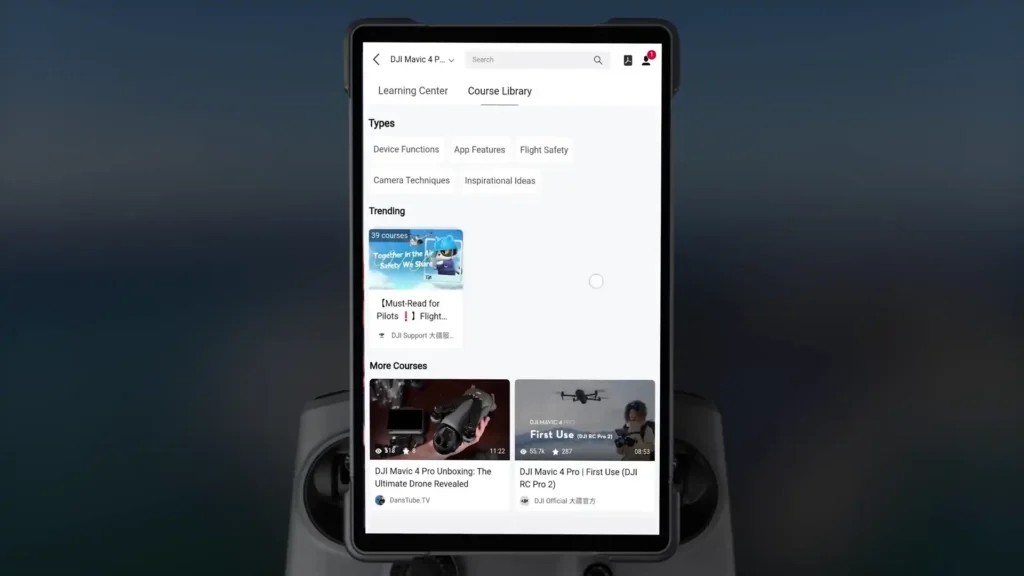
3. DJI Academy & Drone Tutorials
For beginners, the DJI Academy is a treasure trove of helpful tutorials. To access it, tap on the Academy icon at the top right corner of the app. It provides a wide range of tutorials, insights, and videos, specifically catered to different drones, including the Mavic 4 Pro.
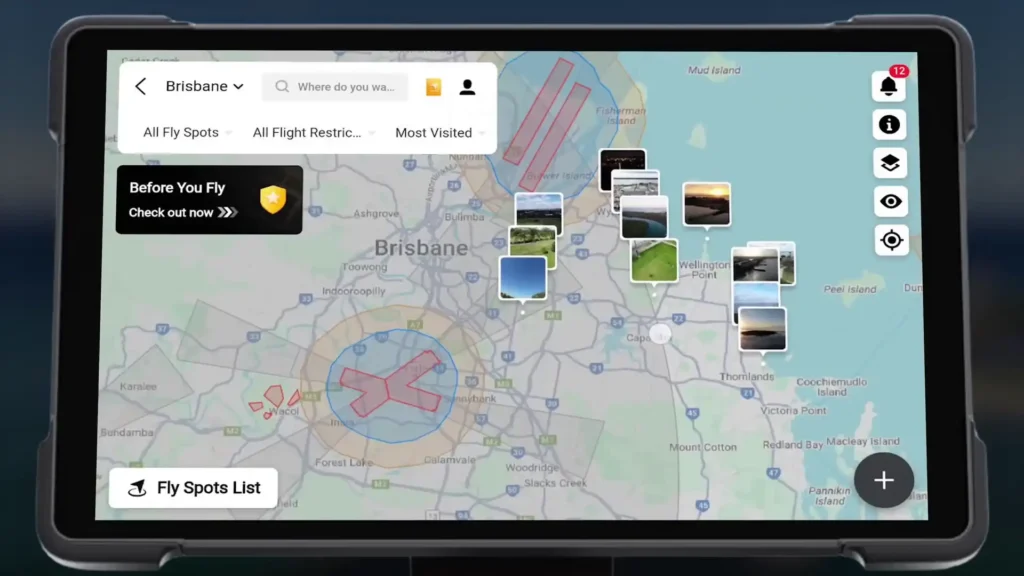
4. No Fly Zones
Before flying, it’s crucial to know where you can and cannot fly. The “Before You Fly” feature will show a map of your location, highlighting nearby no-fly zones like airports. Always check these areas to ensure you’re flying safely and legally.
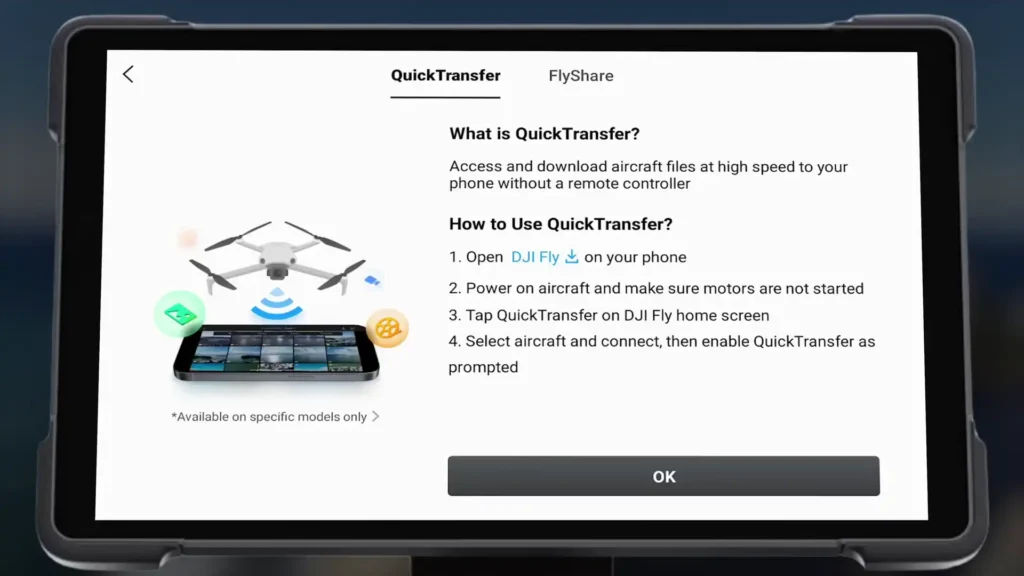
5. Quick Transfer
Quick Transfer allows you to transfer your video files to your phone seamlessly. By using the DJI Fly app, simply follow the easy instructions to transfer footage from your drone to your device.
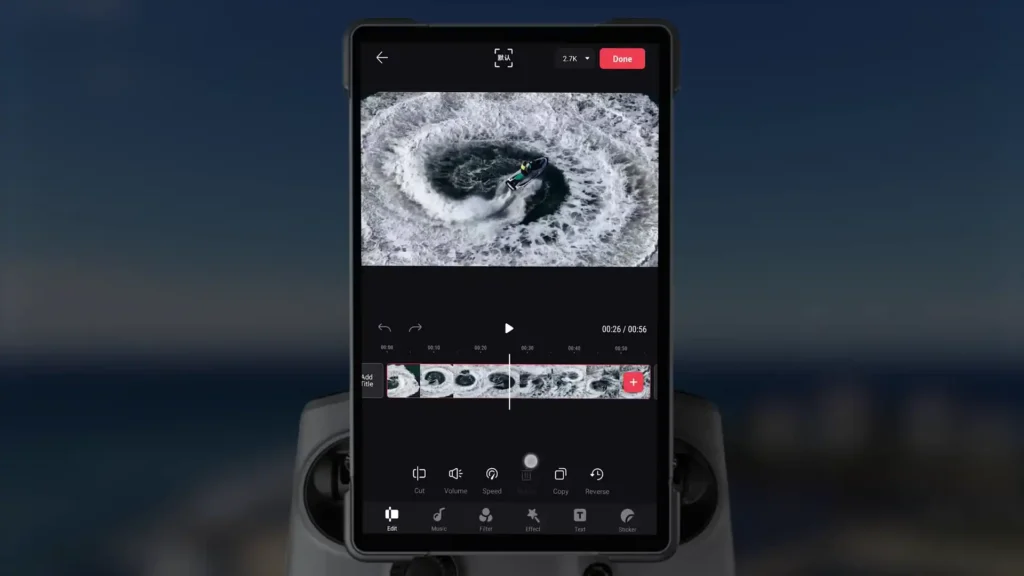
6. In-Built Video Editor
The Mavic 4 Pro has an in-built video editor that lets you create short clips directly on the controller. With options to add music, adjust speed, and apply filters, this feature allows you to edit footage quickly without needing a computer.

Profile Menu
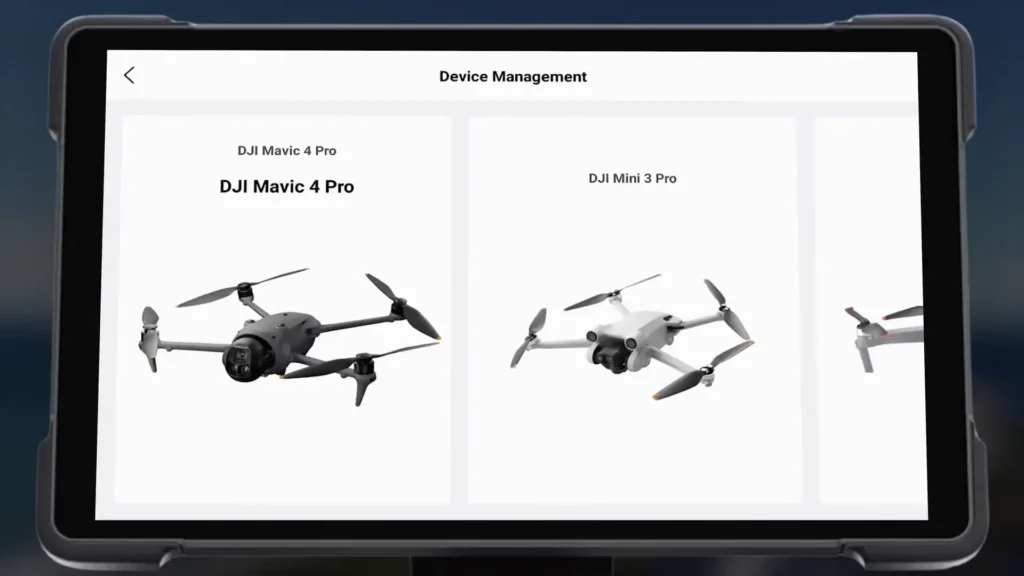
7. Device Management
The Device Management section in the profile menu allows you to track the flight data of your drones. You can check the total flight time, distance traveled, and more. This information can be helpful if you plan to sell your drone or want to monitor its performance.
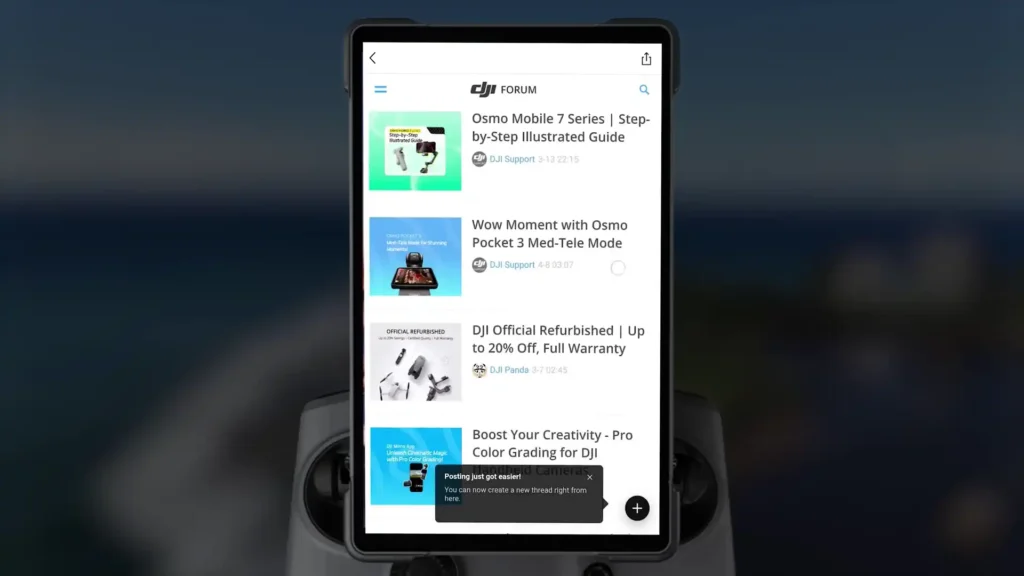
8. DJI Forum
For troubleshooting and getting advice, the DJI Forum is a useful resource. Access it through the profile menu, where you can ask questions or browse through different topics and discussions.
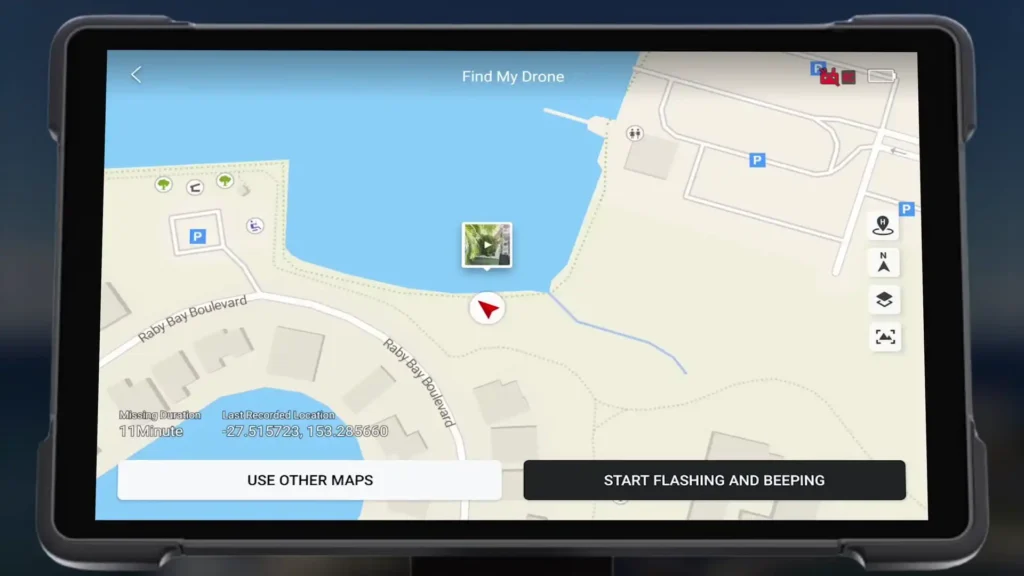
9. Find My Drone
If your drone is lost or misplaced, the “Find My Drone” feature helps you locate it by showing its last known position on the map. If the drone has enough battery, it will flash and beep to help you find it.
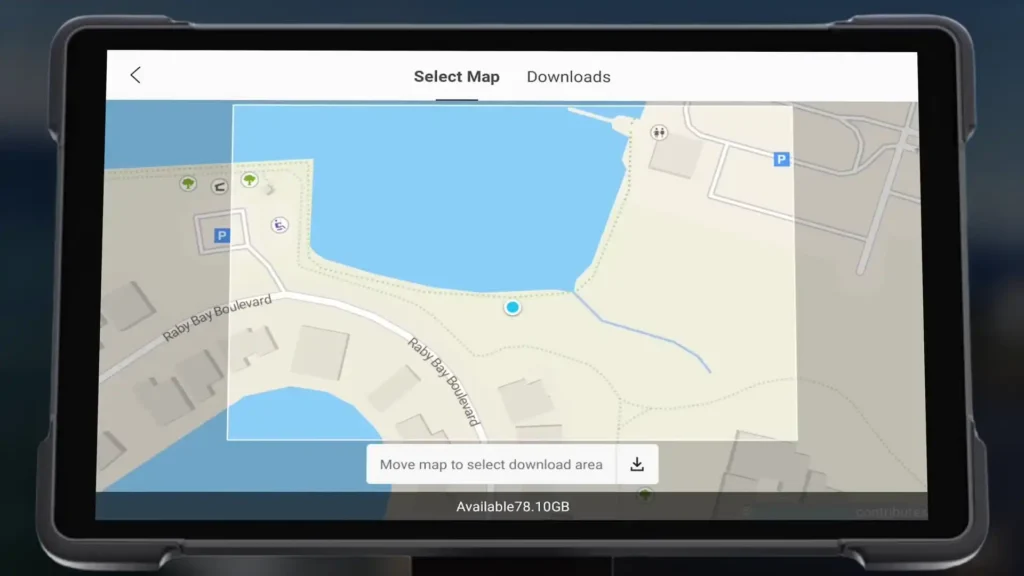
10. Offline Maps
Offline maps are perfect when flying in areas with no internet connection. Simply download the map of your desired flying area, and you’ll have it available without needing to rely on a mobile hotspot.
- Mavic 4 Pro Dual Focal Length Split Filter Kit: Engineered to overcome the challenges of different focal lengths and ape…
- Split ND Filters: ND8/4, ND16/8, ND32/16, and ND64/32 for flexible exposure in varied lighting.
- Enhanced Light Control: Split ND filters balance bright skies and dark landscapes for smooth transitions.

RC Pro 2 Features
11. Rotate Screen to Rotate Camera
The RC Pro 2 controller comes with a rotating screen that allows you to rotate the camera. This is especially useful for switching between portrait and landscape shooting modes mid-flight.
12. Control Dial
The RC Pro 2 controller also features a control dial that lets you adjust different camera settings, such as exposure, ISO, and shutter speed, without having to touch the screen.
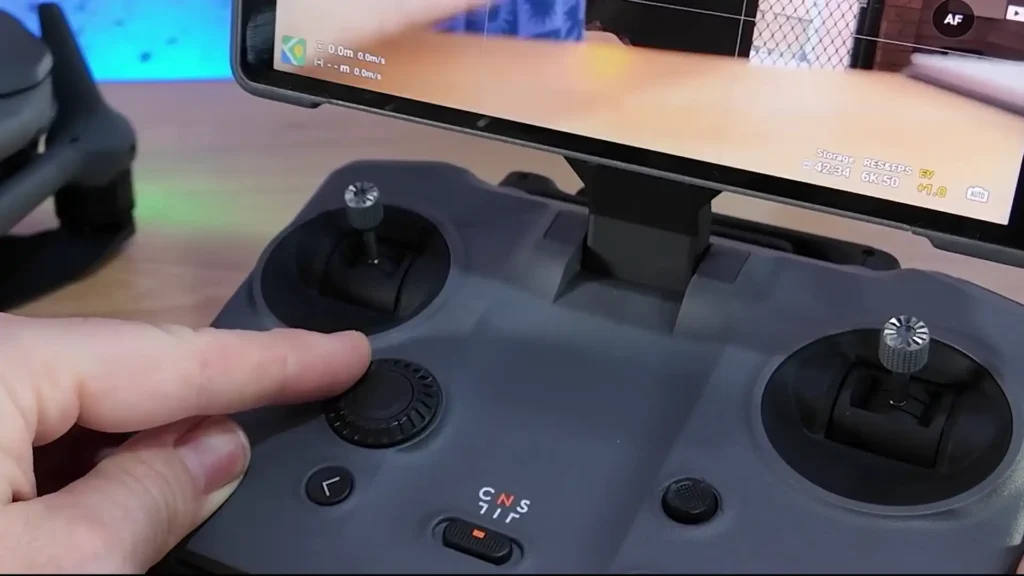
13. 5D Button
The 5D button provides additional customization. It lets you control various drone functions, like switching between photos and videos, focusing on a subject, or adjusting the gimbal’s tilt.

Flight Menu
14. Touchscreen Camera Controls
Use your finger to swipe up or down on the screen to control the camera’s pitch. This allows for smooth camera movements while filming.
15. Subject Focusing
Subject Focusing lets you lock the focus on a specific object or person, even as the drone moves. Simply tap on the object or person, and the camera will stay focused on it, ensuring sharp footage.
16. Flight Checklist
Before takeoff, use the Flight Checklist to ensure your drone is ready to fly. It will alert you to any issues with your settings, such as battery life or SD card formatting.
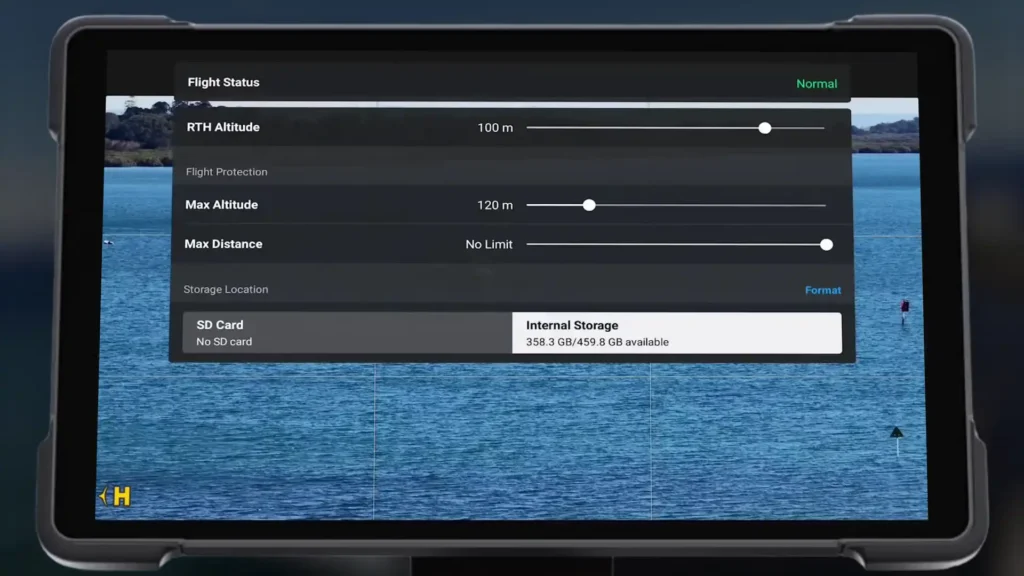
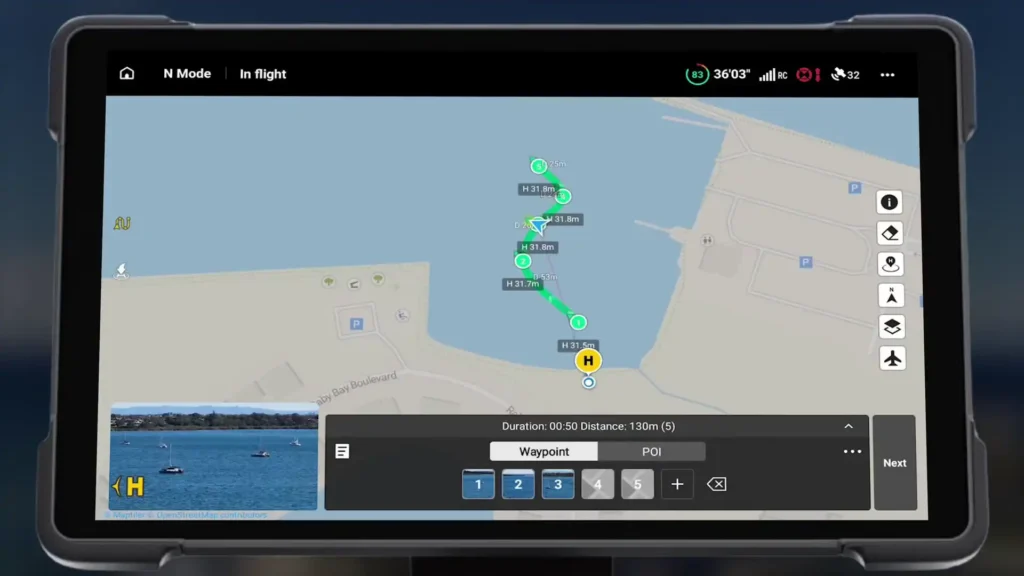
17. Waypoints
Waypoints allow you to set a series of points for the drone to follow. You can customize each point’s action, like taking photos or starting video recording.
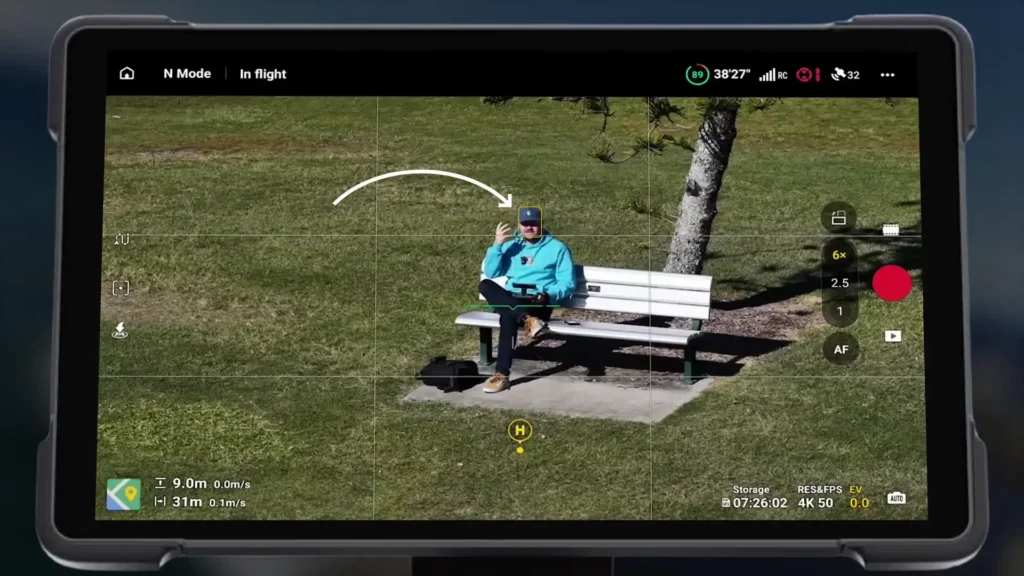
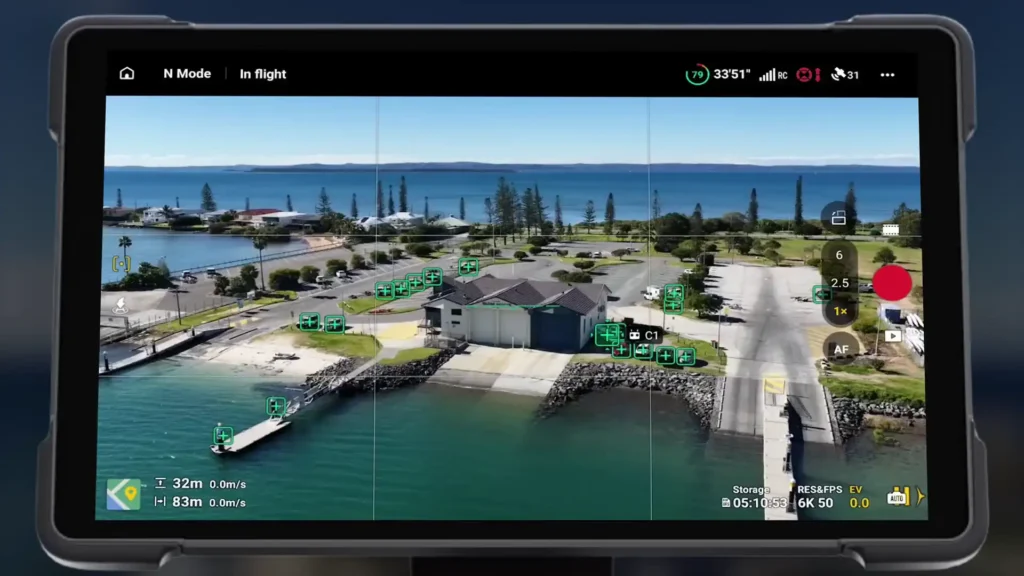
18. FocusTrack
FocusTrack is a powerful feature that lets the drone track a specific subject, such as a moving car or person. It offers several modes, including ActiveTrack and Spotlight, for different tracking needs.
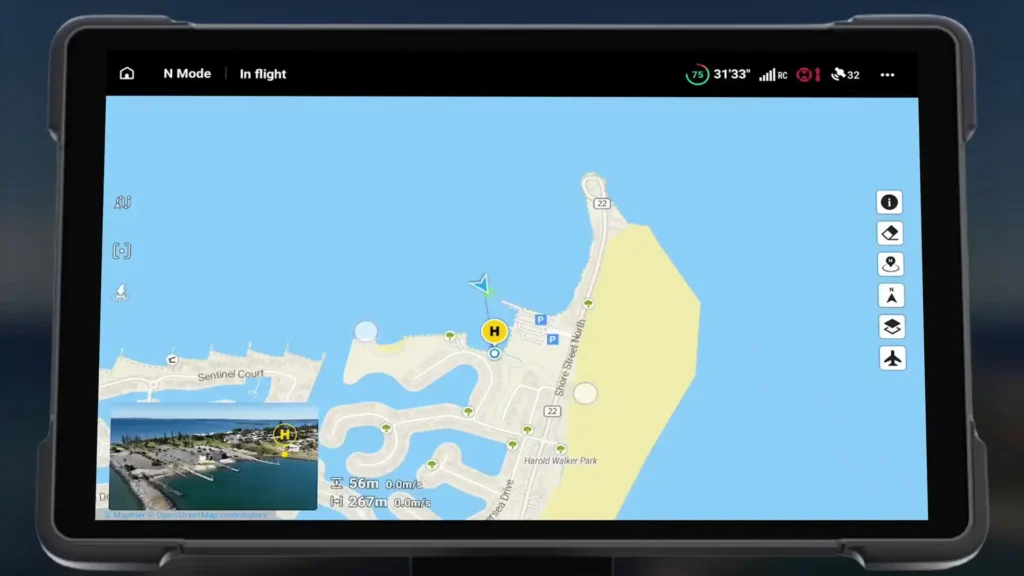
19. Map
The map feature gives you an overview of your flight path, showing where your drone is located, its orientation, and potential collision risks.
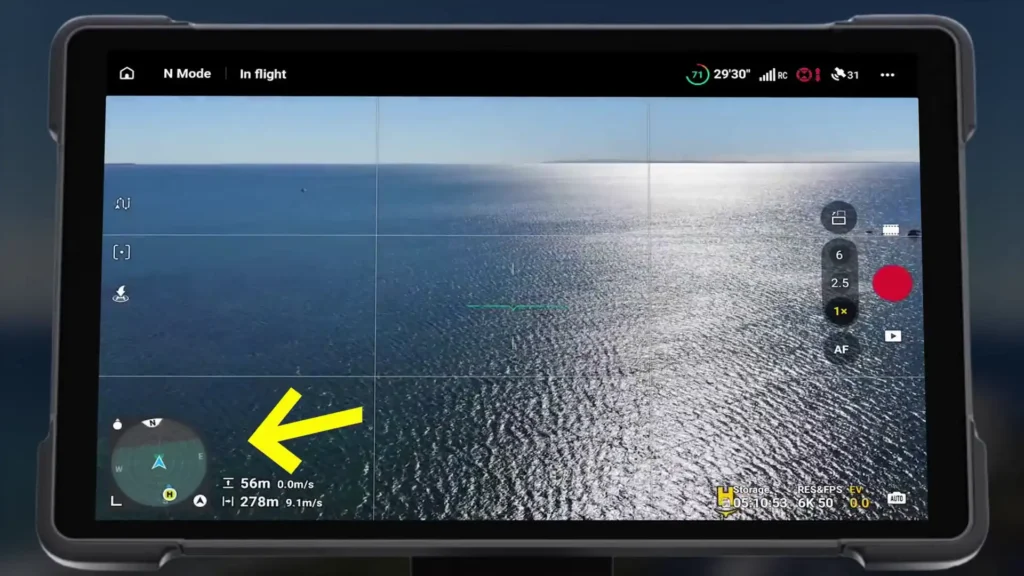
20. Attitude Indicator Compass
The attitude indicator compass displays the drone’s orientation in flight, showing how much the drone is banking or tilting. This can help you maintain steady flight.
- Custom Design: This hard case is specifically designed for DJI Mini 5 pro/Mini 4 pro/Mini 3/Mini 3 Pro & RC 2 Controller…
- Large Capacity: Our Mini 5 Pro case can accommodate 1x Mini 5 pro Drone, 1x RC 2/RC-N3 Remote Controller, 3x Batteries, …

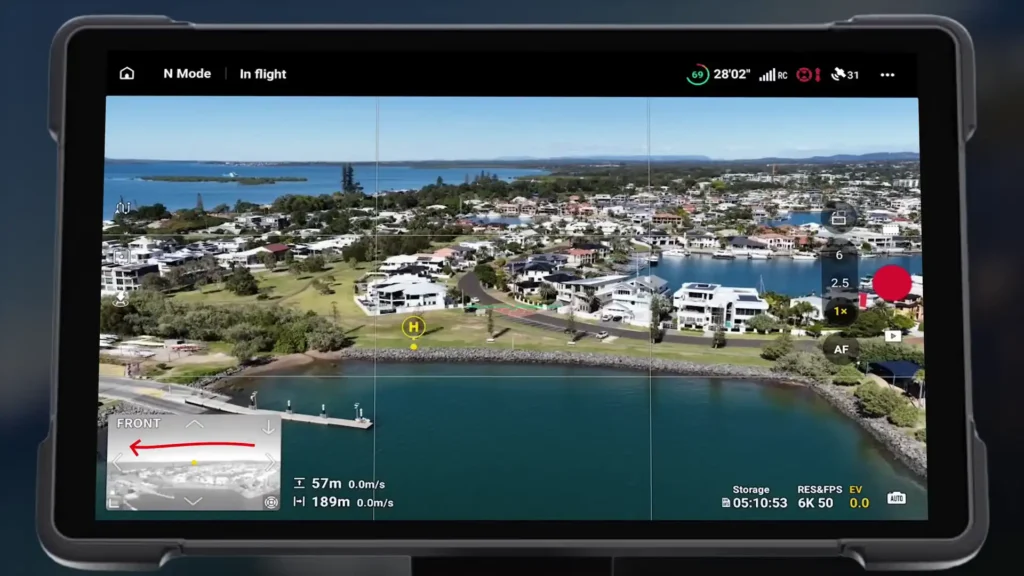
21. Vision Assist
Vision Assist helps you see the drone’s surroundings by displaying a camera feed in the interface. This can be particularly useful when flying in tight spaces or near obstacles.
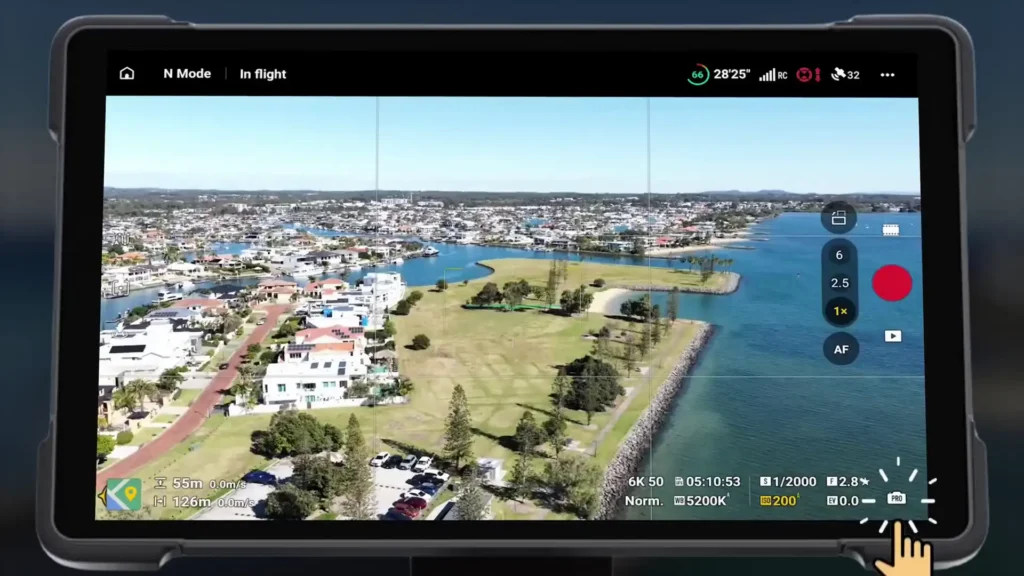
22. Pro Mode
Pro Mode gives you full control over the camera settings, including ISO, shutter speed, and aperture. It’s perfect for users who want to adjust the camera for more advanced shots.
23. Auto Focus & Manual Focus
Switch between auto and manual focus for more control over your shots. Manual focus allows you to fine-tune the focus to your exact preferences.
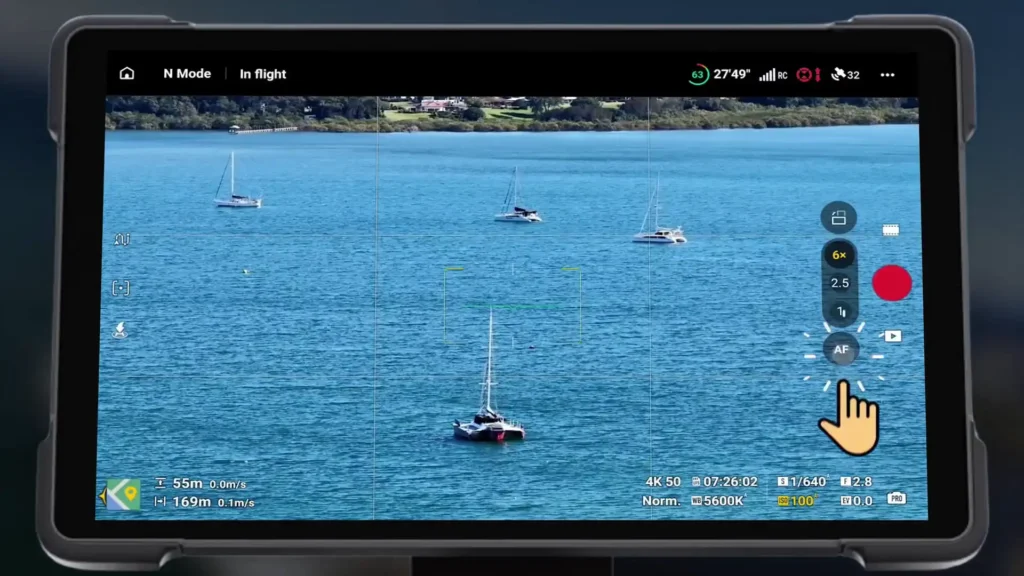
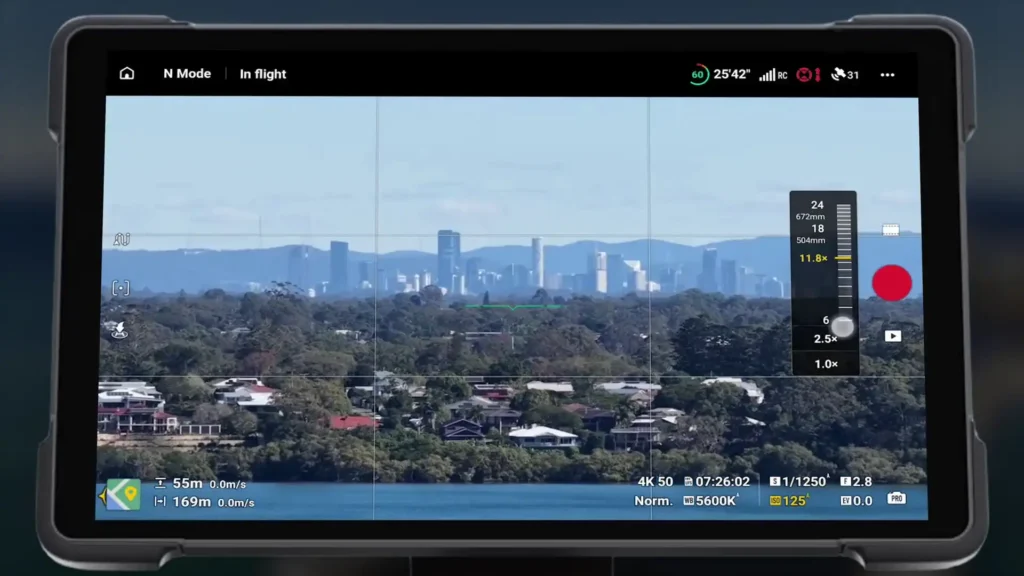
24. Digital Zoom
The Mavic 4 Pro has three zoom levels (1x, 2.5x, and 6x), but you can use the digital zoom to reach up to 24x magnification. While the quality decreases as you zoom further, this feature is great for scouting or inspecting distant objects.

Camera Menu
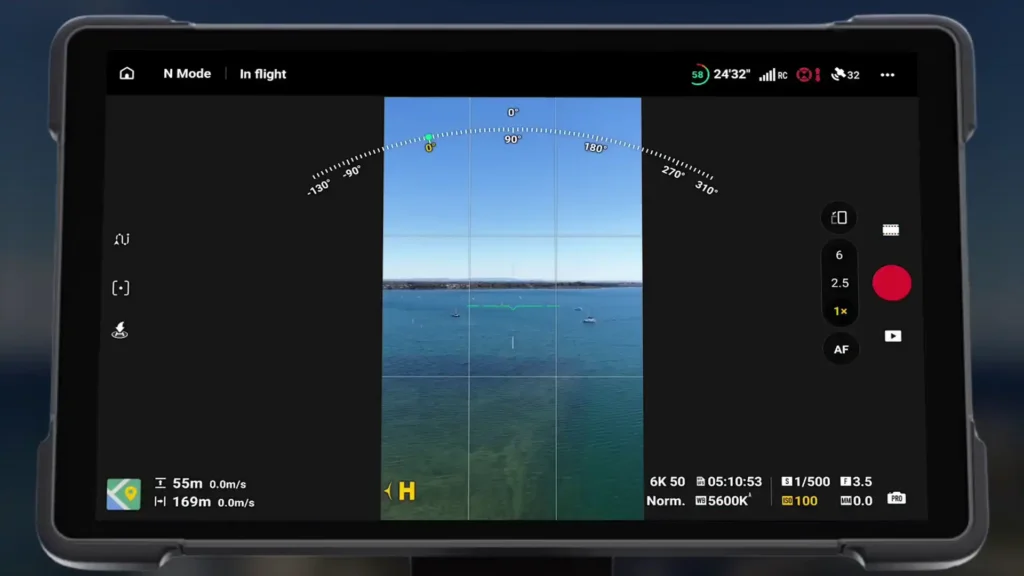
25. Portrait/Vertical Shooting Mode
For shooting in portrait mode, you can quickly switch between portrait and landscape modes by tapping the camera’s orientation button.
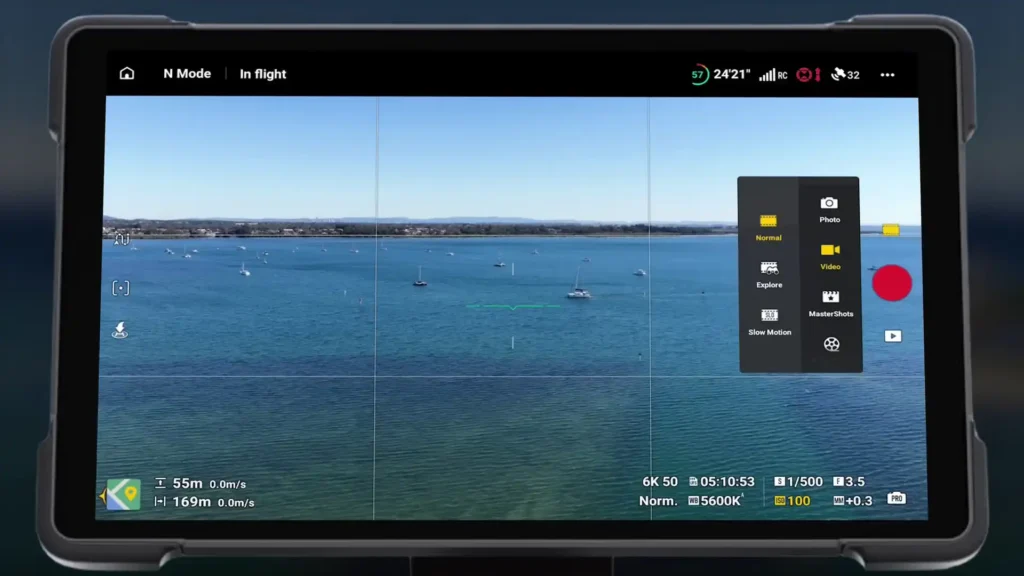
26. Shooting Modes
The Mavic 4 Pro offers various shooting modes, including Normal, Explore, and Slow Motion. Explore mode allows you to switch between different cameras without interrupting your recording.
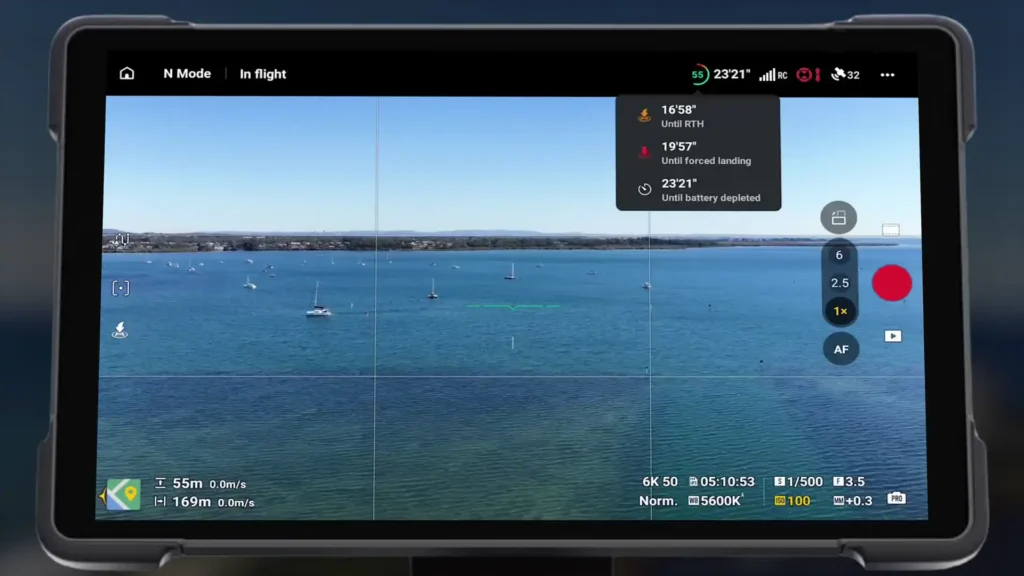
27. Quick Access Icons
Quick Access Icons provide useful information about your drone’s battery life, signal strength, and obstacle avoidance status. Tap on these icons to access more detailed data.
Amazon Deals: Mavic 4 Pro & Mavic 3 Pro
Safety Menu
28. Obstacle Avoidance
Obstacle Avoidance ensures the drone avoids any obstacles in its path. You can toggle between Brake, Bypass, or Off modes depending on your needs.
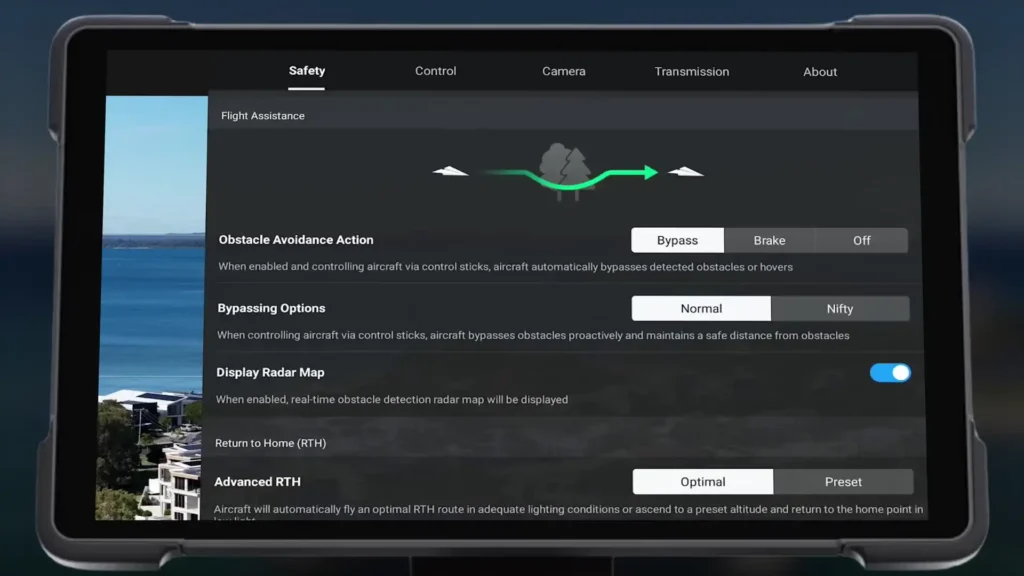
29. Return To Home
The Return to Home feature ensures your drone safely returns to its home point. It can be customized for optimal height and distance to avoid obstacles on the way back.

Control Menu
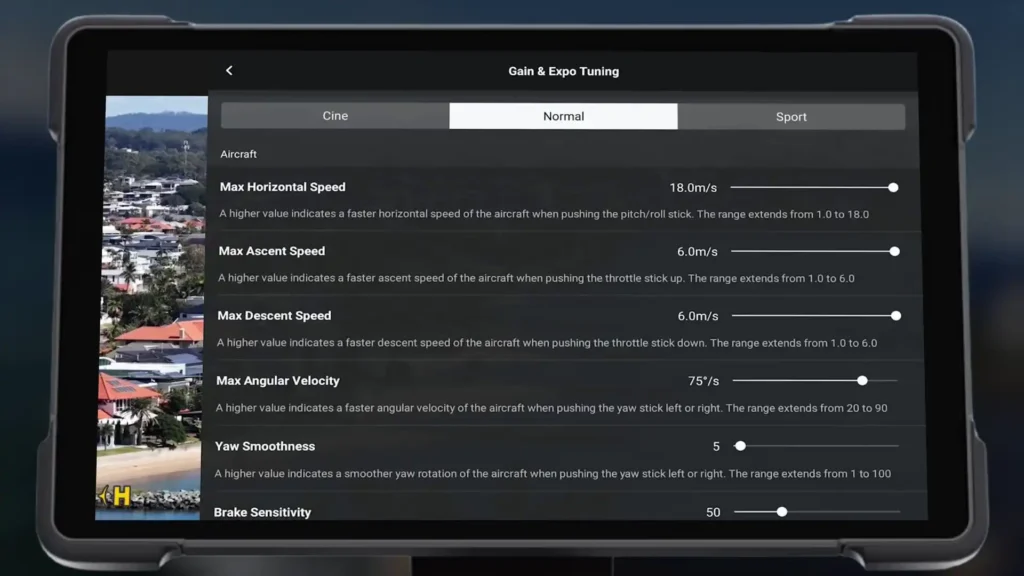
30. Gain and Expo Tuning
Gain and Expo Tuning allows you to customize how the drone handles, including gimbal speed and camera movement smoothness. You can adjust these settings based on your flying style.
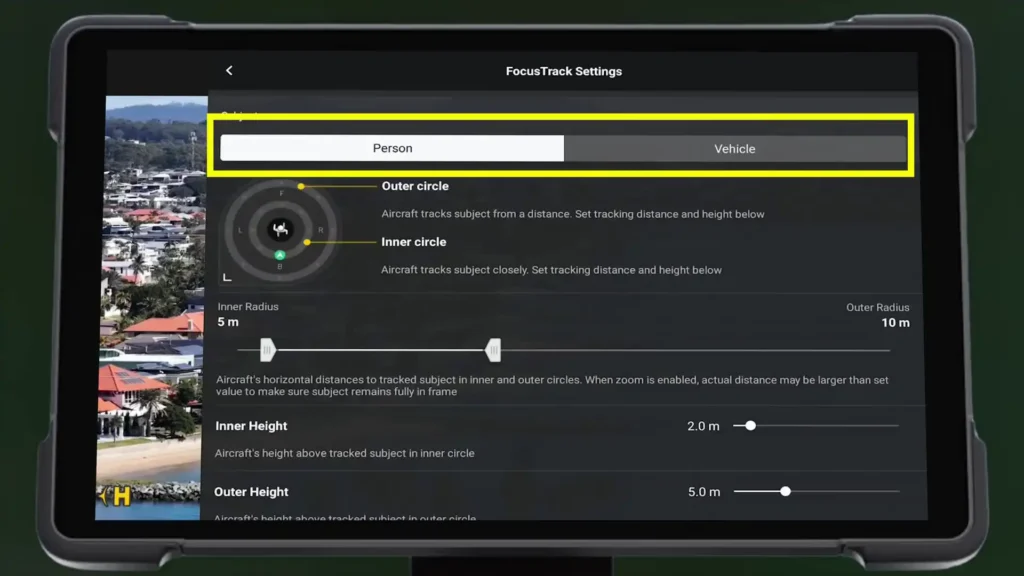
31. FocusTrack Settings
In FocusTrack, you can customize tracking parameters for both people and vehicles. This provides more flexibility in how the drone locks onto and follows subjects.
32. FPV Mode
FPV Mode offers a unique first-person view experience by allowing the camera to lean and provide a more immersive, dynamic perspective.
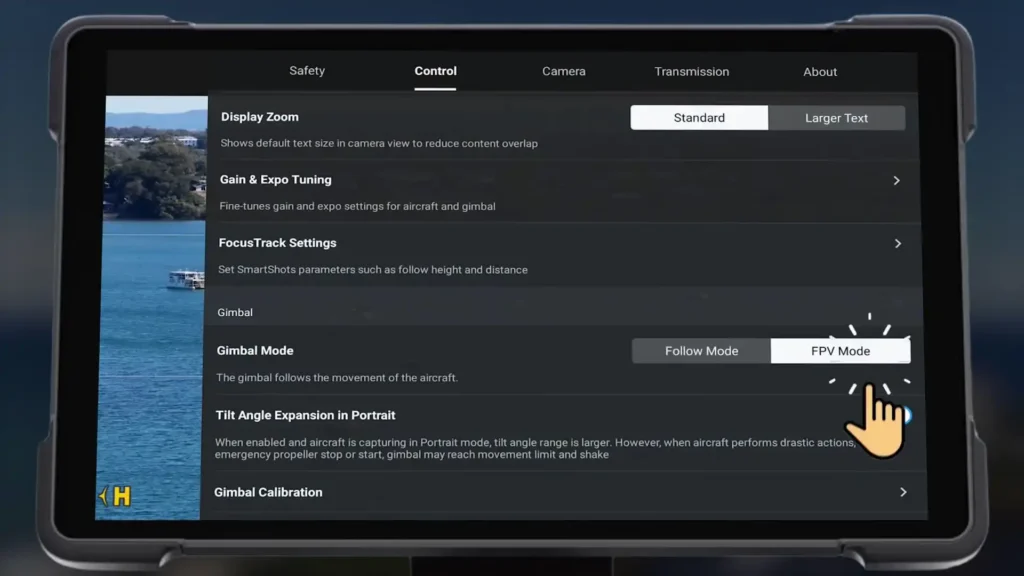
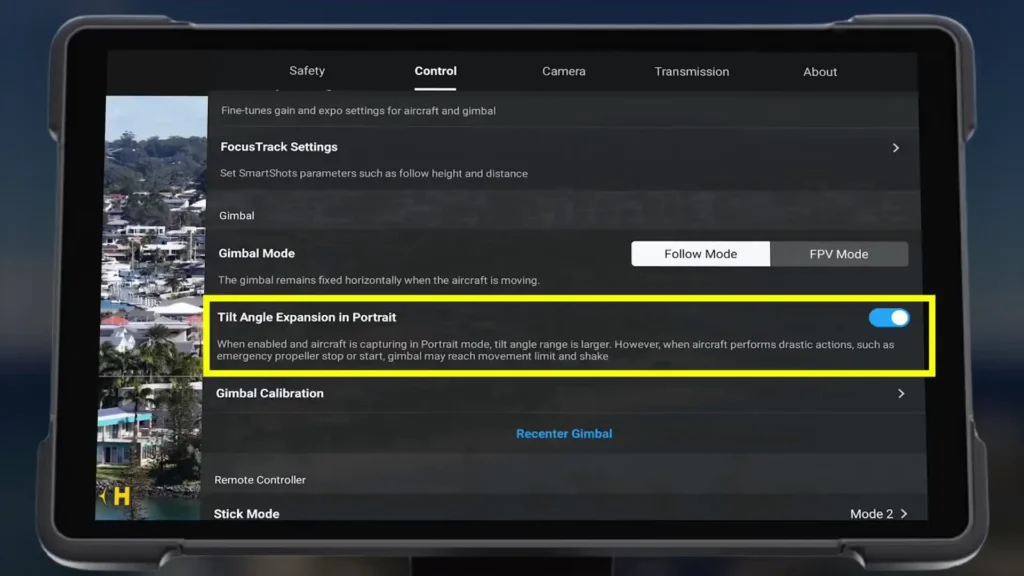
33. Tilt Angle Expansion in Portrait
This setting gives you a larger tilt range when capturing in portrait mode. It’s great for capturing shots with more tilt angle.
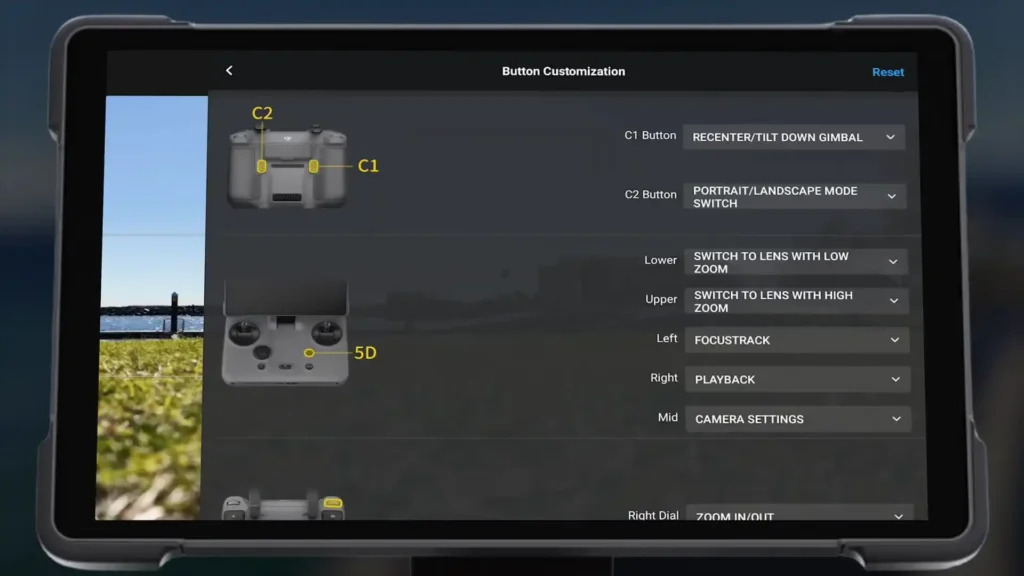
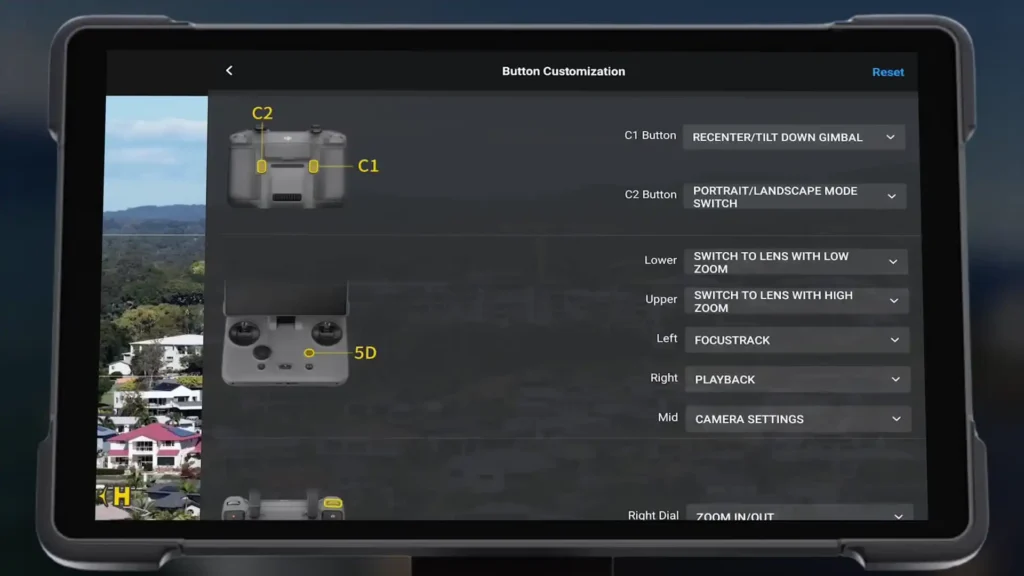
34. Button Customization
Customize the buttons on the RC Pro 2 controller, including the C1 and C2 buttons, the 5D button, and the control dials, to streamline your flying experience.
- STORAGE – Fit DJI Mavic 4 Pro, DJI RC Pro 2/DJI RC 2, up to 6 batteries, charging hub, power adapter, cables, filters, p…
- INTERNAL PROTECTION – CNC precision-cut unibody foam is made of a special type of EVA, which is more elastic than tradit…

Camera Settings
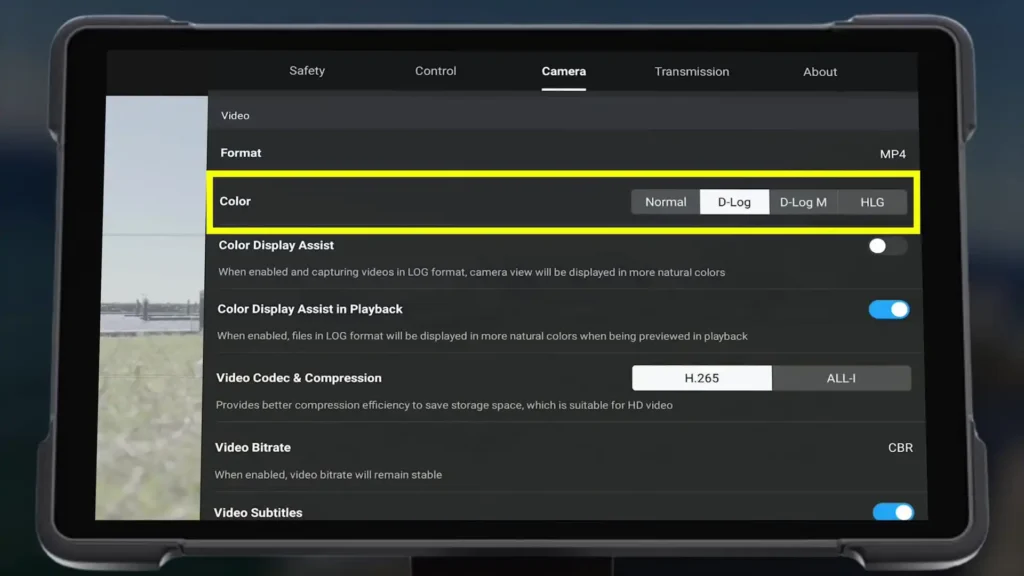
35. Color Mode
Adjust the color profile of your shots with the Color Mode setting. Options include Normal, DLOG, and HLG, each offering different levels of dynamic range.
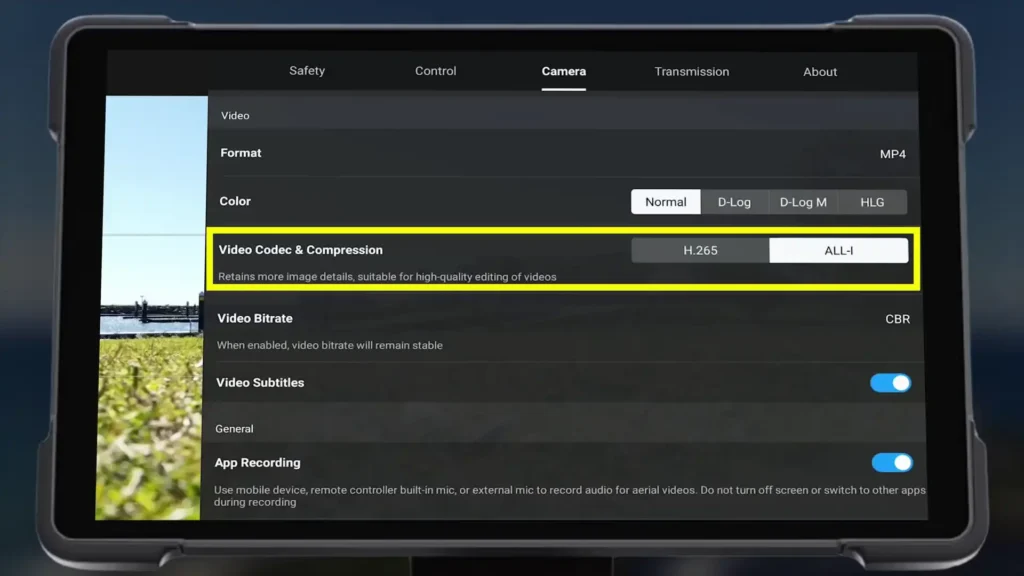
36. All-I Codec
The All-I Codec delivers higher quality footage, making it perfect for post-production work. You can easily enable it in the camera settings.
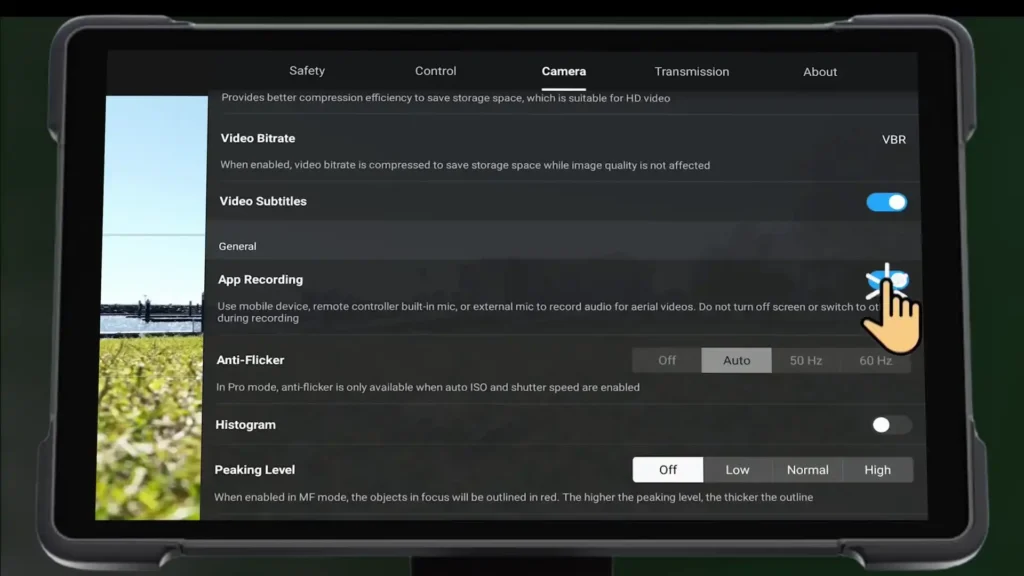
43. Record Audio from Built-In Microphone
Record audio from the built-in microphone or an external mic to add sound to your videos.
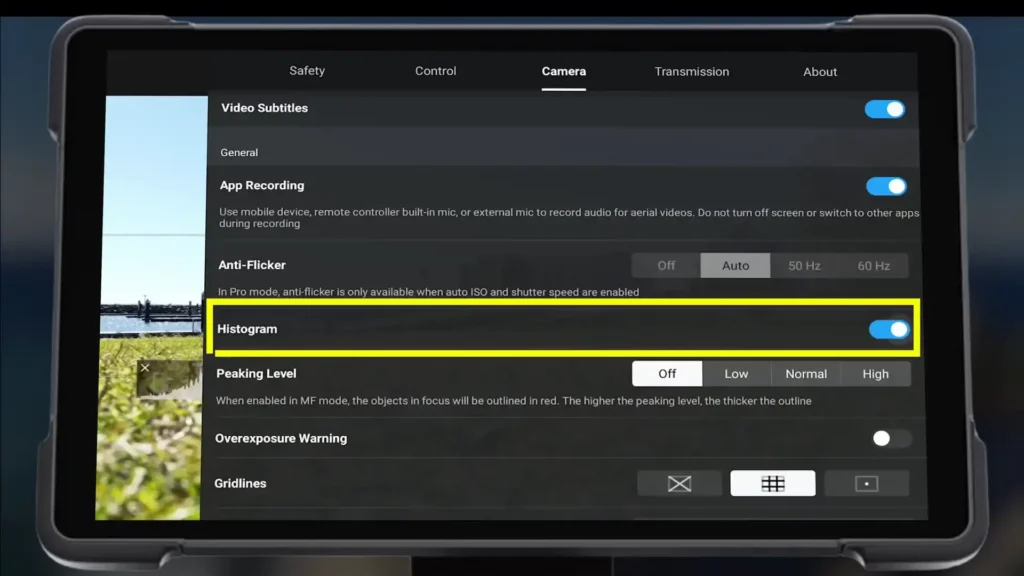
37. Histogram
Use the histogram to check the exposure of your footage in real-time. This is helpful for ensuring your shots are neither underexposed nor overexposed.
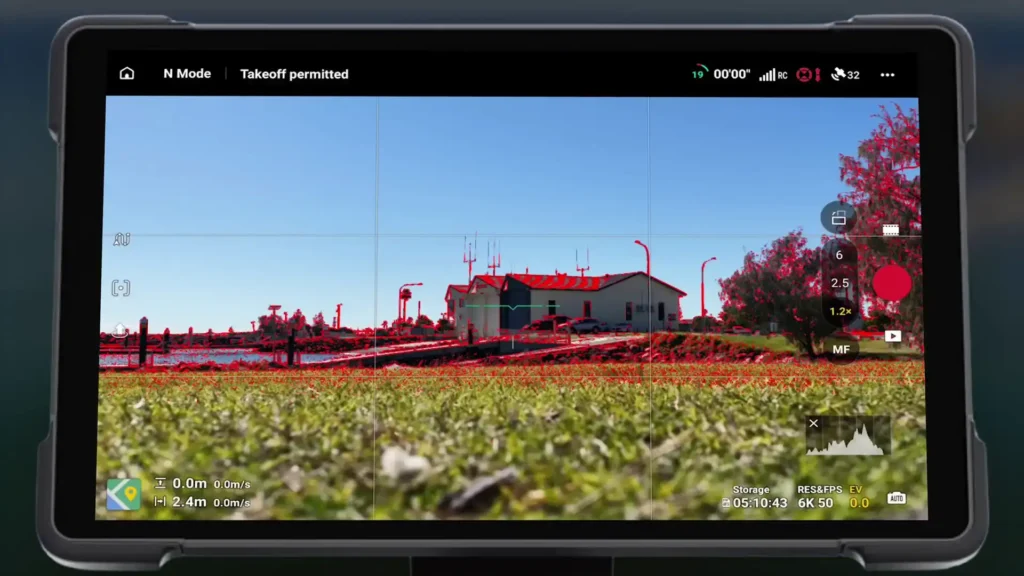
38. Peaking Level for Manual Focus
Enable peaking level to assist with manual focus. The peaking level highlights the areas in focus, helping you achieve sharp shots.
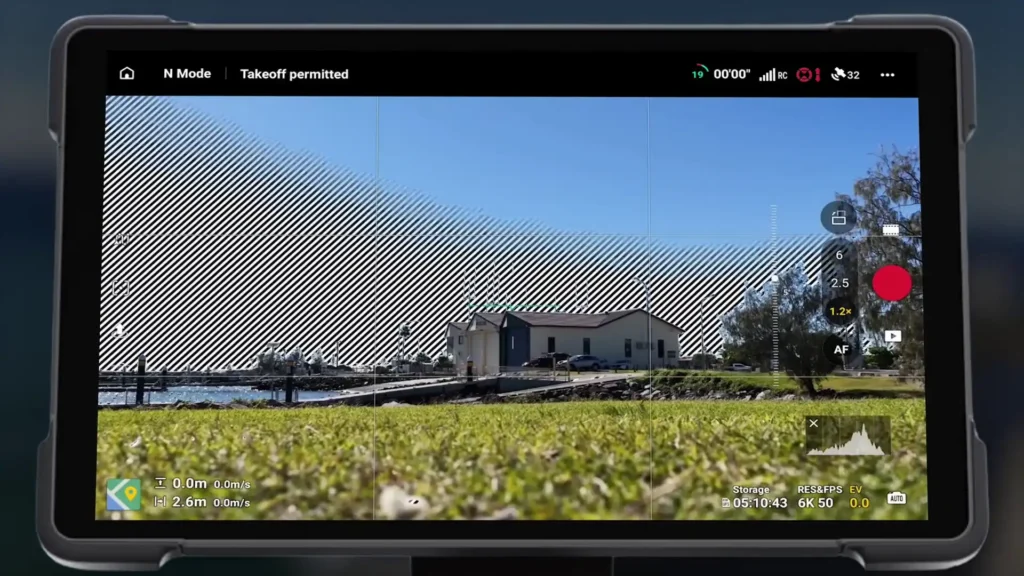
39. Overexposure Warning
Turn on the overexposure warning to get an alert when the image is too bright. This helps prevent overexposed footage.
Amazon Deals: Mavic 4 Pro & Mavic 3 Pro
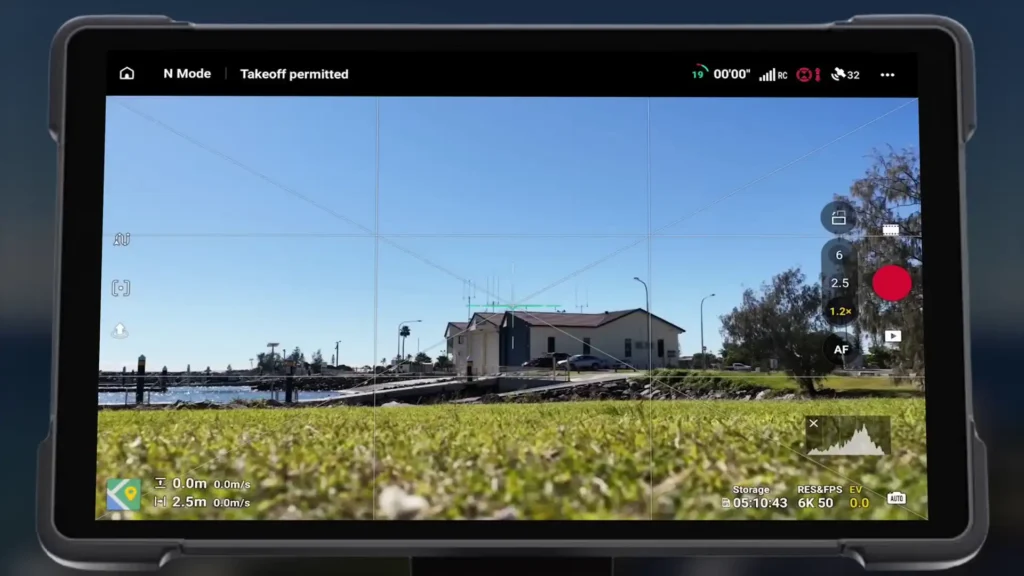
40. Gridlines
Enable gridlines to assist with framing your shots. You can use the rule of thirds or add diagonal lines for better composition.
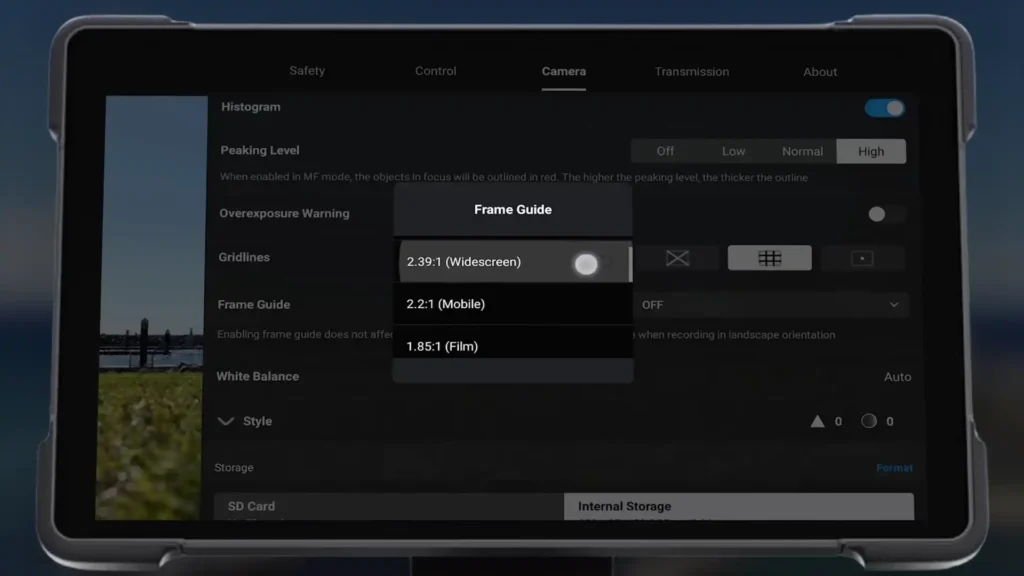
41. Frame Guide
The frame guide helps you frame your shots based on different aspect ratios, such as 1:1 for Instagram or 9:16 for vertical shots.
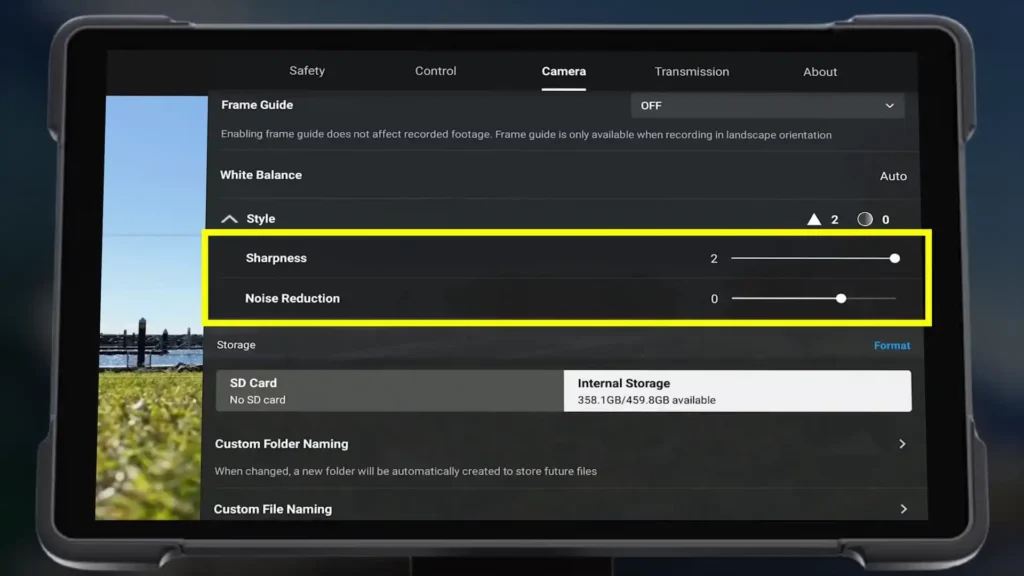
42. Sharpness & Noise Reduction
Customize the sharpness and noise reduction settings to improve image quality, especially in low-light conditions.
43. Storage
Check the storage status of your SD card and internal memory. You can format your storage directly from this menu.

Advanced Settings
44. Live Streaming
The live streaming feature allows you to stream directly from your drone using RTMP, which is great for broadcasting your flight in real-time.
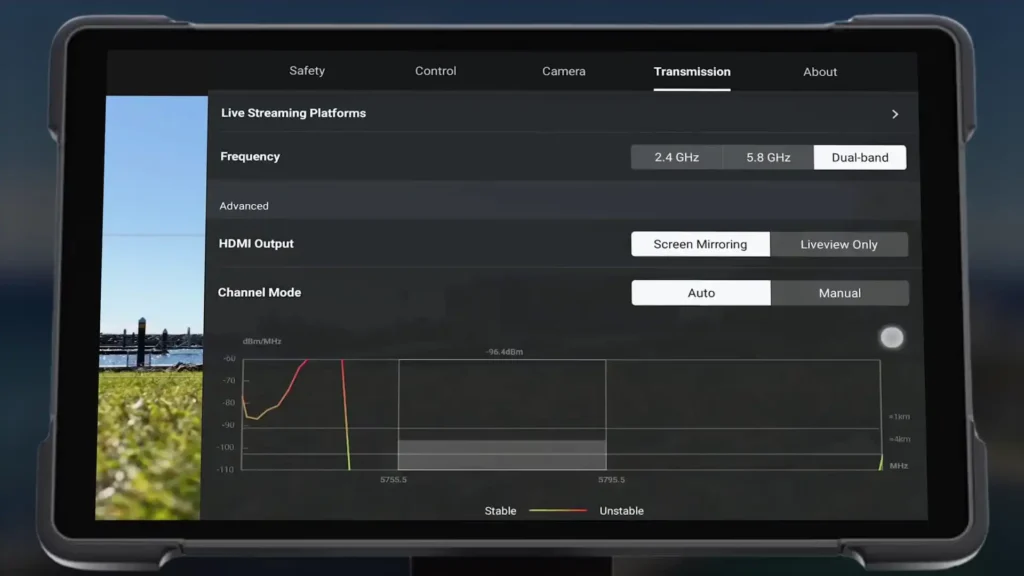
45. HDMI Output
The HDMI output lets you connect your drone to external monitors or projectors, with options for screen mirroring or live view.
46. View Interference
Monitor the interference levels in your flying area. You can adjust the frequency to find the best signal for your location.
47. Change Channel
If you’re experiencing signal issues, you can manually change the transmission channel to optimize your connection.
About Menu
48. Check For Updates
Ensure your drone’s firmware and software are up to date by manually checking for updates in the About Menu.
49. Reset All Settings
If you’ve made too many changes and want to revert to the factory settings, the “Reset All Settings” option will restore everything to its default state.
50. Clear All Data
Before selling your drone or wiping it clean, use the “Clear All Data” option to erase all user data and settings.
Table of Contents
Article Summary
With these 50 tips and settings, you now have a complete guide to mastering the DJI Mavic 4 Pro. Whether you’re looking to improve your flying skills, enhance your footage, or ensure safe operations, these settings will help you get the most out of your drone. Happy flying!
Read More: DJI Mini 5 Pro Leaks: Release Date, Price, Specs, and Features


