Did you just get yourself the DJI Neo 2, but you are completely overwhelmed with all the different settings available in this drone? You are not alone. There are so many options that it can feel unbelievably overwhelming to figure out everything, and that is exactly where this guide comes in handy.
This is Part 1 of a two-part series focused entirely on how you can get the most out of the DJI Neo 2 using just your phone. You can actually use your phone exclusively for a wide range of settings, and you can also hand launch the drone and use the buttons on the side of the aircraft itself.
This guide covers everything you need to know about flying the DJI Neo 2 without a controller. Part 2 covers how to use the drone with a controller. Let’s get straight into all 28 must-know DJI Neo 2 tips and settings.
Table of Contents
Tip 1: How to Hand Launch the DJI Neo 2 Without a Phone or Controller
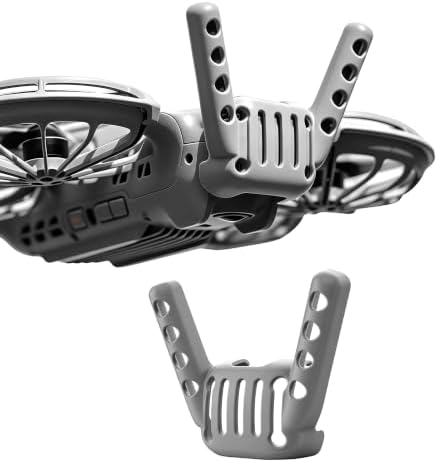
The first thing you need to know is how to use the physical buttons on the drone to hand launch it without needing your phone or a controller at all. There are three buttons on the drone.
The orange button acts as the action button to start the drone, launch it, and initiate the process. Then there is a left and a right button that let you cycle between the different available flight modes.
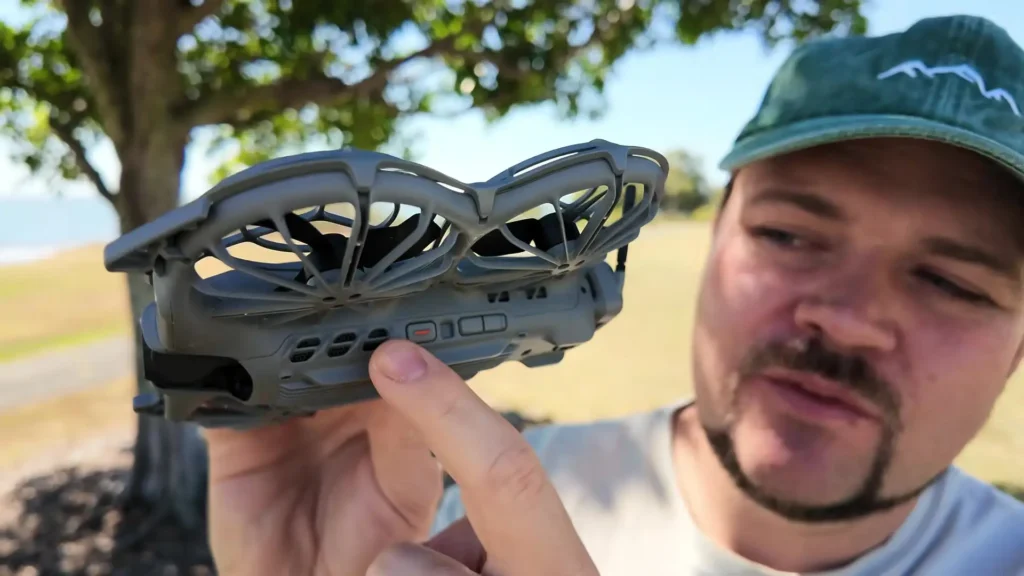
You can press the left or right button to move between the different modes, and the drone will audibly let you know which mode it has switched to. Once you find the mode you want, press the orange button and it will begin a short countdown. You can press the orange button again to cancel the launch if needed.
What makes this even more impressive is that you can also change the parameters within each mode directly from the drone. If you press and hold the right arrow button, the screen will start flashing and you can begin adjusting various parameters.
For example, in the follow mode, you can change the angle between low, flat, or high. Press and hold the left button to move to the next menu, where you can switch between far, medium, or close distance. Press and hold again and you can change the direction, cycling through options like front, front right, and right.
This works across all the different modes. Even in the selfie shot mode, which is the new DJI Neo 2 feature, you can go in and choose options like high angle close-up, medium, high angle wide, and even select how many different photos you want captured, from three sets all the way up to five sets.
Once you have made your selections, press the orange button to confirm, and press it once more to initiate the process. All of this happens without touching your phone at all. The drone is ready to go straight away.
Another cool feature, which will be covered in more detail shortly, is that through the app you can actually change which modes are available on the drone screen itself. You can add modes and remove modes to suit your flying style.
Tip 2: How to Use Gesture Controls on the DJI Neo 2
Gesture controls allow you to control the drone using just your hands, without touching your phone or a controller at all. There is one important thing to note before using this feature: you do need to enable gesture controls through the app settings before they will work. Once enabled, you can launch the drone and immediately start using gesture control.
When the drone is in follow mode, it will track and follow you as you move around. At any point, if you raise your hand, the light on the drone turns blue and you take control.
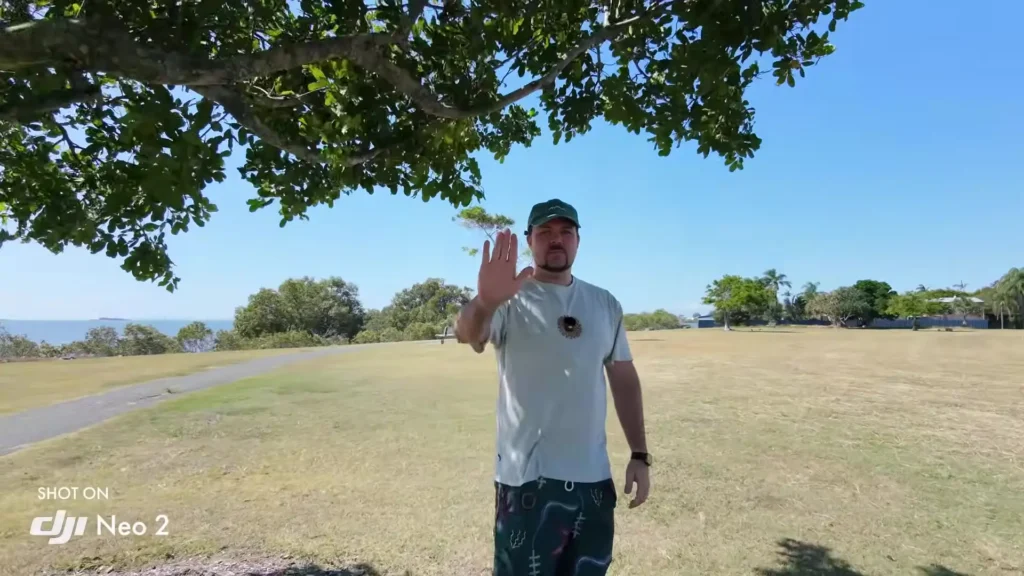
You can direct the drone to keep following you, spin it to one side, or move it in another direction. You can also use both hands to push the drone away from you, and then bring your hands back together to signal it to return closer to you.
As soon as you lower your hands, the drone immediately returns to follow mode. It is simple and intuitive once you get the hang of it. When you are ready to land, simply hold your palm out flat and the drone will recognize the signal, come in close, and land directly on your hand. It really is that straightforward.
Tip 3: How to Connect the DJI Neo 2 to Your Phone
Connecting the DJI Neo 2 to your phone is incredibly simple. As soon as the drone is powered on, you should see a notification appear in the bottom left corner of the DJI Fly app that says Neo 2 detected.
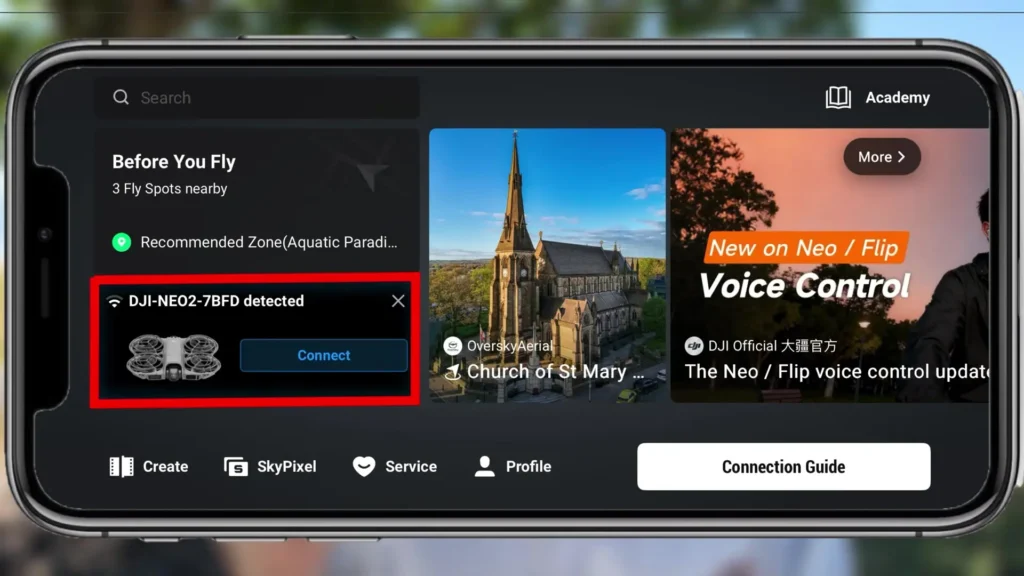
Tap on connect, and the app will join the Wi-Fi of the drone. After a brief loading animation, the drone will be fully connected. From there, you are immediately taken into the live video feed interface with all of the controls available to you. That is all there is to it.
Tip 4: The Pre-Flight Checklist
Once connected, you will notice in the top left of the app interface it says “Take off permitted.” If you tap on that, it will open the pre-flight checklist. This checklist will display any warning messages you might need to be aware of before flying, such as issues with the gimbal, a broken propeller, problems with the battery or motors, or the vision system and obstacle avoidance status.
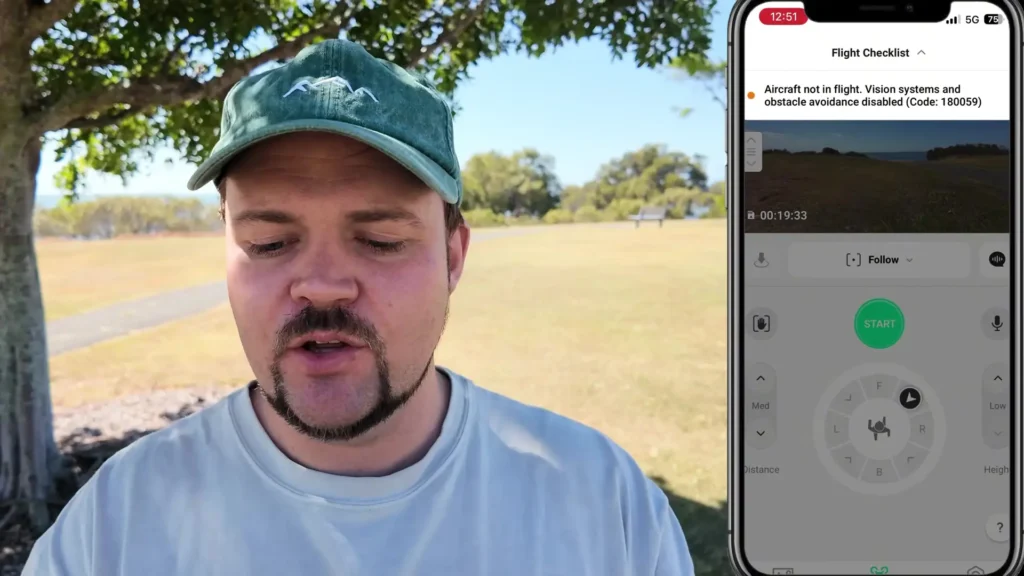
It is always a good habit to tap on this before every flight just to make sure everything is in order. Any issues will be clearly listed there, so you know exactly what to address before you get airborne.
Tip 5: Understanding the Battery Information
The battery percentage is displayed at the top of the app interface. When you tap on it while the drone is in flight, it reveals some critical information.
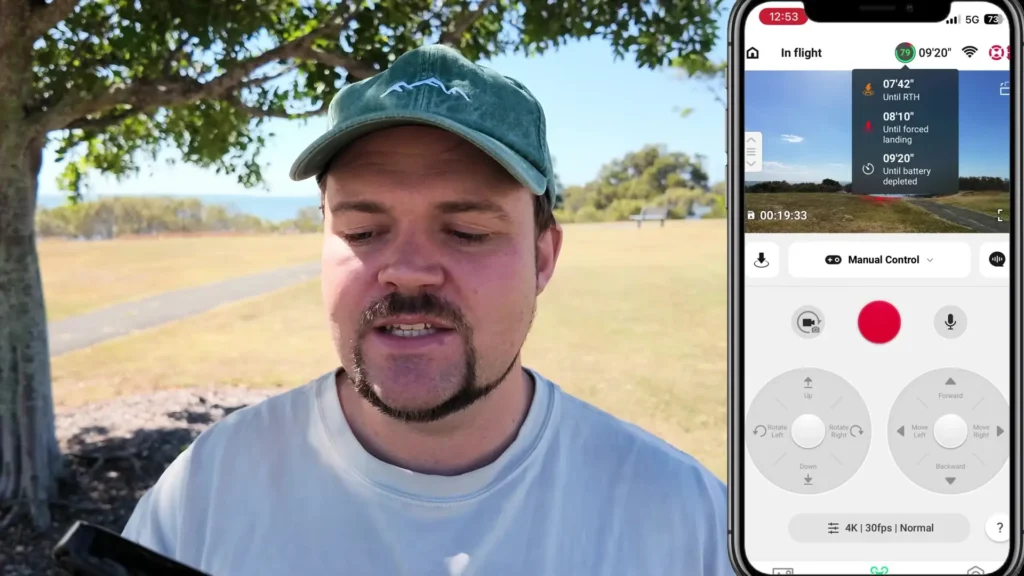
You will see exactly how many minutes you have until the drone initiates a return to home, how many minutes until a forced landing will begin, and how many minutes until the battery is completely depleted.
This is really key information to be aware of mid-flight, and having it available at a quick tap is extremely useful. Keep in mind that the drone does need to be in the air for these metrics to populate. If the drone is on the ground, all of those values will show as zero.
Tip 6: Signal Strength and Obstacle Avoidance
In the top right corner of the app interface, just next to the battery icon, there is a Wi-Fi signal icon. Tapping on it will show you your current signal strength. Even when the drone is a fair distance away, you will often see it reading as excellent signal, which is reassuring.
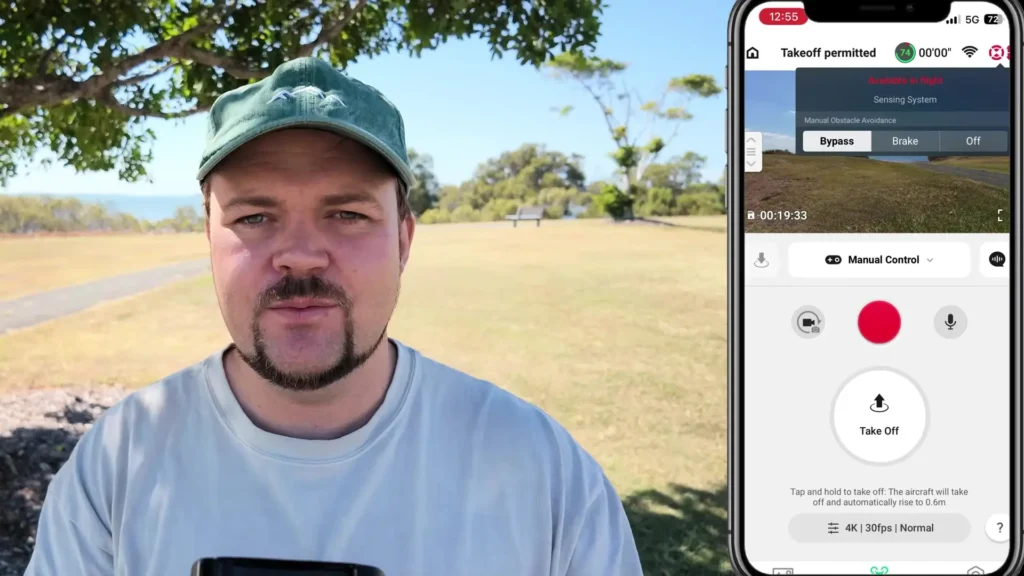
Just to the right of the signal icon is the obstacle avoidance icon. Tapping on that gives you direct control over the obstacle avoidance settings without having to go into any deeper menus. You can switch between three options: obstacle avoidance off, brake mode, and bypass mode.
This is a newer feature on the Neo 2. Previously, tapping on that icon would only show you the current obstacle avoidance status. Now you can change it on the fly directly from that icon. When the drone is in the air, the icon will reflect whichever mode is currently active, making it easy to monitor and adjust at a glance.
Tip 7: How to Control the Gimbal
On the left-hand side of the video feed, there is a small slider icon. To control the gimbal, simply press and hold on that slider and drag it up or down. Dragging down angles the gimbal downward, and dragging up angles it upward. You have full control over the gimbal angle this way, and it works just as well mid-flight as it does on the ground.
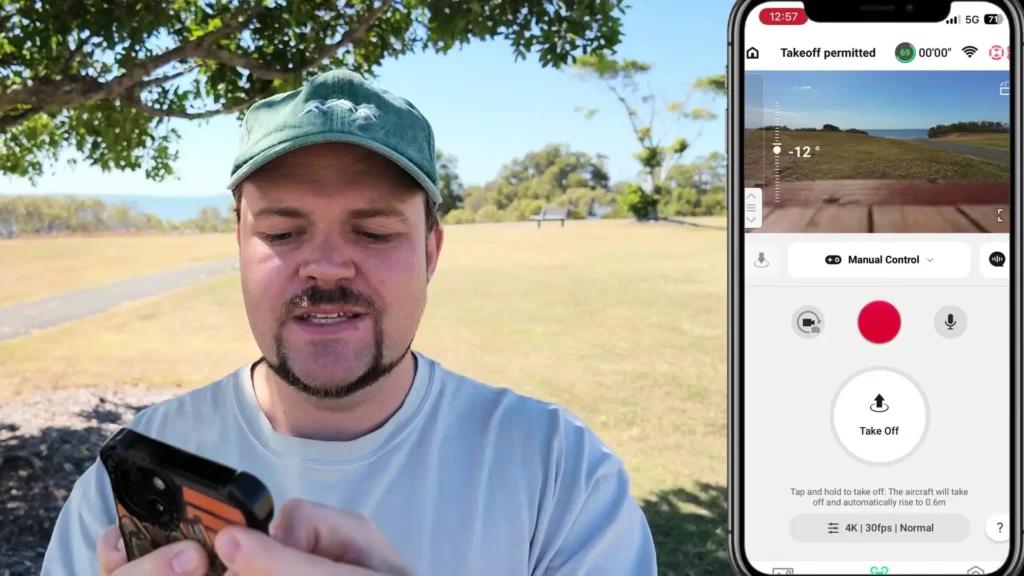
When you release the slider, it fades back into a subtle part of the interface. As soon as you press and hold again, it reappears along with a readout showing you the exact angle the gimbal is positioned at. It is a clean and simple way to adjust your shot perspective without needing to dive into any menus.
Tip 8: How to Switch to Vertical Video Mode
In the top right corner of the video feed, just below the obstacle avoidance icon, there is a small icon that allows you to toggle between horizontal and vertical video mode. Tapping it once crops the feed into a vertical format.
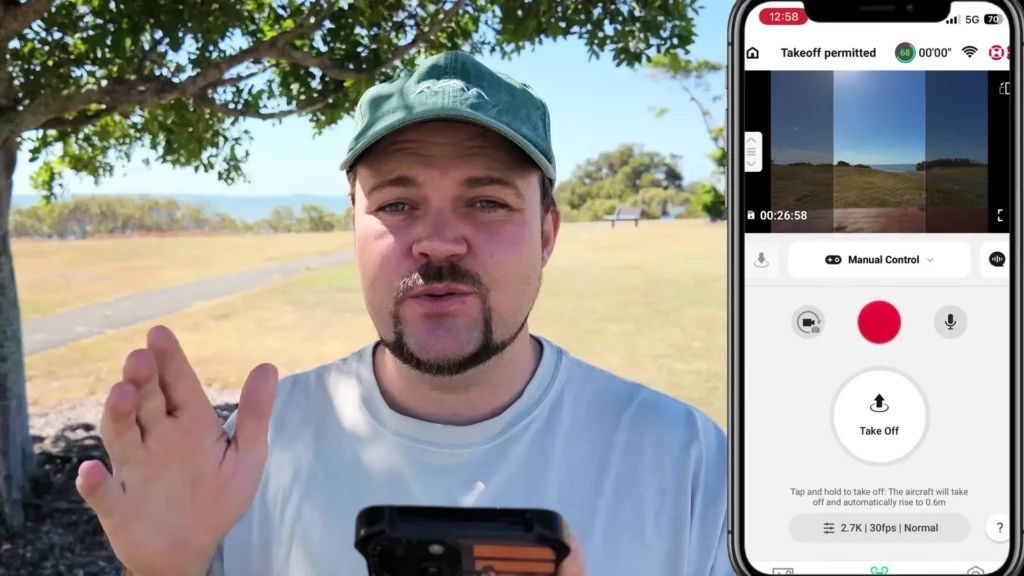
Tapping it again switches back to horizontal. The camera itself does not physically rotate. It is simply a crop within the app that formats the content for vertical output.
This is incredibly handy if you are capturing content for platforms like Instagram Reels or TikTok, where vertical video is preferred. You can switch between the two formats at any point, even while the drone is in flight.
Tip 9: Flight Mode Selection
The flight mode selection is one of the most important features to understand on the DJI Neo 2. You will see the current mode displayed in the app interface. Tapping on it brings up the full list of available flight modes.
From here, you can quickly tap on any mode to switch into it, and the interface will automatically adjust depending on which mode you select.
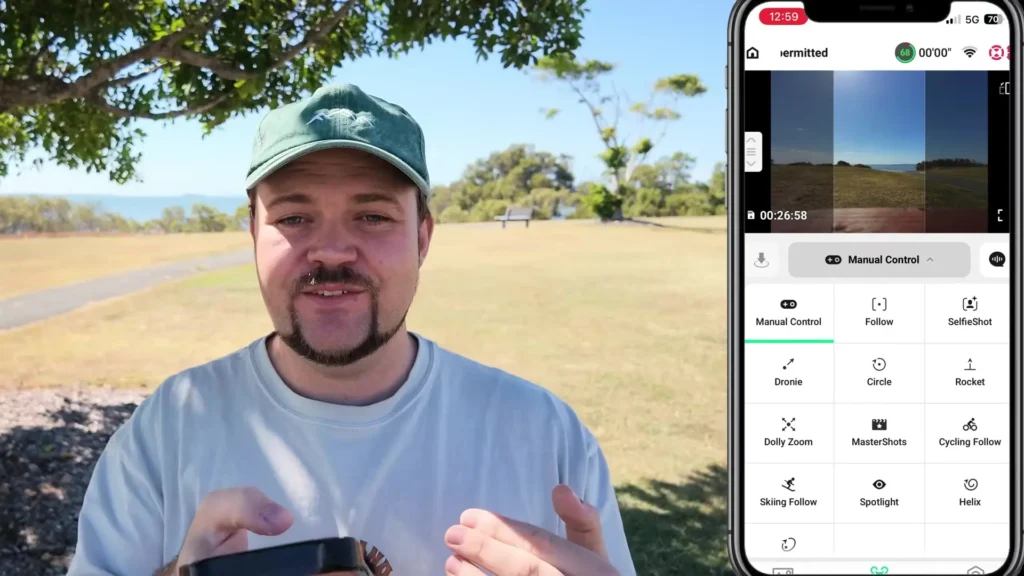
The modes available include manual control, follow, spotlight, helix, master shots, skiing, dronie, circle, rocket, and more. You can also tap on “Customize Modes” from this menu, which gives you even more control over how everything is organized.
This is where you can also manage what modes are displayed directly on the drone itself, which ties back to what was mentioned in the first tip. The ability to switch between modes mid-flight is quick and seamless, making it easy to adapt your creative approach on the go.
Tip 10: Voice Control on the DJI Neo 2
The DJI Neo 2 supports voice control, which means you can actually tell the drone what to do using spoken commands. The wake word is “Hey Fly.” Once you say that, the drone will respond and wait for your command.
You can say things like “Hey Fly, follow front close” to put the drone into a close front-facing follow mode, or “Hey Fly, follow rear” to have it follow from behind. You can also say “Hey Fly, circle” to initiate the circle mode, or “Hey Fly, land” when you want to bring it down.
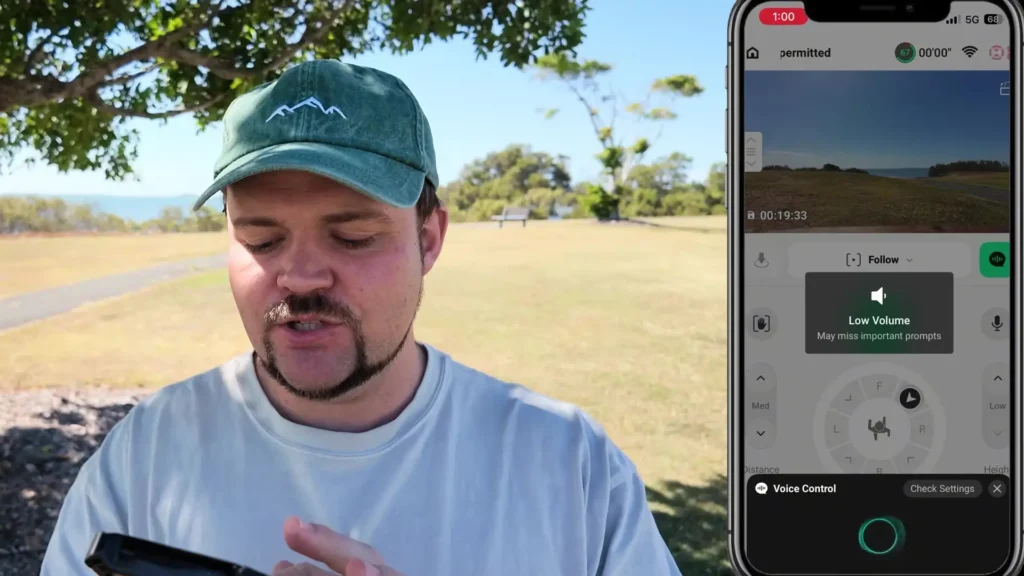
There is a settings page within the voice control section that lists all of the available commands, broken down into recording prompts, following prompts, and safety prompts like land, brake, and stop.
One thing to keep in mind is that the subject needs to be in the shot for certain commands to work correctly. If the drone cannot detect a subject, it may not respond as expected to follow-related commands.
To access voice controls, tap on the voice control icon in the app interface. You can also disable voice wake-up entirely through the control settings if you prefer not to use it.
While voice control might not be something you reach for on every flight, it is a genuinely useful feature when your hands are occupied or when you want to change modes quickly without interacting with your phone screen.
Tip 11: Focus Track Settings
Focus Track is a powerful feature that lets the drone automatically follow and keep you in the frame. To access it, launch the drone and bring it into position. When you are in follow mode, you will notice a plus icon appear on the screen.
Tapping that plus icon immediately puts the drone into tracking mode using spotlight by default, which means the camera stays locked on you even if the drone is not physically moving toward you.
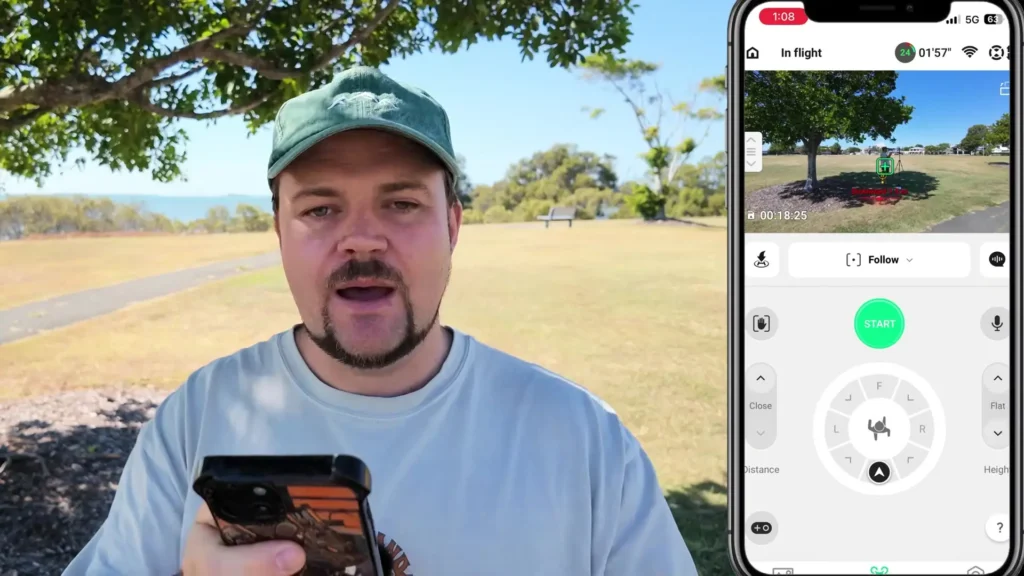
If you want the drone to actively follow your movement, press start and it will begin tracking you as you move. You can access Focus Track from several different modes, including master shots and dronie.
It disappears when you are in manual control mode, but returns as soon as you switch to a compatible mode. The plus icon is your quick access point into the Focus Track experience, and it is a great tool to use when you want hands-free tracking without having to configure everything from scratch.
Tip 12: Flight Controls and Adjusting Parameters
Going a little deeper into the flight controls, each mode comes with its own set of adjustable parameters that can be changed directly within the app interface. In follow mode, for example, you can use the on-screen arrows to adjust the height between flat, low, and high.
You can also adjust the following distance between close, medium, and far. The gesture control toggle is visible here as well, so you can enable or disable it without going into the settings menu.
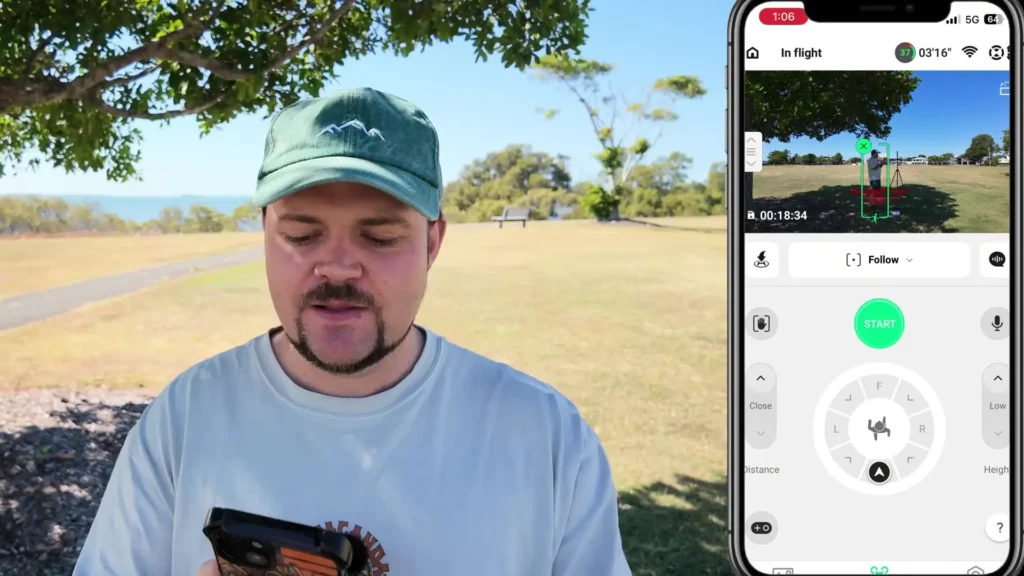
The manual controls are always available in the bottom left corner of the interface in case you need to take back control at any point for safety reasons. You can also choose which direction the drone follows you from, whether that is from the front, the rear, the side, or other angles. Once you have set up your preferred parameters and the drone has recognized you as the subject, pressing start will begin the tracking sequence.
Other modes like circle have slightly different interfaces, with options such as radius, altitude, and speed. The selfie shot mode provides visual illustrations of each option to help you understand exactly what to expect.
The key takeaway here is that each mode has its own unique interface, and taking a bit of time to explore each one will help you get the most out of every flight.
Tip 13: Manual Flight Controls
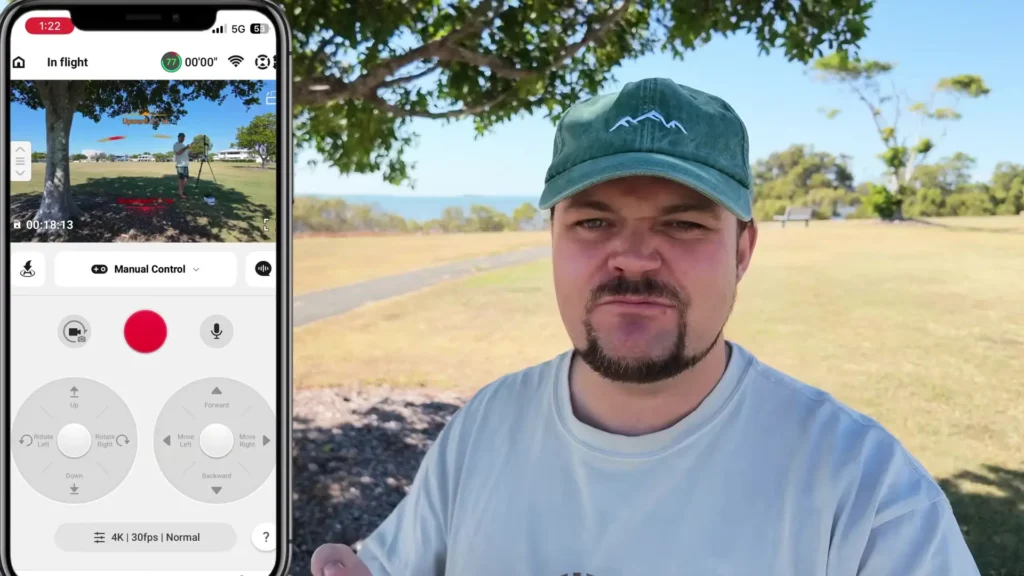
Manual control is the mode that gives you full hands-on control of the DJI Neo 2 from your phone. To access it, press the mode selection button, scroll through the options, and tap on manual control.
From there, you will see the interface update to show you the recording button, an audio recording toggle, and the option to switch between photo and video mode. At the bottom, you can also adjust the portrait or landscape orientation, resolution, and frame rate before you take off.
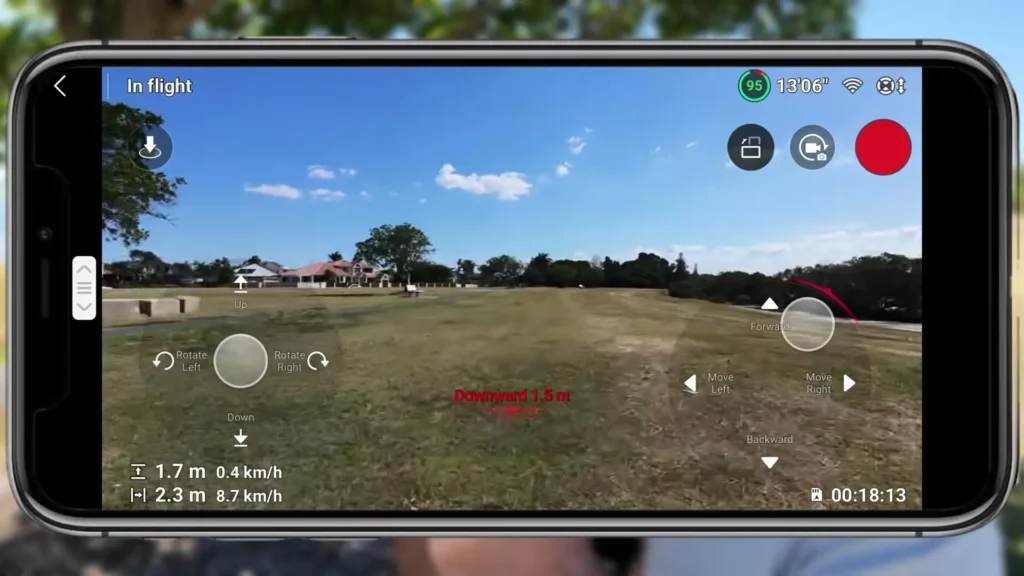
Press and hold the takeoff button to launch the drone, and then you have full control to fly it yourself. One of the best features in manual control mode is the full screen button, located in the bottom right corner of the video feed. Pressing that expands the view to fill your entire screen, making the experience feel much more like a video game controller setup.
You can fly the drone forward, backward, left, right, increase altitude, decrease altitude, and rotate, all from the on-screen controls. The responsiveness is impressive, with virtually no noticeable latency.
Even while in full screen mode, you still have access to the gimbal slider, the return to home button, the land button, the portrait toggle, and the photo mode switch. Manual control is a really important mode to get comfortable with, and it is best practiced in a safe, open environment before taking the drone out in more complex locations or windy conditions.
Tip 14: Customized Modes
Customized Modes is the feature that lets you control exactly which modes appear on the physical drone screen when you are flying without your phone. To access it, press on the mode selection button, scroll down, and tap on “Customize Modes.” You will see a list of shooting modes.
The ones displayed at the top are the modes currently programmed onto the drone. To add a new mode, press and hold it from the lower section and drag it up into the active list. To remove a mode, you drag it back down.
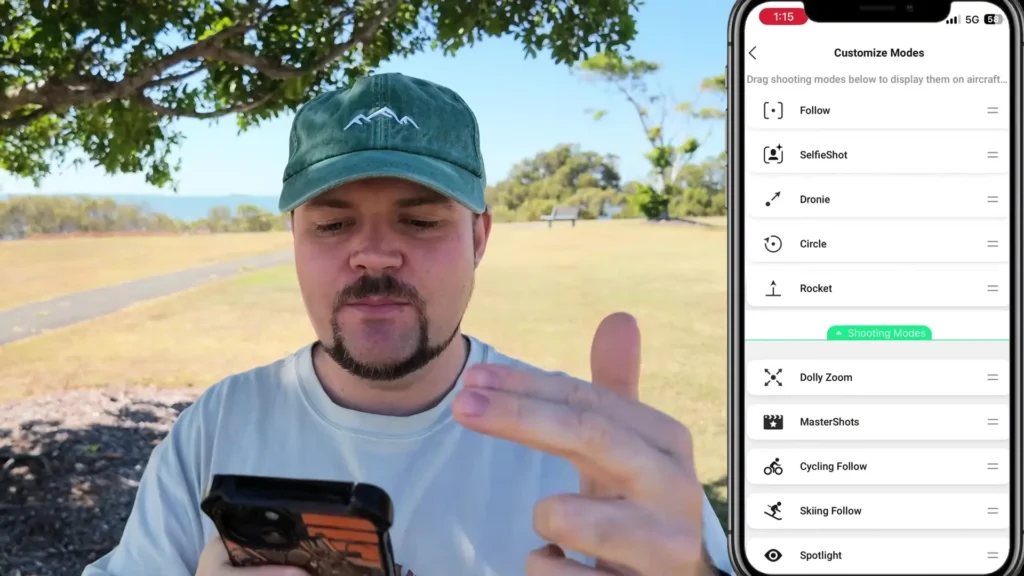
For example, if you want Dolly Zoom available directly on the drone without needing your phone, you just drag it up into the active section. If you want Spotlight added as well, you drag that up too.
You can reset everything back to factory defaults at any time with a single tap. This is a really thoughtful feature that adds a lot of flexibility depending on what type of shooting you plan to do on any given day.
Tip 15: Preview Every Mode With a Video
Before diving into any flight mode, you can preview exactly what it does through a built-in video preview feature. To access it, tap on “Settings” in the bottom right corner of the mode selection screen, then tap on any mode.
You will immediately see a short video demonstrating what that mode actually looks like in real-world use, along with a written description explaining what the drone will do.
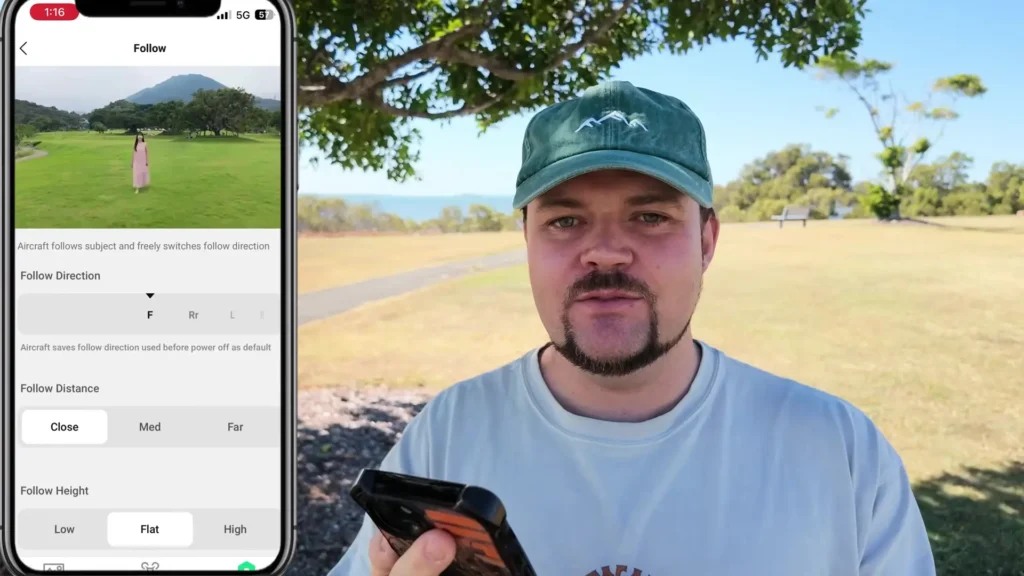
For example, tapping on master shots will show you a video of the drone performing its automated sequence, with a description explaining that it will automatically shoot a number of clips based on the subject and distance and compile them into a finished master shot.
This is an incredibly useful feature if you are new to the drone and not yet sure what each mode involves. It is highly recommended that you go through each mode in this preview section before flying so you know exactly what to expect.
Tip 16: Photo Settings
To access the photo settings, scroll down through the settings menu until you see the photo section. Tap on it and you will find the available photo options. Currently, the only file format available is JPEG, and the only setting you can adjust is the aspect ratio, which can be changed between 16:9 and 4:3. Photo resolution cannot be changed from this menu.
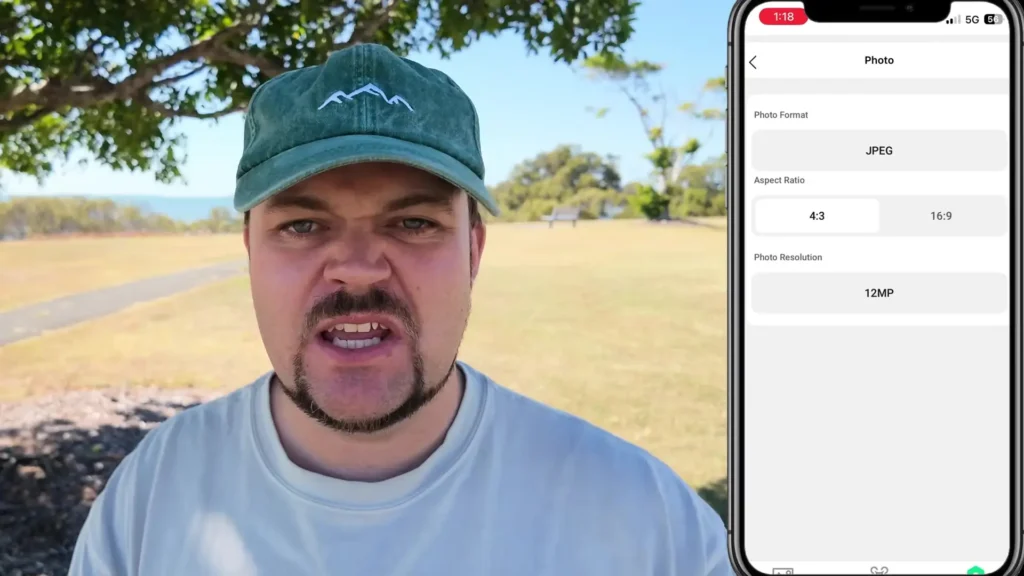
While the options are limited, it is useful to know where to find this setting so you can quickly switch aspect ratios depending on what you are shooting.
Tip 17: Video Settings
The video settings are located just below the photo settings. Tapping on this section gives you a bit more control. You can choose between portrait and landscape orientation, and the resolution options available will change depending on which orientation you select.
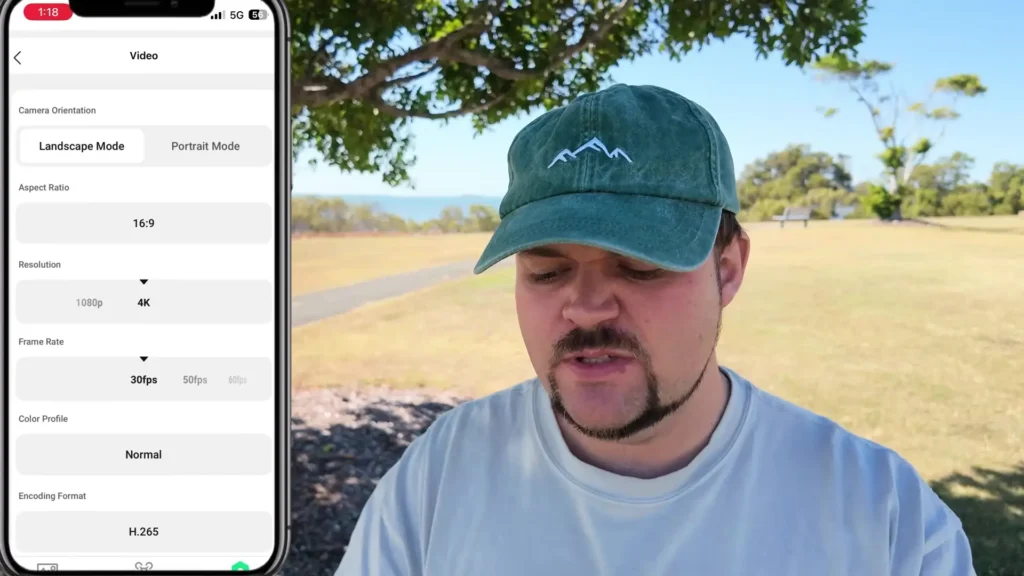
For example, in landscape mode you can shoot in 4K, while portrait mode offers up to 2.7K. Frame rate options go all the way up to 60 frames per second, which is great for smoother footage or slow motion in post. Color profile and encoding format cannot be changed from this menu, so the customization is somewhat limited, but you do have meaningful control over the core video output settings.
Also Read : Control DJI Neo 2 with Your Apple Watch?
Tip 18: App Recording
Just below the video settings is the app recording option. This feature allows the microphone built into your phone to record audio at the same time as the drone is recording video. The audio from your phone will only be captured while you are actively recording, not continuously throughout the flight.
This is a great option if you want to narrate what you are doing, talk to camera while the drone is hovering, or add voice commentary to your footage using your phone’s microphone rather than an external device.
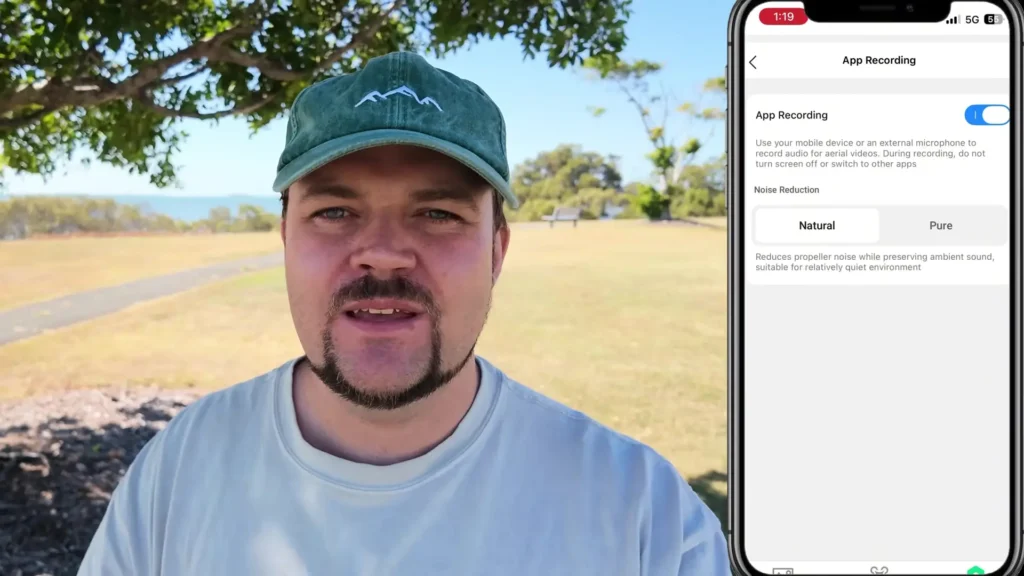
You can also enable noise reduction from this menu, with two options available: natural or pure. Natural preserves more of the ambient sound while reducing wind noise, while pure focuses on capturing clean voice audio with more aggressive noise filtering.
Tip 19: Formatting the Storage
Just below app recording, you will find the storage option. Tapping on it reveals one simple option: format. If you need to wipe the internal storage of your DJI Neo 2, this is where you do it. There are no other adjustable options within this section, but the ability to format quickly through the app is a convenient feature to have readily accessible.

Tip 20: Obstacle Avoidance Settings
To get into the deeper settings menus, tap on “More Settings” and it will open the safety menu. This is where you can find the full obstacle avoidance settings. While you can quickly toggle obstacle avoidance from the flight interface, coming into the safety menu gives you more context and explanation for each option.
Brake mode means the drone will stop when it detects an obstacle. Bypass mode means the drone will navigate around the obstacle and continue following you.
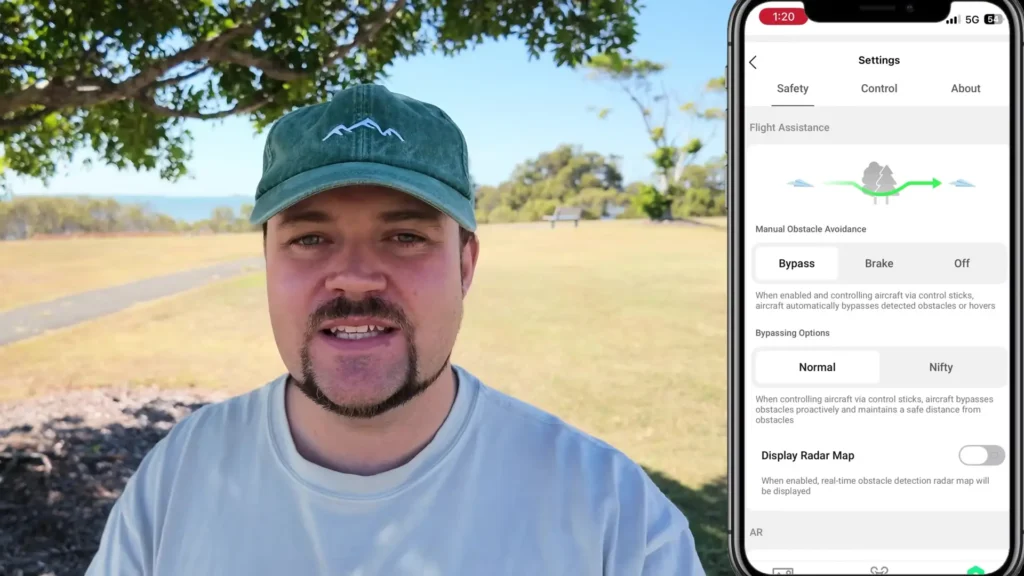
Within the bypass mode, there is also an additional option called Nifty mode. When Nifty mode is enabled, the drone becomes more experimental and dynamic in the way it navigates around obstacles.
It will try to find more creative paths around them rather than simply going over or around in a straightforward way. For most situations, sticking with the normal bypass mode is the safest and most reliable choice, but Nifty mode is there for those who want to push the capabilities a little further.
Tip 21: The Radar Map
Still within the safety settings, there is an option to display the radar map. When this is enabled, a real-time obstacle detection radar map appears on your screen during flight.
The radar uses color coding to indicate how close obstacles are. Orange markers indicate that obstacles are relatively nearby, while red markers signal that something is very close and you should be cautious.
This is a genuinely useful feature to have active during every flight, as it gives you a constant at-a-glance overview of your surroundings without having to rely solely on the video feed. It is recommended to keep the radar map turned on as a default setting for all your flights.
Tip 22 and 23: AR Home Point and Return to Home Route
Scrolling further down in the safety settings, you will find the AR settings. There are two options here: show AR home point and show AR return to home route. Having both of these enabled is highly recommended.
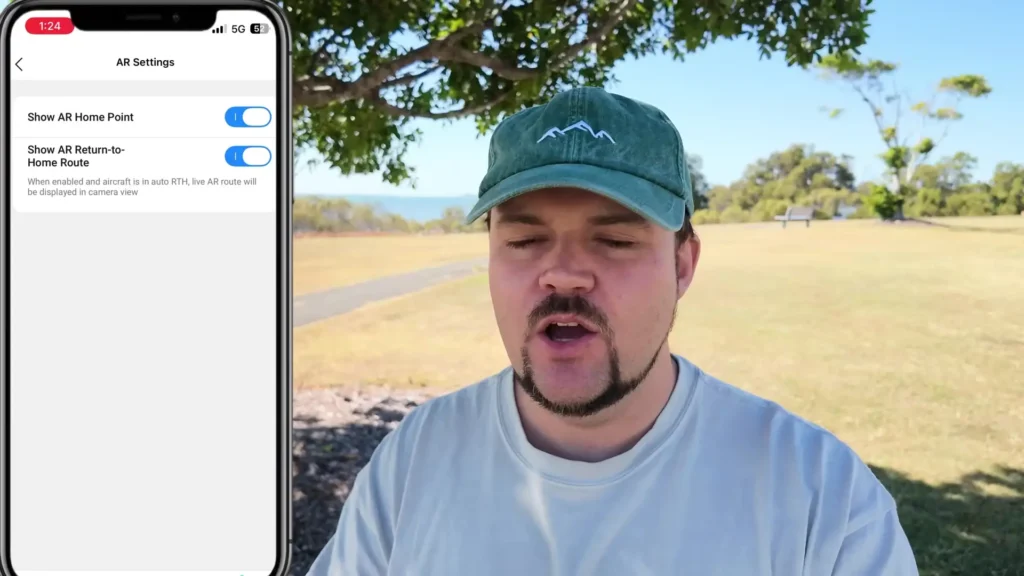
The AR home point option displays a visual marker on your screen showing exactly where the drone’s home point is, which is the location the drone will return to if the return to home function is triggered.
The AR return to home route option goes a step further by showing a live visual route on your screen indicating the path the drone will take to get back to the home point.
This augmented reality overlay becomes especially useful when you are far from the drone and want to understand its planned flight path before it begins returning. Both features add a layer of situational awareness that can make a real difference during complex flights or in challenging conditions.
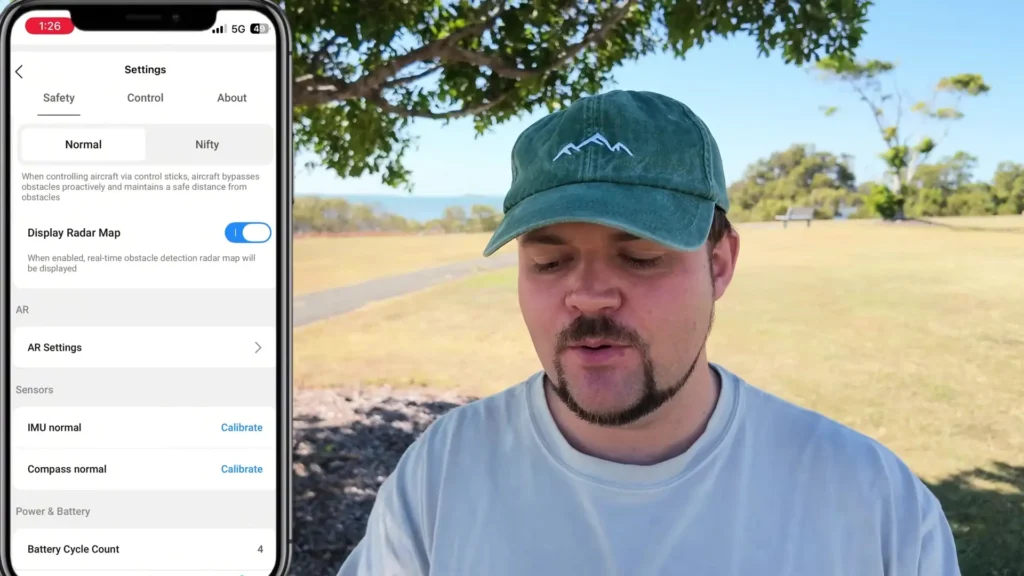
Continuing down through the safety menu, you will also find the sensor calibration options. There are two sensors you can calibrate: the IMU and the compass. To calibrate either one, simply tap on “Calibrate” and follow the on-screen instructions. For best results, place the drone on a stable, level surface like a table rather than on grass, as an unstable surface can interfere with the calibration process.
Tip 24: Palm Landing Settings
Switching over from the safety tab to the control tab at the top of the settings menu opens up a whole new set of options. The first one worth noting is the palm landing sensitivity setting. Palm landing is the feature that allows the drone to detect your outstretched palm and land on it automatically.
By default, the response time is set to 0.5 seconds, meaning the drone will initiate landing as soon as it detects your palm for that brief moment.
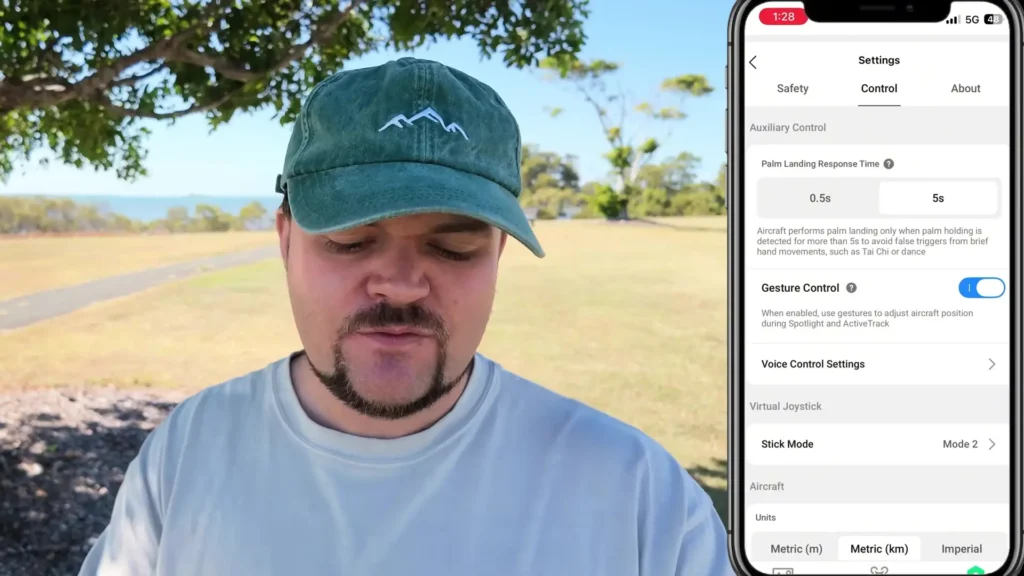
If you are concerned about accidental palm detection, perhaps in a crowded environment or if you have had issues with it triggering unexpectedly, you can change the sensitivity to 5 seconds.
This means the drone will only begin the palm landing sequence if it detects your palm consistently for a full five seconds, reducing the chance of an accidental landing. For most everyday use, the default 0.5-second setting works well.
Tip 25: Enabling Gesture Controls
As mentioned in the second tip, gesture controls need to be enabled through the app before they will function when flying without your phone. You will find the gesture control toggle in the control settings menu.
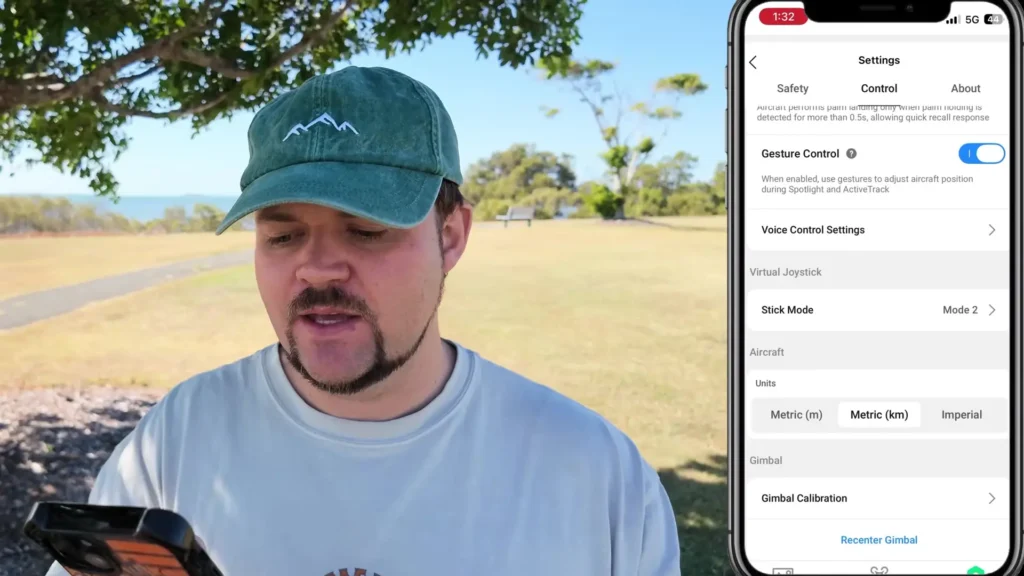
By default, gesture controls are turned off, so you will need to come in here and enable them before your first flight if you want to use them. Once enabled, the setting is saved and the drone will have gesture control active from the moment it launches.
Tip 26: Voice Control Settings
Also found in the control settings menu is the voice control section. Tapping on it brings up the full voice control interface, where you can turn the feature on or off. The toggle here is specifically for voice wake-up, meaning if you disable it, the drone will no longer respond to the “Hey Fly” wake word. When it is enabled, you can scroll through the listed commands to see everything that is available.
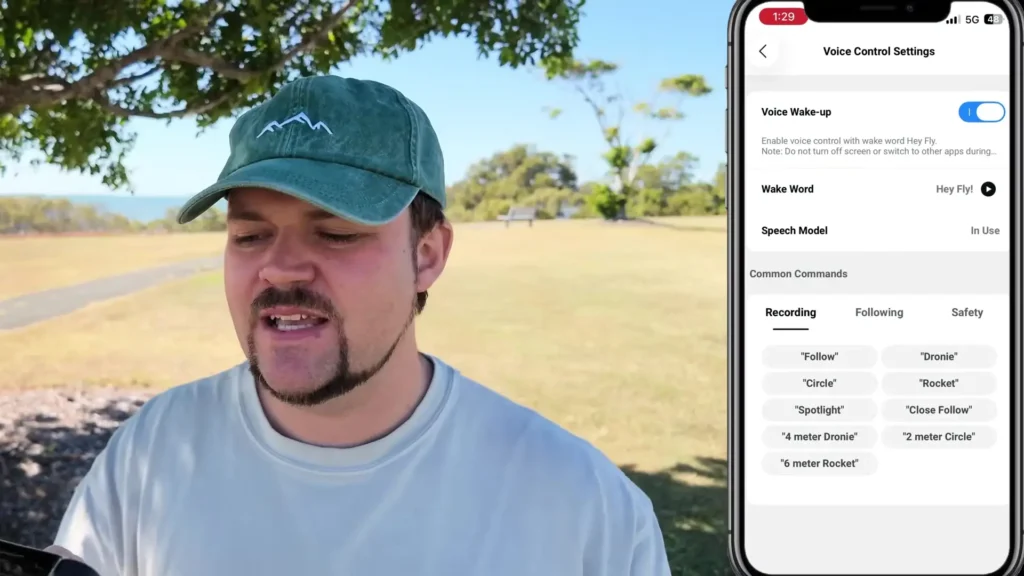
The commands are organized into categories including recording prompts, following prompts, and safety prompts such as land, brake, and stop. This section is worth reviewing if you plan on using voice controls regularly, as it gives you a clear reference for all of the commands at your disposal.
Tip 27: Gimbal Settings and Re-Centering
The gimbal settings are also found within the control menu. From here, you can initiate a gimbal calibration if you are experiencing any issues with the gimbal not sitting level or behaving unexpectedly. Tapping on calibrate will walk you through the process step by step.
There is also a re-center gimbal button at the bottom of the gimbal settings page. If you have adjusted the gimbal to an extreme angle during flight and want to quickly return it to a neutral forward-facing position, pressing this button will reset it instantly.
This is particularly useful if you have been shooting at a sharp downward or upward angle and want to return to a standard perspective without having to manually drag the slider back to center.
Tip 28: How to Use the Find My Drone Feature
The final tip is one that you hopefully will never need but will be very glad to know about if you do. The Find My Drone feature helps you locate your drone if it has crashed, become stuck in a tree, or gone missing after a flyaway.
To access it, press the home button in the top left corner of the app, then tap on your profile, and select “Find My Drone.” This will open a map view showing the last recorded location of your drone based on its most recent flight data.
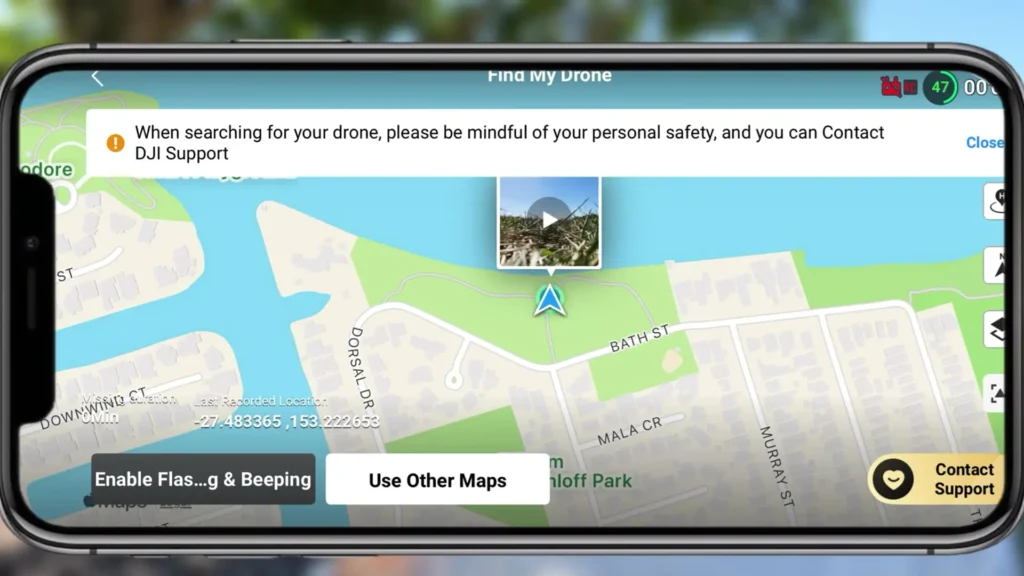
From here, you can tap “Enable Flashing and Beeping” and the drone will activate its lights and emit a loud beeping sound to help you locate it by sight and sound. If you are in a dense environment like a forest or a field, this audible alert can make a significant difference in helping you track it down.
You can also use external maps within the app to navigate to the drone’s last known location. The sound the drone produces when the beeping is activated is very loud and very noticeable, so if it is anywhere nearby, you should be able to find it without too much trouble.
Final Thoughts on DJI Neo 2 Tips and Settings
Those are all 28 must-know DJI Neo 2 tips and settings for flying with just your phone and the drone itself, no controller required. As you can see, there is an incredible amount of functionality available even without a physical controller in your hands.
From gesture controls and voice commands to customized modes, AR overlays, and full manual flight from your phone screen, the DJI Neo 2 is a remarkably capable drone right out of the box.
The best advice is to take your time working through each setting in a safe, open environment before heading out to more complex or demanding locations. The more familiar you become with the interface and the various modes, the more confident and creative you will be when you are actually out in the field.
Read More: What Is a Fiber Optic Drone and How It Works